
Install Qt Automotive Suite
The Qt Automotive Suite is provided under the same dual license conditions as Qt itself. The commercial package is available from the Qt Installer and provides the most comprehensive feature set, allowing you to explore Qt Automotive Suite's possibilities in the simplest way. To find a license that suits your need, refer to the guide on Download Qt. The license you purchase is associated with a Qt Account, that is required to install the product.
Install on Desktop
When you install the Qt Automotive Suite, you can select which components, SD-card images, and toolchains to install. To use the Qt Automotive Suite components on your host system, you also need to have a proper Qt version installed. Consequently, when you install any of these components, the suitable Qt version is automatically installed.
Note: The SD-card images provided by the Installer are based on Qt for Device Creation. To cross-compile and use those images, you need to check the requirements depending on your desktop platform: Requirements for Linux/X11 and Requirements for Windows.
To install Qt Automotive Suite:
- Download the Qt online installer.
Note: On Linux, the installer needs executable permissions before you can run it.
- Run the installer and select Next to get to the Qt account section.
- Enter your Qt account credentials and select Next to run a license check against the Qt account.
- Select Next again to choose an install path.
- Select Next to see the components that are available to install.
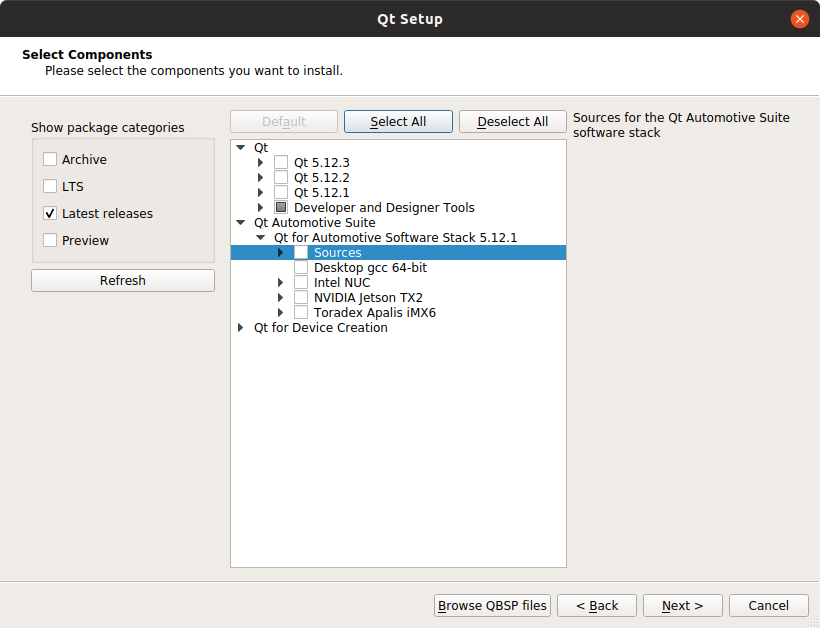
- Under Qt Automotive Suite, there are Qt for Automotive Suite software stacks available. Select a stack, then select the components and your hardware. In a minimal setup, you need to select Desktop gcc 64-bit, at least. A desktop build of a related Qt version is included with this selection, along with Qt Creator. If you want to test on a target device, select one or more target hardware options.
- Select Next and follow the instructions to complete the installation.
Once the installation is complete, you can choose to launch Qt Creator, view Qt Automotive Suite documentation, or view Qt for Device Creation documentation.
- To understand the building blocks necessary to build an In-Vehicle Infotainment (IVI) System, see Reference UI.
- To create QML applications that run in single-process or multi-process, see Qt Application Manager.
- To integrate middleware into your system, see Qt IVI.
- To explore some of the key features, see Examples in Qt Automotive Suite.
Note: On macOS, currently only development on desktop is supported. If you start the Qt Installer on macOS, no target-related packages are shown in the selection.
Install on Target Devices
Before you can test Qt Automotive Suite applications on the target device, you must carry out some steps for embedded development configuration: such as set up the Boot to Qt software stack and configure a Device Kit. Follow the steps in the target device guide:
Once the installation is complete, start Qt Creator and try to run one of the examples against a target. Neptune 3 UI provides a reference UI. The quickest way to get a first impression of this reference UI is to run it on desktop or target and inspect its functionality. For more information, see Neptune 3 UI Insights.
Build from Source
To build Qt Automotive from source, clone the following component git repositories from https://code.qt.io/:
| Component | Details |
|---|---|
| qtapplicationmanager | For installation details, see Installation. |
| qtivi | For configuration details, see Installation. |
| neptune3-ui | For details on how to run Neptune 3 UI, see Neptune 3 UI - Install. |
| qmllive | For installation details, see Installation. |
For each component, run qmake, make, and then make install.
© 2020 The Qt Company Ltd. Documentation contributions included herein are the copyrights of their respective owners. The documentation provided herein is licensed under the terms of the GNU Free Documentation License version 1.3 as published by the Free Software Foundation. Qt and respective logos are trademarks of The Qt Company Ltd. in Finland and/or other countries worldwide. All other trademarks are property of their respective owners.