C
Studio: Project Palette
The project palette displays the files and folders on disk for your project. Only files usable by Studio are displayed in the palette.
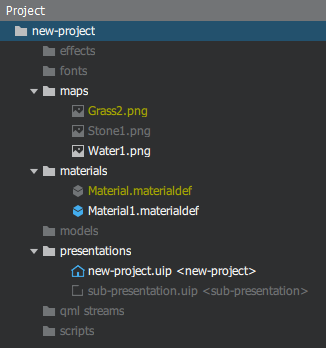
The text color of assets in the project palette shows if they are currently being used in the project.
| Dark grey | The asset is not referenced by any presentation or another asset in the current project. |
| White | The asset is in use in the presentation currently being edited. |
| Dark yellow | The asset is required by other assets or presentations within the project. |
Importing Assets
You can import assets to your project in the following ways:
- From the menu bar, select File > Import Assets.
- Select desired files to import, then press Open.
- In the bottom of the project palette, click the
 .
. - Select desired files to import, then press Open.
- In the bottom of the project palette, click the
- In the project palette, right-click and select Import Assets from the context menu.
- Select desired files to import, then press Open.
Note: If a folder is selected in the project palette, only files of corresponding file types will be visible in the file dialogue. If you for example have selected the models folder before importing, only files of .fbx and .dae will be shown.
- From the file system, drag and drop desired files to the project palette. If the files are not dropped in a specific folder they will be automatically imported to the corresponding folder. For example, image files will be imported to the maps folder.
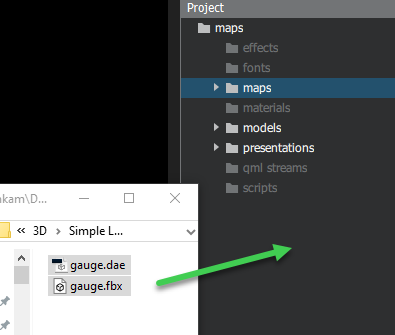
- From the file system, drag and drop desired files to the project palette. If the files are not dropped in a specific folder they will be automatically imported to the corresponding folder. For example, image files will be imported to the maps folder.
When importing files to your project, a copy of the file is imported. The original file will always remain untouched.
Importing Assets from the Asset Library
Qt 3D Studio ships with a variety of sample assets to help you experiment and to speed common development needs. To import these assets to your project, use the assets library icons in the bottom part of the project palette.

Clicking on one of these icons will open the corresponding assets library folder. Select the desired files and press open to import them to your project, this will copy the sample asset into your project. Once you have a copy you are free to edit it without fear of damaging the pristine original.
Deleting Assets
To delete an asset from your project, right-click it in the project palette and select Delete from the context menu.
Note: Assets high-lighted in white or dark yellow cannot be deleted.
Using Assets
To add an asset to a layer, do one of the following:
- Drag the asset from the project palette to the scene view. The asset will be added to the active layer. If no layer is active, the asset will be added to the top-most layer.
- Drag the asset from the project palette to a layer in the scene graph.
A new element will be created in your scene tied to that asset.
Fonts
Dragging a font to the scene graph or the scene view will create a new text object with the font set correctly.
Maps
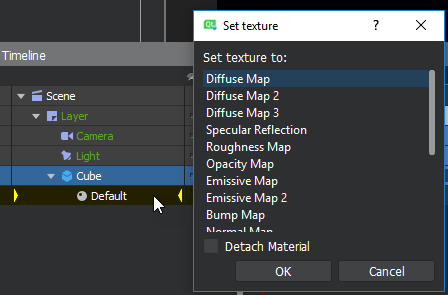
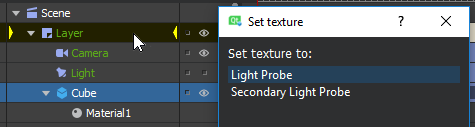
Dragging a map to the scene view or the scene graph will create a rectangle object, and apply the map as diffuse map to the rectangle.
Dragging a map to a material slot or a layer in the scene graph will display a context menu where you can select which which material/layer property you want to apply the map to.
Materials
You can drag a material straight to an object in the scene view to apply the material to the object.
Note: Dropping the material on an object with more than one material slot will assign the material to the top-most material slot.
You can also drag the material to a material slot in the scene graph.
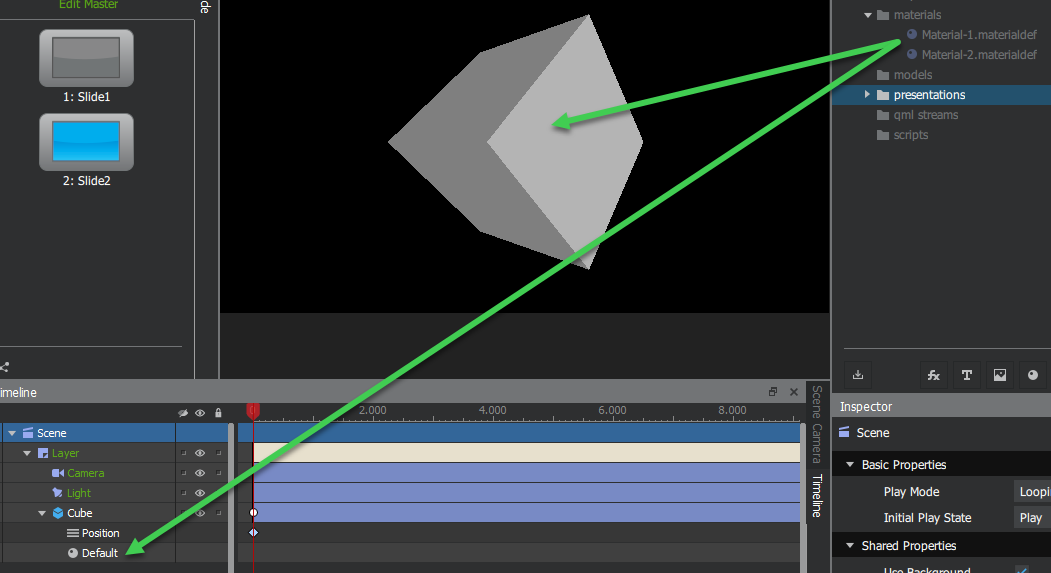
Presentations and QML Streams
Dragging a presentation or QML stream to the scene view will display a pop-up window with two options; Layer and Texture.
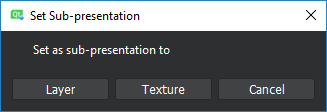
If you select Layer, the presentation will be set as the Sub-presentation property for the layer. The layer will re-size to match the size of the sub-presentation.
If you select Texture, a rectangle object will be created and the sub-presentation will be set as the Diffuse Map property for the rectangle.
Editing Assets
Double-clicking an asset in the project palette will open the file in the application associated by the operating system. .uip files will open in Qt 3D Studio.
Changes to the asset on disk (for example, editing an image in Photoshop), will automatically update inside Studio.
The one caveat to the above are 3D model assets. When you import a 3D model (in Collada or FBX format) into your project, it is converted into a .import file that references one or more .mesh assets. Changes to the original 3D model file will not automatically update inside of Studio. To update a changed model, right-click on the .import file in the project palette and choose Refresh Import. In the subsequent file dialog, select the model file on disk that you wish to re-import. Your model in Studio will be updated. For more details, read the section 3D Assets.
Available under certain Qt licenses.
Find out more.