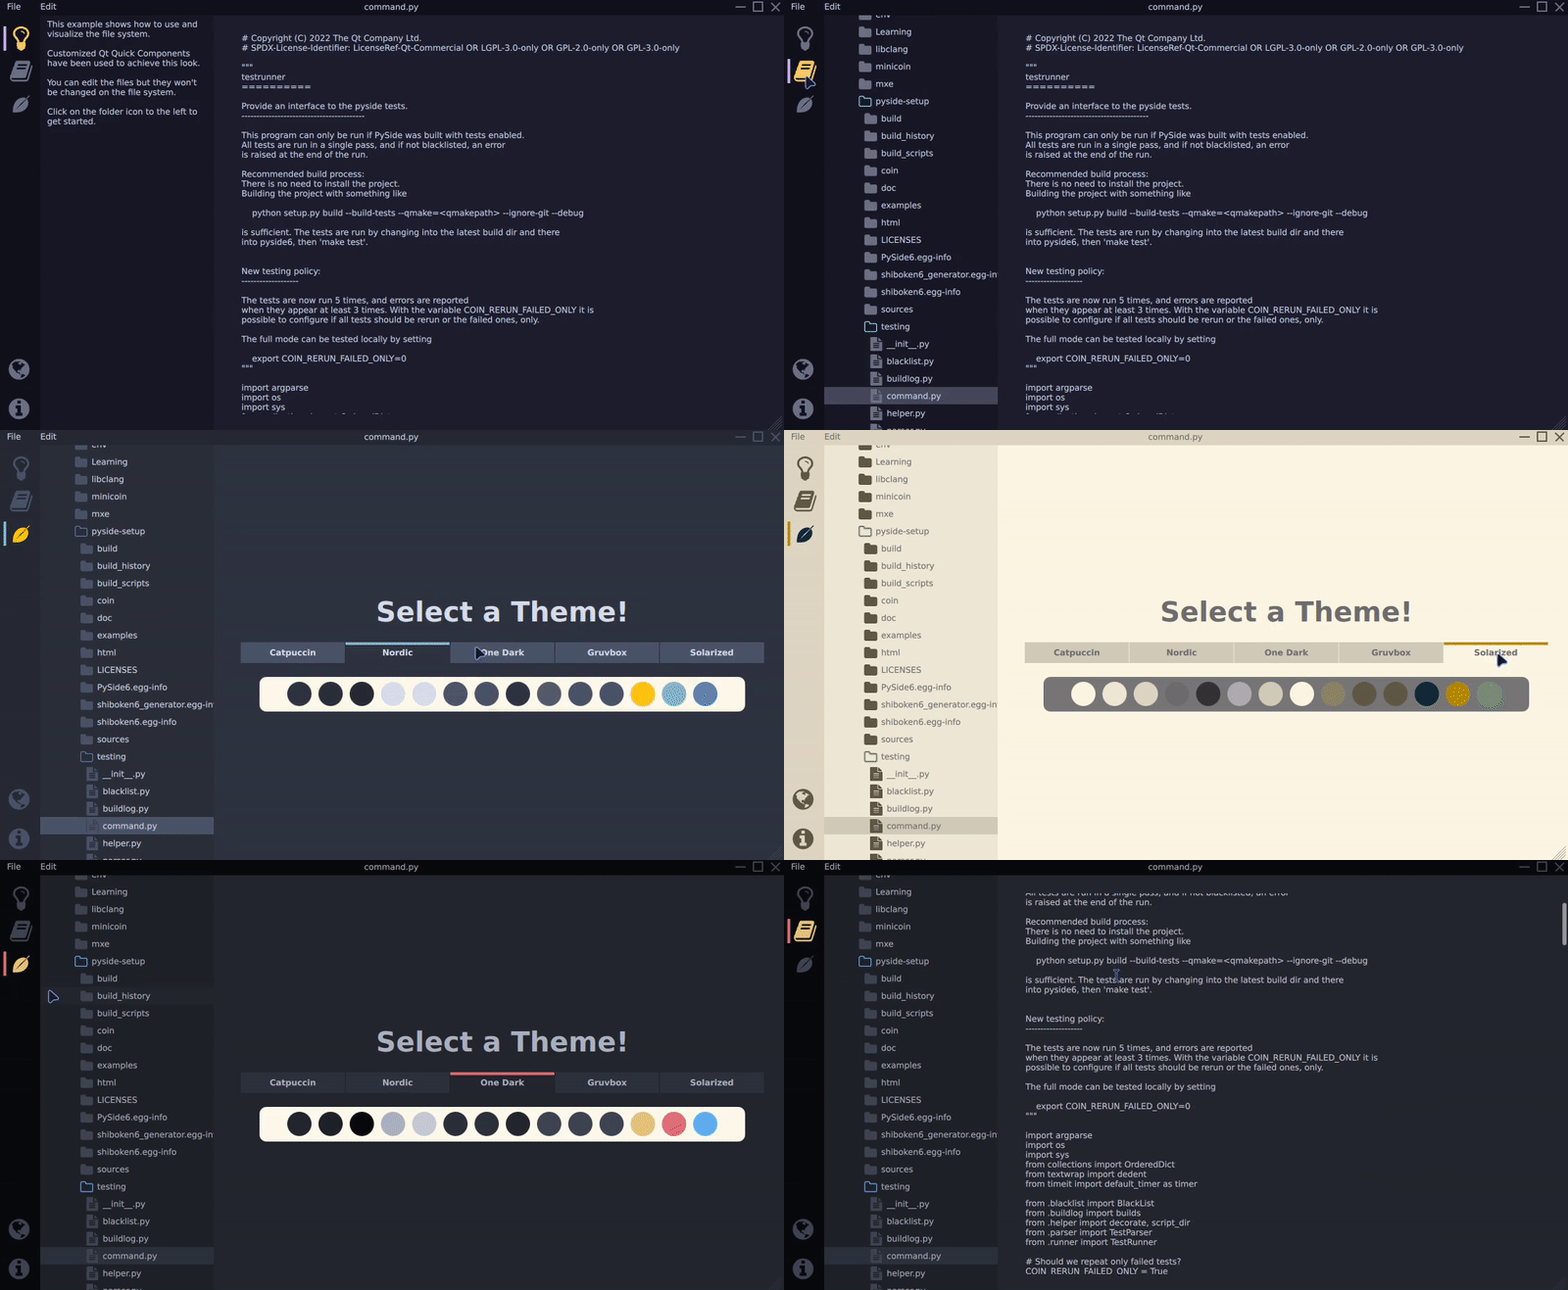
Extending the file system explorer example
This tutorial shows how to extend the Filesystem Explorer Example by adding a simple scheme manager. This feature will allow you to switch color schemes during the application’s runtime. The color schemes will be declared in JSON format and made available through a custom Python-QML plugin.

Defining the color schemes
To define your color scheme, you can use the same color names as the original
example, so you don’t have to rename every occurrence. The original colors are
defined in the Colors.qml file as follows:
 1QtObject {
 2    readonly property color background: "#23272E"
 3    readonly property color surface1: "#1E2227"
 4    readonly property color surface2: "#090A0C"
 5    readonly property color text: "#ABB2BF"
 6    readonly property color textFile: "#C5CAD3"
 7    readonly property color disabledText: "#454D5F"
 8    readonly property color selection: "#2C313A"
 9    readonly property color active: "#23272E"
10    readonly property color inactive: "#3E4452"
11    readonly property color folder: "#3D4451"
12    readonly property color icon: "#3D4451"
13    readonly property color iconIndicator: "#E5C07B"
14    readonly property color color1: "#E06B74"
15    readonly property color color2: "#62AEEF"
16}
The schemes.json file holds the color schemes. To start implementing this, you
can use the Catppuccin scheme.
 1  "Catppuccin": {
 2    "background": "#1E1E2E",
 3    "surface1": "#181825",
 4    "surface2": "#11111B",
 5    "text": "#CDD6F4",
 6    "textFile": "#CDD6F4",
 7    "disabledText": "#363659",
 8    "selection": "#45475A",
 9    "active": "#1E1E2E",
10    "inactive": "#6C7086",
11    "folder": "#6C7086",
12    "icon": "#6C7086",
13    "iconIndicator": "#FFCC66",
14    "color1": "#CBA6F7",
15    "color2": "#89DCEB"
16  },
In addition to the “Catppuccin” color scheme, four other color schemes got implemented: Nordic, One Dark, Gruvbox, and Solarized. However, feel free to get creative and experiment with your schemes.
To define a new color scheme, copy the structure from above and provide your color values
Implement the scheme manager
After defining the color schemes, you can implement the actual scheme manager.
The manager will read the schemes.json file and provide QML bindings to switch
between schemes during runtime.
To implement the scheme manager, create a Python-QML plugin that exposes the
SchemeManager object to QML. This object will have methods to load the color
schemes from the schemes.json file and switch between them.
Create a new Python file called schememanager.py in your project directory. In
this file, define the SchemeManager class:
1QML_IMPORT_NAME = "FileSystemModule"
2QML_IMPORT_MAJOR_VERSION = 1
3
4
5@QmlNamedElement("Colors")
6@QmlSingleton
7class SchemeManager(QObject):
To integrate smoothly into the already existing code, attach the SchemeManager
to the same QML module that’s already present with
QML_IMPORT_NAME = "FileSystemModule". Additionally, use the@QmlNamedElement
decorator to smoothly transition to using the custom plugin instead of the
Colors.qml file. With these changes, we can avoid editing all previous
assignments like:
import FileSystemModule
...
Rectangle {
    color: Colors.background
}
The constructor reads the schemes.json file once upon application start and
then calls the setTheme member function.
1
2    schemeChanged = Signal()
3
4    def __init__(self, parent=None):
5        super().__init__(parent=parent)
6        with open(Path(__file__).parent / "schemes.json", 'r') as f:
7            self.m_schemes = json.load(f)
By adding the SchemeManager as a callable QML element named Colors to the
FileSystemModule, the class is now accessible in the code without the need to
import it each time or edit previous assignments. This, in turn, will streamline
the workflow.
After defining the schemes in the JSON format and making the SchemeManager
class a callable element from QML under the name Colors, there are two
remaining steps to fully integrate the new scheme manager in the example.
The first step is to create a function in the SchemeManager class that
loads a color scheme from the JSON file. The second step is to make the
individual colors available in QML with the same name as used before with the
syntax Colors.<previousName> as assignable properties.
1        self.m_activeSchemeName = "Catppuccin"
2        self.setScheme(self.m_activeSchemeName)
3
4    @Slot(str)
5    def setScheme(self, theme):
6        for k, v in self.m_schemes[theme].items():
The setScheme method is responsible for switching between color schemes. To
make this method accessible in QML, use the @Slot(str) decorator and specify
that it takes a string as its input parameter. In this method, we populate a
dictionary with the color values from the JSON file.
Note: For simplicity reasons no other error checking is performed. You would probably want to validate the keys contained in the json.
1    @Property(QColor, notify=schemeChanged)
2    def background(self):
3        return self.m_activeScheme["background"]
To make the color property assignable in QML, use the @Property decorator.
We simply return the corresponding color value from the dictionary for each
property. This process is repeated for all other colors that are used in the
application.
At this point the application should start with the colors provided by the
active scheme in the constructor.
Add the scheme switching to QML
To visualize the current scheme and enable interactive scheme switching, start
by adding a new entry to the Sidebar.qml file.
1            // Shows the scheme switcher
2            SidebarEntry {
3                icon.source: "../icons/leaf.svg"
4                checkable: true
5
6                Layout.alignment: Qt.AlignHCenter
7            }
To update the main content area of the application to display the ColorScheme,
the logic that checks the active index from the Sidebar buttons needs to be
modified. The necessary changes will be made to the Main.qml file:
 1            // The main view that contains the editor or the scheme-manager.
 2            StackLayout {
 3                currentIndex: sidebar.currentTabIndex > 1 ? 1 : 0
 4
 5                SplitView.fillWidth: true
 6                SplitView.fillHeight: true
 7
 8                Editor {
 9                    id: editor
10                    showLineNumbers: root.showLineNumbers
11                    currentFilePath: root.currentFilePath
12                }
13
14                ColorScheme {
15                    Layout.fillWidth: true
16                    Layout.fillHeight: true
17                }
In addition, change the behavior of the application so that there are two
StackLayouts: one for the resizable navigation and one for the main content
area where we display our color scheme switching functionality. These changes
will also be made to the Main.qml file.
1                // selected buttons inside the sidebar.
2                StackLayout {
3                    anchors.fill: parent
4                    currentIndex: sidebar.currentTabIndex > 1 ? 1 : sidebar.currentTabIndex
To complete our implementation, the ColorScheme.qml file needs to be created.
The implementation is straightforward and follows the same principles as in the
original example. If anything is unclear, please refer to the documentation
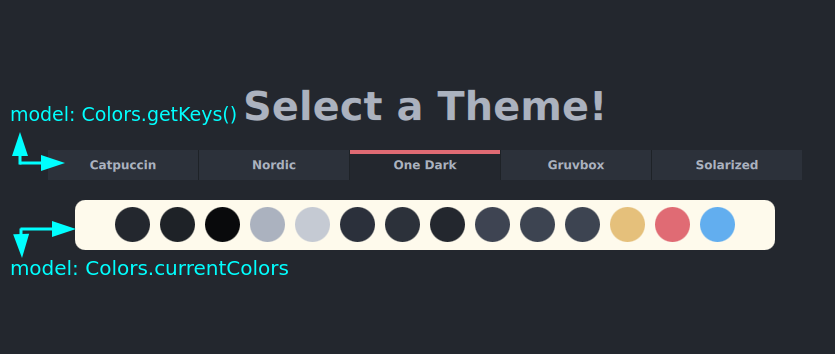
provided there. To display all colors and scheme names, use a Repeater. The
model for the Repeater is provided by our scheme_manager.pyfile as a
QStringList.
 1        // Display all used colors inside a row
 2        Row {
 3            anchors.centerIn: parent
 4            spacing: 10
 5
 6            Repeater {
 7                model: Colors.currentColors
 8                Rectangle {
 9                    width: 35
10                    height: width
11                    radius: width / 2
12                    color: modelData
13                }
14            }
15        }
When examining the code in more detail, you will notice that there are different
ways to retrieve the models. The getKeys() method is defined as a Slot and
therefore requires parentheses when called. On the other hand, the currentColors
model is defined as a property and is therefore assigned as a property in QML.
The reason for this is to receive notifications when the color scheme is switched
so that the colors displayed in the application can be updated. The keys for the
color schemes are loaded only once at application startup and do not rely on any
notifications.
