Create Qt Quick Applications
You can create Qt Quick applications that can have both QML and C++ code. Build the applications and deploy them to desktop, embedded, and mobile target platforms.
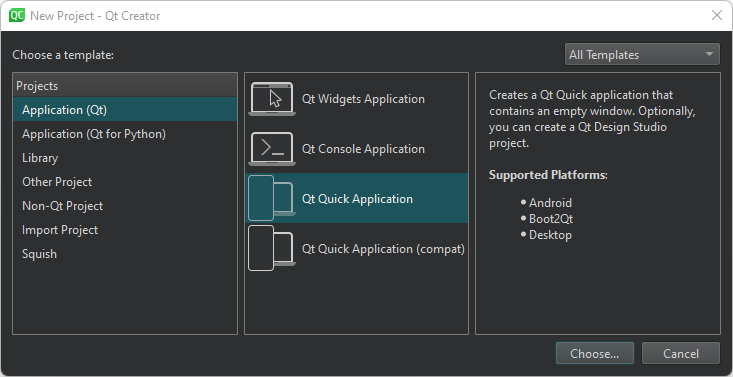
To create a Qt Quick Application project:
- Go to File > New Project > Application (Qt) > Qt Quick Application.
Note: To use qmake as the build system, develop with Qt 5, or add translations to the application, select Qt Quick Application (compat).
- Select Choose to open the Project Location dialog.
- In Name, enter a name for the project. Keep in mind that you cannot easily change the project name later.
- In Create in, enter the path for the project files. Select Use as default project location to create new projects in this folder by default. You can move project folders later without problems.
- Select Next to open the Define Project Details dialog.
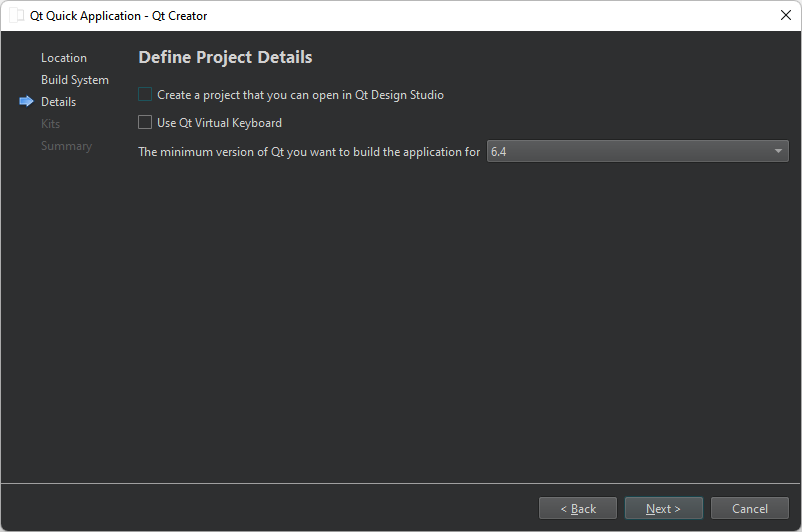
- Select Use Qt Virtual Keyboard to add support for Qt Virtual Keyboard to the application.
Note: If you have not installed the Qt Virtual Keyboard module when you installed Qt, an error message will appear when you try to open
Main.qmlfor editing. You can use Qt Online Installer to install Qt Virtual Keyboard. - Select the Qt version to develop with in Minimum required Qt version. The Qt version determines the Qt Quick imports that are used in the QML files.
- For Qt versions earlier than 6.10, select Set QT_QML_GENERATE_QMLLS_INI to ON in CMake to configure QML Language Server. It offers code completion and issues warnings when you write QML code.
- Select Next to open the Kit Selection dialog.
- Select kits for the platforms that you want to build the application for.
Note: Kits are listed if they have been specified in Preferences > Kits. For more information, see Add kits and Managing kits.
- Select Next to open the Project Management dialog.
- Review the project settings, and select Finish (on Windows and Linux) or Done (on macOS) to create the project.
Qt Creator creates a QML file, Main.qml, that you can modify in the Edit mode.
See also How to: Design Qt Quick UIs, Configure language servers for projects, Tutorial: Qt Quick and Python, Tutorial: Qt Quick application, Creating projects, and Developing Qt Quick Applications.
Copyright © The Qt Company Ltd. and other contributors. Documentation contributions included herein are the copyrights of their respective owners. The documentation provided herein is licensed under the terms of the GNU Free Documentation License version 1.3 as published by the Free Software Foundation. Qt and respective logos are trademarks of The Qt Company Ltd in Finland and/or other countries worldwide. All other trademarks are property of their respective owners.
