Qt Quick 3D - Introduction
Demonstrates how to render a scene in Qt Quick 3D.
This example gives an introductory overview of the basic Quick 3D features by going through the code of a simple example.
Setting Up the Scene
We set up the entire scene in the main.qml file.
To be able to use the types in the QtQuick3D module, we must import it:
import QtQuick
import QtQuick3D
To draw any 3D scene, we need a 3D viewport within the Qt Quick scene. This is provided by the View3D class, and this is where we define our scene. It is also possible to have multiple views in one application, see Qt Quick 3D - View3D Example.
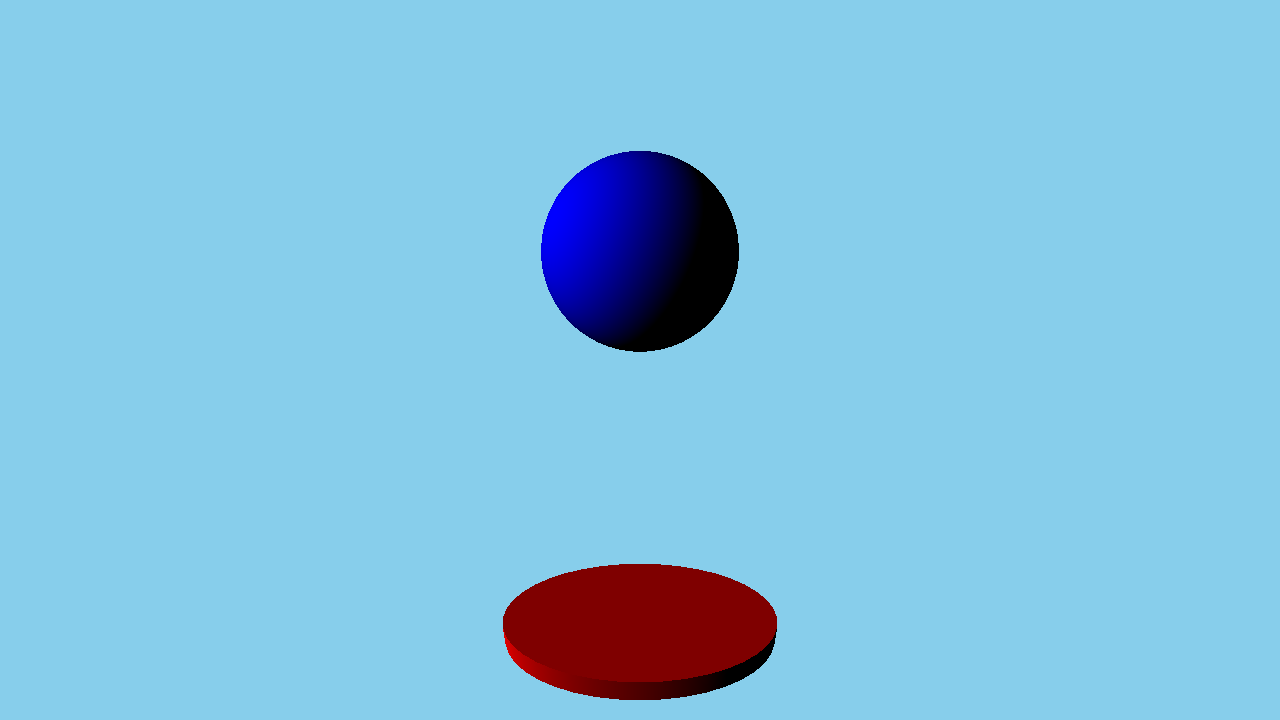
We start with defining the environment of our scene. In this example we just clear the background color with skyblue, which we specify in a SceneEnvironment for the environment property of the view. SceneEnvironment describes various properties related to the environment of the scene, such as tonemapping settings, light probe settings for image based lighting, background mode, or ambient occlusion parameters. It can also control anti-aliasing, see Qt Quick 3D - Antialiasing Example. In our example we set the clearColor and backgroundMode properties to get a blue background.
environment: SceneEnvironment {
    clearColor: "skyblue"
    backgroundMode: SceneEnvironment.Color
}
Meshes
To make the scene a bit more interesting we are now going to add some meshes. In Quick 3D there are a number of builtin meshes for convenience, for example sphere, cube, cone, or cylinder. These are referenced by using the special identifiers, such as #Sphere, #Cube, or#Rectangle in the source property of a Model node. Besides the built-in primitives, a .mesh file can be specified. To generate .mesh files from FBX or glTF2 assets, the assets need to be processed using the Balsam Asset Import Tool. Below shows the code adding a blue sphere and a red flattened cylinder:
Model {
    position: Qt.vector3d(0, -200, 0)
    source: "#Cylinder"
    scale: Qt.vector3d(2, 0.2, 1)
    materials: [ PrincipledMaterial {
            baseColor: "red"
        }
    ]
}

Model {
    position: Qt.vector3d(0, 150, 0)
    source: "#Sphere"

    materials: [ PrincipledMaterial {
            baseColor: "blue"
        }
    ]

    SequentialAnimation on y {
        loops: Animation.Infinite
        NumberAnimation {
            duration: 3000
            to: -150
            from: 150
            easing.type:Easing.InQuad
        }
        NumberAnimation {
            duration: 3000
            to: 150
            from: -150
            easing.type:Easing.OutQuad
        }
    }
}
To add the meshes, we use two Model nodes, with #Sphere and #Cylinder as the source to load our built-in meshes. To give the model a color we need to first specify a material. In this case we use a PrincipledMaterial with a red and blue base color. There are three different materials available with different properties, namely PrincipledMaterial, SpecularGlossyMaterial and CustomMaterial, see Qt Quick 3D - Principled Material Example and Programmable Materials, Effects, Geometry, and Texture data. The mesh loaded by a Model can have multiple sub-meshes, and each sub-mesh needs to have a material specified. In the example only the built-in meshes are used, and those only have one sub-mesh each, and therefore it is sufficient to specify a single PrincipledMaterial in the materials list.
A Model is a Node, so it has an associated transformation. To apply a translation, we use the position property. It is also possible to rotate the model by setting the eulerRotation property. To make the cylinder look like a plate we set the scale property accordingly.
Camera
Then we define a camera, which specifies how the content of the 3D scene is projected onto a 2D surface. In this example, we use PerspectiveCamera which gives us a perspective projection. Orthographic projection is also possible through the OrthographicCamera type. The default orientation of the camera has its forward vector pointing along the negative Z axis and its up vector along the positive Y axis. The example moves the camera back to 300 on the Z axis. In addition, it is moved up an the Y axis a bit, and is rotated slightly around the X axis to look slightly downwards.
PerspectiveCamera {
    position: Qt.vector3d(0, 200, 300)
    eulerRotation.x: -30
}
Lights
The scene also needs a light source in order to be able to see the models in our scene. A DirectionalLight, which can be thought of as a distant sun shining from a certain direction, is added to the scene. There are two other light sources available, namely SpotLight and PointLight, see Qt Quick 3D - Lights Example.
DirectionalLight {
    eulerRotation.x: -30
    eulerRotation.y: -70
}
Animation
Finally, we are also going to animate the sphere. We do this by applying a SequentialAnimation on the y component, moving the sphere up and down infinitely.
SequentialAnimation on y {
    loops: Animation.Infinite
    NumberAnimation {
        duration: 3000
        to: -150
        from: 150
        easing.type:Easing.InQuad
    }
    NumberAnimation {
        duration: 3000
        to: 150
        from: -150
        easing.type:Easing.OutQuad
    }
}
With all these parts working together we are able to render our 3D scene. This example touches only some of the basic capabilities of Qt Quick 3D. Visit the examples page for further examples.
© 2026 The Qt Company Ltd. Documentation contributions included herein are the copyrights of their respective owners. The documentation provided herein is licensed under the terms of the GNU Free Documentation License version 1.3 as published by the Free Software Foundation. Qt and respective logos are trademarks of The Qt Company Ltd. in Finland and/or other countries worldwide. All other trademarks are property of their respective owners.
