C
Develop the application backend
This topic guides you through the steps to develop the application's backend using Qt Creator, which is the default IDE you get with Qt for MCUs. The backend enables the application's UI to communicate with the platform and get the required information from the hardware. In this case, the communicator gets the status of the on-board LED. The following diagram describes the workflow between the two components:
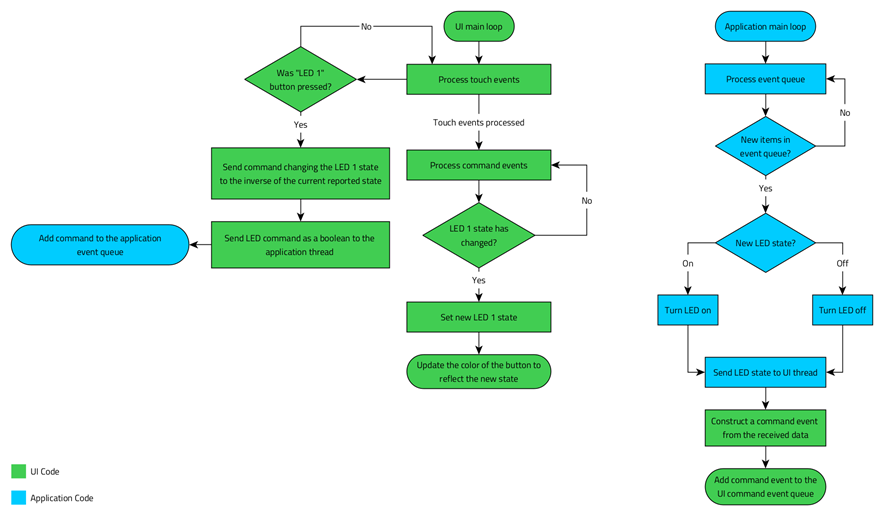
The following instructions guide you through the entire process:
- Launch Qt Creator and open the Qt Design Studio project that your created in the previous topic:
- Click File > Open File or Project.
- Navigate to your project folder and double-click the
CMakeLists.txtfile. - In the Configure Project dialog, select the kits Qt for MCUs 2.3 - Desktop 32bpp and Qt for MCUs 2.3 - EK-RA6M3G-BAREMETAL 16bpp (ARMGCC). Ensure to deselect the other kits before you click Configure Project.
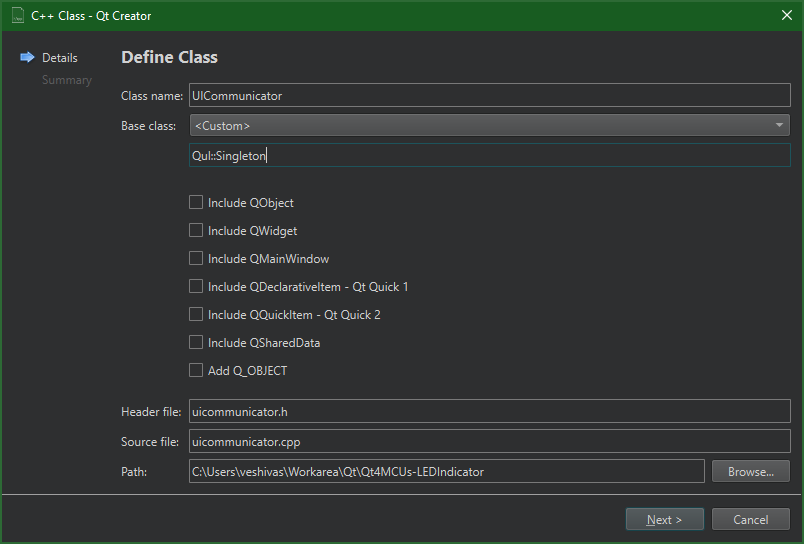
- Select File > New File to add a new C++ Class to the project. Name the new class as
UICommunicatorand enterQul::Singletonas its base class.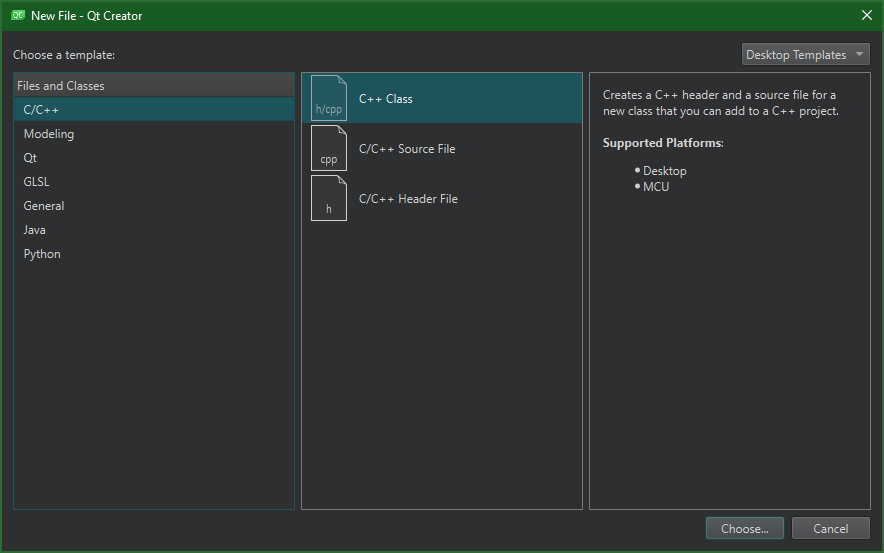
- Click Next and choose the correct project (your project name) from the list before you click Finish.
- Click Yes in the resulting pop-up window to copy the source file names and append them to the
qul_add_target...line inCMakeLists.txt:qul_add_target(<project-name> uicommunicator.h uicommunicator.cpp)
In addition, add the following line:
qul_target_generate_interfaces(<project-name> uicommunicator.h)
- Navigate to
uicommunicator.heither using the Header Files section in the Projects pane, or the File System view (switch from "Projects" view on the upper-left corner). Replace the entire file contents with the following:/****************************************************************************** ** ** Copyright (C) 2022 The Qt Company Ltd. ** Contact: https://www.qt.io/licensing/ ** ** This file is part of the Qt Quick Ultralite module. ** ** $QT_BEGIN_LICENSE:COMM$ ** ** Commercial License Usage ** Licensees holding valid commercial Qt licenses may use this file in ** accordance with the commercial license agreement provided with the ** Software or, alternatively, in accordance with the terms contained in ** a written agreement between you and The Qt Company. For licensing terms ** and conditions see http://www.qt.io/terms-conditions. For further ** information use the contact form at http://www.qt.io/contact-us. ** ** $QT_END_LICENSE$ ** ******************************************************************************/ #ifndef UICOMMUNICATOR_H #define UICOMMUNICATOR_H #include <qul/singleton.h> #include <qul/property.h> #include <qul/eventqueue.h> struct UICommunicator : public Qul::Singleton<UICommunicator> { friend struct Qul::Singleton<UICommunicator>; enum Command { LED1State }; Qul::Property<bool> led1Status; void sendFromUI(Command command, bool commandData); void receiveToUI(Command command, bool commandData); private: UICommunicator(); UICommunicator(const UICommunicator &); UICommunicator &operator=(const UICommunicator &); }; struct CommandEvent { UICommunicator::Command command; bool commandData; }; class CommandEventQueue : public Qul::EventQueue<struct CommandEvent, Qul::EventQueueOverrunPolicy_Discard, 10> { public: void onEvent(const CommandEvent &commandEvent); }; #endif // UICOMMUNICATOR_H
The header declares the
UICommunicatorstruct, which inherits Qul::Singleton, making it safe to call in a C++ code. For more information, refer to the Singleton class reference.The header also declares the
Commandenumthat contains a list of commands, and theCommandEventQueueto manage the queue. In addition, it declares theled1Statusproperty to indicate the status of the on-board blue LED. This exposes the property to the QML context, which uses it to determine the color of the button.The
UICommunicatorclass contains thesendFromUIandreceiveToUIfunctions to send and receive commands. It uses theCommandEventQueueto communicate with the UI thread in a thread-safe way. Instead of calling receiveToUI from the application thread, adds the commands to theCommandEventQueue, which gets processed by the QUL thread to callreceiveToUI. - Replace the code in
uicommunicator.cppwith the following:/****************************************************************************** ** ** Copyright (C) 2022 The Qt Company Ltd. ** Contact: https://www.qt.io/licensing/ ** ** This file is part of the Qt Quick Ultralite module. ** ** $QT_BEGIN_LICENSE:COMM$ ** ** Commercial License Usage ** Licensees holding valid commercial Qt licenses may use this file in ** accordance with the commercial license agreement provided with the ** Software or, alternatively, in accordance with the terms contained in ** a written agreement between you and The Qt Company. For licensing terms ** and conditions see http://www.qt.io/terms-conditions. For further ** information use the contact form at http://www.qt.io/contact-us. ** ** $QT_END_LICENSE$ ** ******************************************************************************/ #include "uicommunicator.h" extern void sendCommandToAppThread(bool led1Status); UICommunicator::UICommunicator() { led1Status.setValue(false); } void UICommunicator::sendFromUI(Command command, bool commandData) { QUL_UNUSED(command) sendCommandToAppThread(commandData); } void UICommunicator::receiveToUI(Command command, bool commandData) { switch (command) { case LED1State: led1Status.setValue(commandData); break; default: break; } } void CommandEventQueue::onEvent(const CommandEvent &commandEvent) { UICommunicator::instance().receiveToUI(commandEvent.command, commandEvent.commandData); } static CommandEventQueue commandEventQueue; void sendToUI(bool led1Data) { CommandEvent commandEvent; commandEvent.command = UICommunicator::LED1State; commandEvent.commandData = led1Data; commandEventQueue.postEvent(commandEvent); }
When you create the e2 Studio project in the next topic, move the
externsymbol. For now, you need it here to ensure the UI project compiles.The
UICommunicatorclass setsled1Statustofalse. ItssendFromUI()member function sends aboolvalue to the application thread. ThereceiveToUI()member function updates the property depending command argument.The
CommandEventQueueclass overrides theonEvent()function. It callsreceiveToUI()on theUICommunicatorinstance, with thecommandandcommandDataparameters.In addition, the
UICommunicatorclass creates a static instance ofCommandEventQueue. ThesendToUI()function constructs aCommandEventfrom the givenboolvalue, and adds it to thecommandEventQueuefor processing. The application thread callssendToUI()function when the LED1's state changes. - Connect an RA6M3G board to your computer and use Qt Creator to build, flash, and run the project in its current state:
- Replace the
externkeyword at the beginning ofuicommunicator.cppwith a no-op (empty) function, and save. - Select the RA6 kit in the sub-menu that appears on clicking Debug in the bottom-left corner.
- Click the green arrow below Debug, to build and flash the application onto the device, and run.
- Replace the
- Make necessary changes to the CMake project file to build it as a static library:
- Edit CMakeLists.txt to append the
STATIC_LIBRARYargument to thequl_add_targetfunction call. Thequl_add_targetline should look like this after the changes:qul_add_target(<project-name> STATIC_LIBRARY uicommunicator.h uicommunicator.cpp)
- Build your project against the Qt for MCUs 2.3 - EK-RA6M3G-BAREMETAL 16bpp (ARMGCC) kit.
- Edit CMakeLists.txt to append the
After a successful build, you should see the static library and qul_run.h C++ header in the build directory.
Note: Qt Creator builds a project in a directory that is parallel to the source directory. The build directory name depends on the project name, kit, and the build type (debug or release). For example, a debug build of project Foo against the Qt for MCUs 2.3 - Desktop kit, should have build-Foo-Qt_for_MCUs_2_3_Desktop_32bpp_Debug as its build directory.
Available under certain Qt licenses.
Find out more.