Raspberry Pi での開発
Qt Edu for Developersパッケージを利用することで、Raspberry Pi をターゲットハードウェアとした組み込み機器向けの開発も可能になります。これは、既存の Qt インストールにQt Board Support Package(QBSP) を追加し、Raspberry Pi で使用する SD カードにシステムイメージをフラッシュすることで実現できます。 Boot to Qtシステムイメージでフラッシュします。
注意: Windows と Linux は開発ホストとしてサポートされていますが、macOS はサポートされていません。
まず、Qt Edu for Developersのインストール手順を完了させてください。
1.QBSP のダウンロード
Qt アカウントにログインします。Downloads セクションに移動し、Product フィールドのドロップダウンメニューからEDU ライセンスの Qt for Device Creation QBSP を選択します。
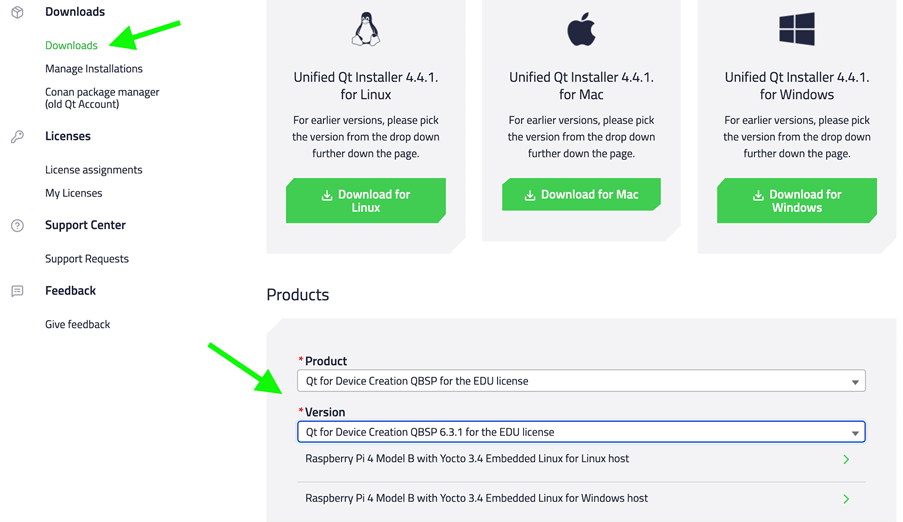
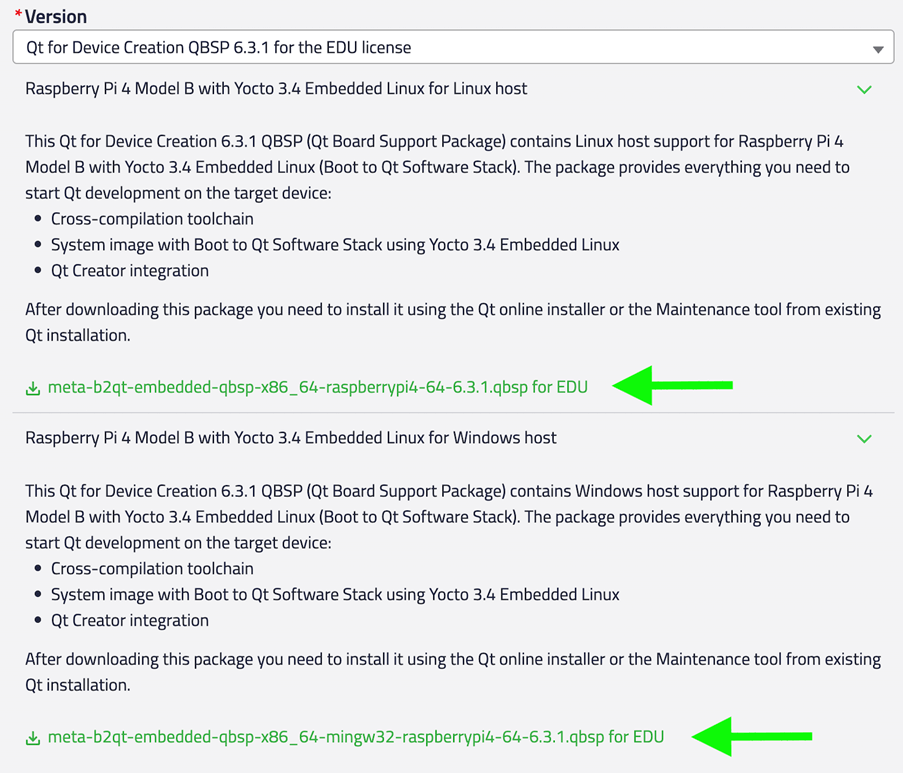
開発ホスト(Windows または Linux)に適したバージョンの.qbspファイルをダウンロードします。
2.メンテナンスツールの実行
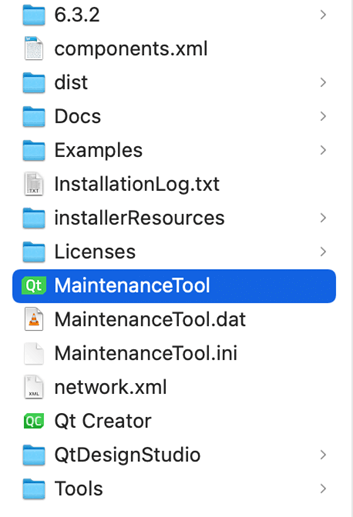
Qt のインストールフォルダに移動し、MaintenanceTool を実行します。
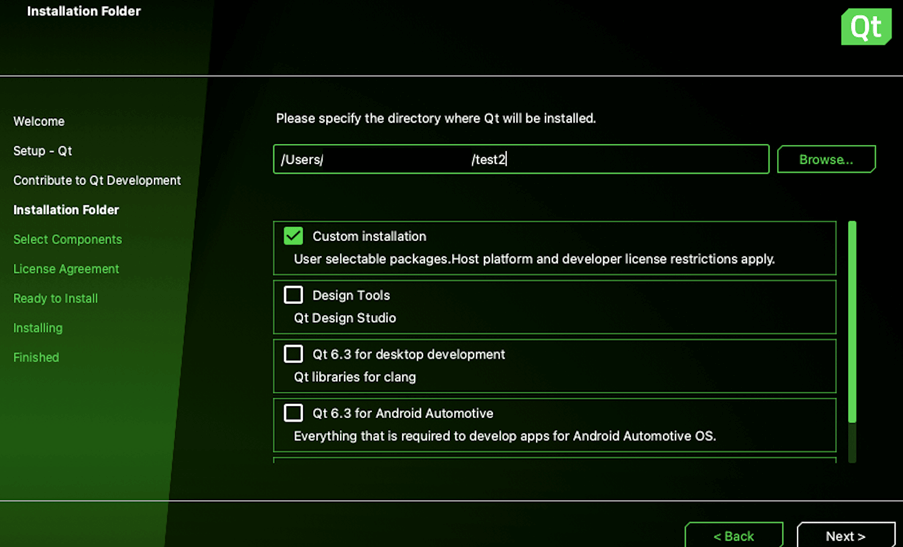
Maintenance Tool を使って、既存の Qt インストールを変更することができます。Custom installation に移動し、Next を選択します。
Browse QBSP files を選択します。ファイルダイアログウィンドウで、Qt アカウントからダウンロードした.qbsp ファイルを見つけて選択します。
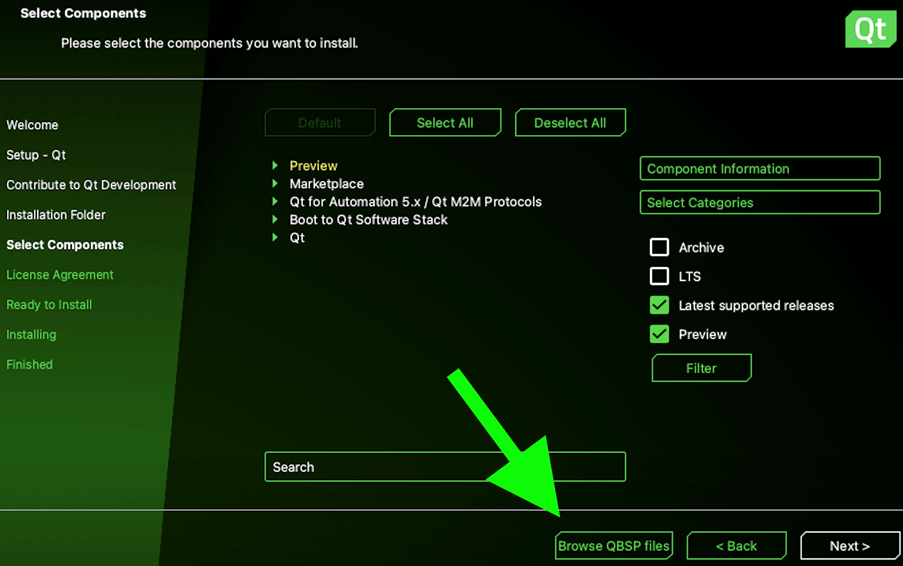
この後、利用可能なコンポーネントのリストが更新されます。この後、利用可能なコンポーネントのリストが更新されます。 Boot to Qt Software Stackで、Raspberry Pi を選択し、Next を選択します。これで、Raspberry Pi 用のBoot to Qt システムイメージとツールチェーンがインストールされます。
3.開くQt Creator
セットアップを完了するには、Raspberry Piのブートドライブとして使用するSDカードにBoot to Qt システムイメージをフラッシュする必要があります。さらに、有線または無線ネットワーク接続を使用して、Boot to Qt ソフトウェアスタックを実行しているデバイスに接続するために、Qt Creator を設定する必要があります。
Qt Creator詳細はQt Creator: ConnectBoot to Qt devicesを参照してください。
© 2026 The Qt Company Ltd. Documentation contributions included herein are the copyrights of their respective owners. The documentation provided herein is licensed under the terms of the GNU Free Documentation License version 1.3 as published by the Free Software Foundation. Qt and respective logos are trademarks of The Qt Company Ltd. in Finland and/or other countries worldwide. All other trademarks are property of their respective owners.
