
대기 중인 사용자 정의 유형
'큐에 추가된 사용자 정의 유형' 예제는 큐에 추가된 시그널과 슬롯을 사용하여 스레드 간에 사용자 정의 유형을 전송하는 방법을 보여줍니다.
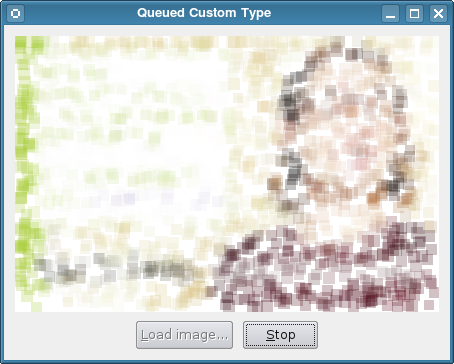
개요
이 예제에서는 값 클래스인 ` Block`를 생성하고, 이를 메타 객체 시스템에 등록하여 큐 기반 신호와 슬롯을 사용하여 스레드 간에 해당 인스턴스를 전송할 수 있도록 합니다.
블록 클래스
Block 클래스는 메타 객체 시스템의 요구 사항에 따라 클래스의 public 섹션에 기본 생성자, 복사 생성자 및 소멸자를 제공합니다. 이 클래스는 색상이 지정된 직사각형을 나타냅니다.
class Block
{
public:
    Block();
    Block(const Block &other);
    ~Block();

    Block(const QRect &rect, const QColor &color);

    QColor color() const;
    QRect rect() const;

private:
    QRect m_rect;
    QColor m_color;
};

Q_DECLARE_METATYPE(Block);
이 유형을 사용하는 신호-슬롯 연결을 설정하기 전에, qRegisterMetaType() 템플릿 함수를 호출하여 런타임에 메타 객체 시스템에 이 클래스를 등록해야 합니다. 이 예제에서는 QVariant 와 함께 이 유형을 사용할 계획이 없더라도, Q_DECLARE_METATYPE()을 통해 새 유형을 선언하는 것이 좋은 관행입니다.
Block 클래스의 구현은 매우 간단하므로, 여기서는 생략하겠습니다.
Window 클래스
Block 객체를 받는 공용 슬롯을 가진 간단한 Window 클래스를 정의합니다. 이 클래스의 나머지 부분은 사용자 인터페이스 관리와 이미지 처리에 중점을 둡니다.
class Window : public QWidget
{
    Q_OBJECT

public:
    Window(QWidget *parent = nullptr);
    void loadImage(const QImage &image);

public slots:
    void addBlock(const Block &block);

private slots:
    void loadImage();
    void resetUi();

private:
    QLabel *label;
    QPixmap pixmap;
    QPushButton *loadButton;
    QPushButton *resetButton;
    QString path;
    RenderThread *thread;
};
Window 클래스에는 RenderThread 객체가 제공하는 작업자 스레드도 포함되어 있습니다. 이 스레드는 신호를 발생시켜 Block 객체를 창의 addBlock(Block) 슬롯으로 전송합니다.
Window 클래스에서 가장 중요한 부분은 생성자와 addBlock(Block) 슬롯입니다.
생성자는 이미지 렌더링을 위한 스레드를 생성하고, 레이블과 두 개의 푸시 버튼으로 구성된 사용자 인터페이스를 설정하며, 이 버튼들은 동일한 클래스 내의 슬롯에 연결되어 있습니다.
Window::Window(QWidget *parent)
    : QWidget(parent), thread(new RenderThread(this))
{
    label = new QLabel(this);
    label->setAlignment(Qt::AlignCenter);

    loadButton = new QPushButton(tr("&Load image..."), this);
    resetButton = new QPushButton(tr("&Stop"), this);
    resetButton->setEnabled(false);

    connect(loadButton, &QPushButton::clicked,
            this, QOverload<>::of(&Window::loadImage));
    connect(resetButton, &QPushButton::clicked,
            thread, &RenderThread::requestInterruption);
    connect(thread, &RenderThread::finished,
            this, &Window::resetUi);
    connect(thread, &RenderThread::sendBlock,
            this, &Window::addBlock);
마지막 연결 단계에서는 ` RenderThread ` 객체의 신호를 창의 ` addBlock(Block) ` 슬롯에 연결합니다.
    ...
    setWindowTitle(tr("Queued Custom Type"));
}
생성자의 나머지 부분은 단순히 창의 레이아웃을 설정합니다.
addBlock(Block) 슬롯은 생성자에서 설정된 신호-슬롯 연결을 통해 렌더링 스레드로부터 블록을 수신합니다:
void Window::addBlock(const Block &block)
{
    QColor color = block.color();
    color.setAlpha(64);

    QPainter painter;
    painter.begin(&pixmap);
    painter.fillRect(block.rect(), color);
    painter.end();
    label->setPixmap(pixmap);
}
이 블록들이 도착하는 대로 라벨에 그려 넣기만 하면 됩니다.
RenderThread 클래스
RenderThread 클래스는 이미지를 처리하여 Block 객체를 생성하고, sendBlock(Block) 신호를 사용하여 이 객체들을 예제의 다른 컴포넌트로 전송합니다.
class RenderThread : public QThread
{
    Q_OBJECT

public:
    RenderThread(QObject *parent = nullptr);
    ~RenderThread();

    void processImage(const QImage &image);

signals:
    void sendBlock(const Block &block);

protected:
    void run();

private:
    QImage m_image;
};
생성자와 소멸자는 여기에서 생략합니다. 이 두 함수는 스레드의 내부 상태를 설정하고, 스레드가 소멸될 때 정리하는 역할을 합니다.
처리는 ` processImage() ` 함수로 시작되며, 이 함수는 ` RenderThread ` 클래스에서 재구현된 ` QThread::run()` 함수를 호출합니다:
void RenderThread::processImage(const QImage &image)
{
    if (image.isNull())
        return;

    m_image = image;
    start();
}

void RenderThread::run()
{
    const int size = qMax(m_image.width()/20, m_image.height()/20);
    for (int s = size; s > 0; --s) {
        for (int c = 0; c < 400; ++c) {
이미지 처리 방식의 세부 사항은 차치하고, 블록을 포함하는 신호가 일반적인 방식으로 발신되는 것을 볼 수 있습니다:
    ...
            const Block block(QRect(x1, y1, x2 - x1 + 1, y2 - y1 + 1),
                        QColor(red/n, green/n, blue/n));
            emit sendBlock(block);
            if (isInterruptionRequested())
                return;
            msleep(10);
        }
    }
}
발신된 각 신호는 대기열에 추가된 후, 나중에 창의 ` addBlock(Block) ` 슬롯으로 전달됩니다.
타입 등록
이 예제의 ` main() ` 함수에서는 ` qRegisterMetaType()` 템플릿 함수를 호출하여 ` Block ` 클래스를 메타 객체 시스템에 사용자 정의 유형으로 등록합니다:
int main(int argc, char *argv[])
{
    QApplication app(argc, argv);
    qRegisterMetaType<Block>();

    Window window;
    window.show();

    window.loadImage(createImage(256, 256));
    return app.exec();
}
이 호출은 해당 타입을 사용하는 신호-슬롯 연결이 이루어지기 전에 타입이 등록되도록 보장하기 위해 여기에 배치되었습니다.
main() 함수의 나머지 부분은 난수 생성기의 시드 설정, 창의 생성 및 표시, 그리고 기본 이미지 설정과 관련이 있습니다. createImage() 함수의 구현에 대해서는 소스 코드를 참조하십시오.
추가 참고 자료
이 예제는 사용자 정의 타입을 메타 객체 시스템에 등록하여 스레드 간 신호-슬롯 연결에서 사용할 수 있도록 하는 방법을 보여주었습니다.
실제로는 ` Q_DECLARE_METATYPE()` 매크로와 ` qRegisterMetaType()` 템플릿 함수 모두 사용자 정의 타입을 등록하는 데 사용할 수 있지만, ` qRegisterMetaType()`은 신호-슬롯 통신을 수행해야 하거나 런타임에 사용자 정의 타입의 객체를 생성 및 소멸시켜야 하는 경우에만 필요합니다.
Qt에서 사용자 정의 유형을 사용하는 방법에 대한 자세한 내용은 ‘Creating Custom Qt Types’ 문서에서 확인할 수 있습니다.
© 2026 The Qt Company Ltd. Documentation contributions included herein are the copyrights of their respective owners. The documentation provided herein is licensed under the terms of the GNU Free Documentation License version 1.3 as published by the Free Software Foundation. Qt and respective logos are trademarks of The Qt Company Ltd. in Finland and/or other countries worldwide. All other trademarks are property of their respective owners.
