Qt Edu for Designers
Qt Edu for Designers package contains Qt Design Studio Enterprise, allowing you to import your designs from design tools such as Figma, Sketch, or Adobe XD, and develop them further into functioning user interfaces on your target devices.
These instructions walk you through the installation of the Qt Edu for Designers package.
1. Apply for Qt Educational license
Start by filling out the form available here.
Note: To be eligible for a license, use an email address from an educational institution. If we don't recognize your educational institution, send us a suggestion to add it in our list here.
The license is personal, and it's valid for a period of 12 months. To renew the license, fill out the Qt Educational License form again, or launch Qt Maintenance Tool and log in.

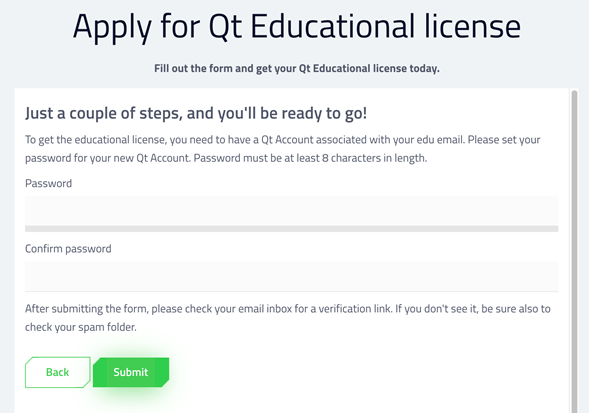
Create a password
After submitting the form, create a password for your Qt Account. Qt Account is where you'll find details about your license, and it's created automatically for you after setting a password.
Note: If you already have an account associated with an educational email address and you are renewing the license, this step is skipped.
You can find more information about Qt Account here.
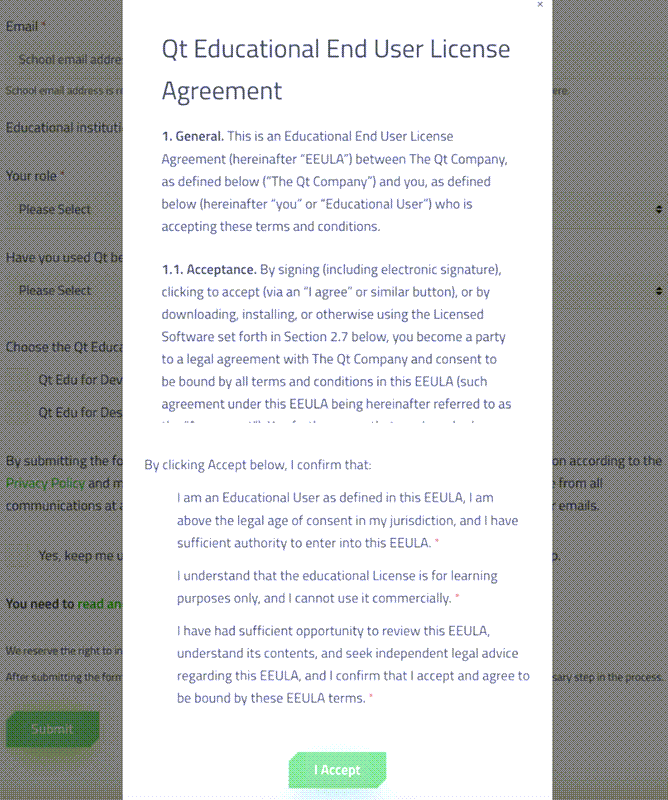
Accept terms
Select I accept on the Qt Educational End user License Agreement.
2. Verify email address
After setting up the Qt Account, verify your email address. Check your inbox for a message containing a verification link.
3. Download the online installer
The verification link will automatically redirect you to a page for downloading the installer. You can also find it here.
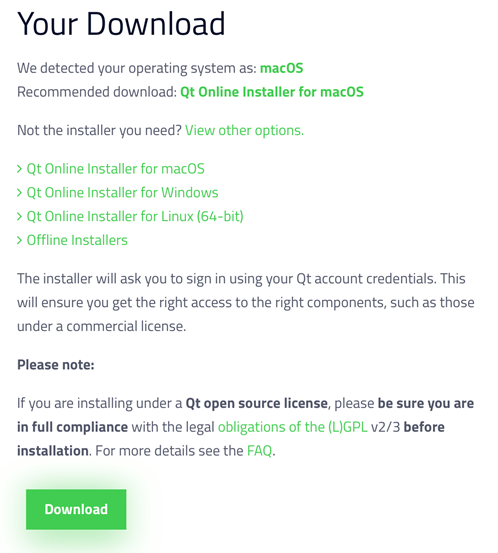
The page detects your operating system automatically and recommends a version to download. Alternatively, you can click on View other options and select the correct version of the online installer, then select Download.
4. Run the installer
Once the download completes, go to your download folder and run the installer.
On Linux, you'll need to set execution permission for the installer binary.
On macOS, the online installer is a .dmg file that contains the installer application. Double-click on the installer icon to run it.
5. Log in to Qt Account
The installer asks you to log in to your Qt Account. Fill in the email address and the password you created in step 1.
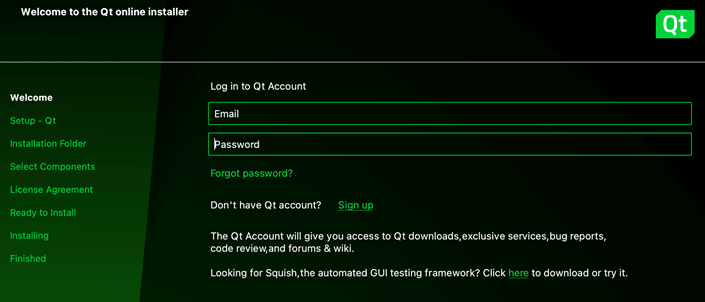
Select Next.
Notes about build environment
On macOS, you may see the following pop-up:

Developing on macOS requires Xcode to be installed on the system. For more information, see Qt for macOS - Build environment.
See also Qt for Windows and Qt for Linux.
6. Contribute to Qt development
On the next step, the installer asks you to contribute to Qt development by tracking usage data.
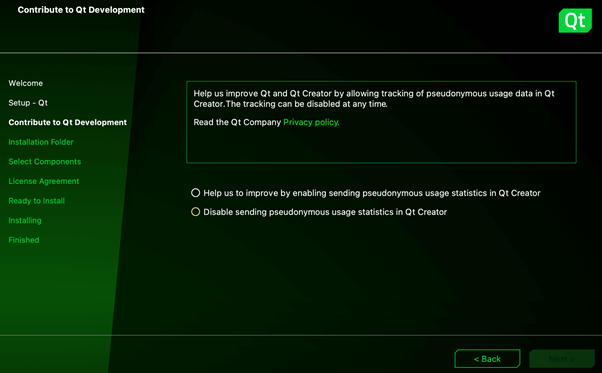
Select the preferred option and then Next.
7. Select installation folder
Select the directory where you want to install Qt Design Studio.
Note: Avoid whitespace in the installation path as this may lead to problems later.
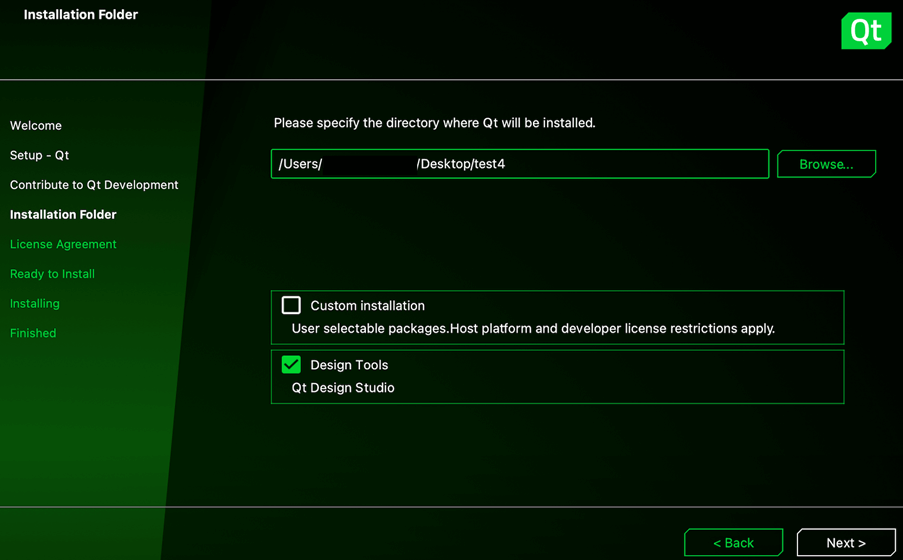
With Qt Edu for Designers license, you get access to Qt Design Studio. Select the Design Tools shortcut to install the latest version of Qt Design Studio Enterprise.
Select Next.
8. License agreements
Before continuing, you need to accept the license agreements. Note that educational licenses are for learning purposes only, as detailed in Qt Educational End User License Agreement.
If you want to create a commercial product, you need to buy a commercial license or use an open-source license provided you can comply with the terms and conditions of the open-source license(s).
For more information, see Qt Licensing.
After scrolling through the agreements, select the checkbox and continue with Next.
9. Finish the installation
Select Install to start the installation process.
Once installation is complete, you'll see the following screen:
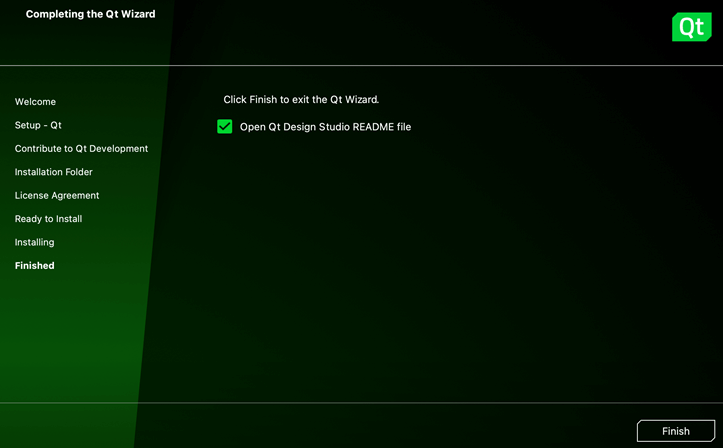
Select Finish to exit the installer.
10. Open Qt Design Studio
Go to the installation folder to see all tools that were installed on your computer. Qt Design Studio is located under its own folder:

Run the Qt Design Studio application:
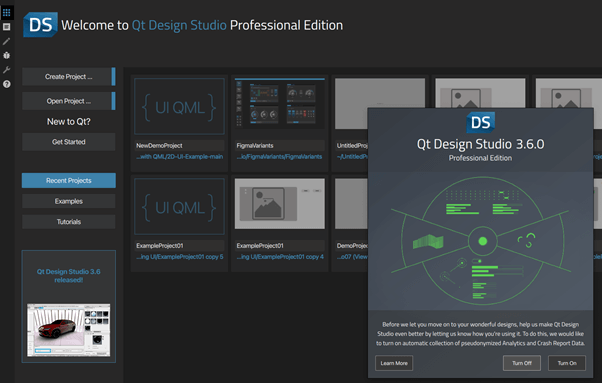
Now you're ready to start creating user interfaces with Qt Design Studio!
Start learning at resources.qt.io/learning-hub.
© 2026 The Qt Company Ltd. Documentation contributions included herein are the copyrights of their respective owners. The documentation provided herein is licensed under the terms of the GNU Free Documentation License version 1.3 as published by the Free Software Foundation. Qt and respective logos are trademarks of The Qt Company Ltd. in Finland and/or other countries worldwide. All other trademarks are property of their respective owners.
