
在树莓派上开发
借助Qt Edu 开发者套件,您还可以以树莓派为目标硬件,开发面向嵌入式设备的应用程序。具体操作包括:在现有的 Qt 安装中添加Qt 板级支持包(QBSP),并将树莓派所用的 SD 卡刷写为 Boot to Qt 系统镜像。
注意: 支持Windows 和 Linux 作为开发主机,但不支持 macOS。
在继续之前,请先完成Qt Edu for Developers的安装步骤。
1. 下载 QBSP
登录您的Qt 帐户。转至“Downloads ”部分,并在“Product ”字段的下拉菜单中选择EDU 许可证对应的 Qt for Device Creation QBSP。
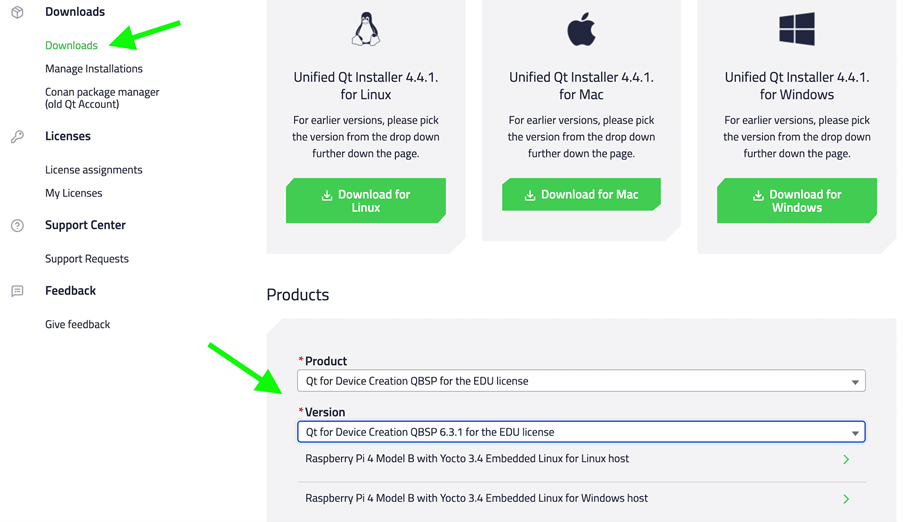
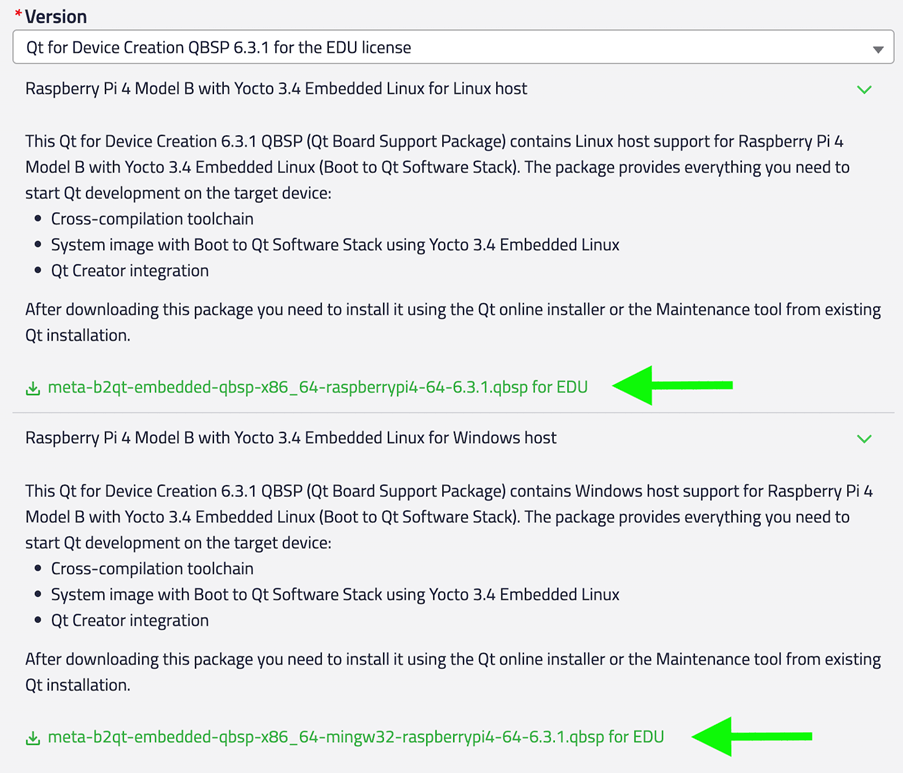
下载适用于您的开发主机(Windows 或 Linux)的正确版本的.qbsp文件。
2. 运行维护工具
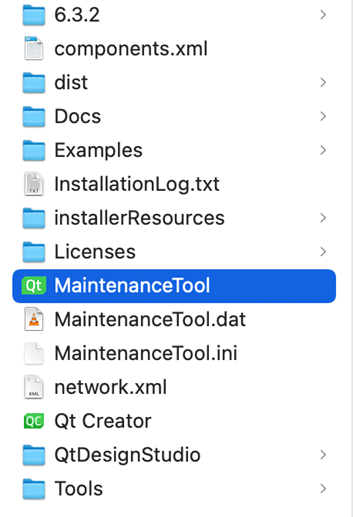
进入 Qt 安装文件夹,运行MaintenanceTool 。
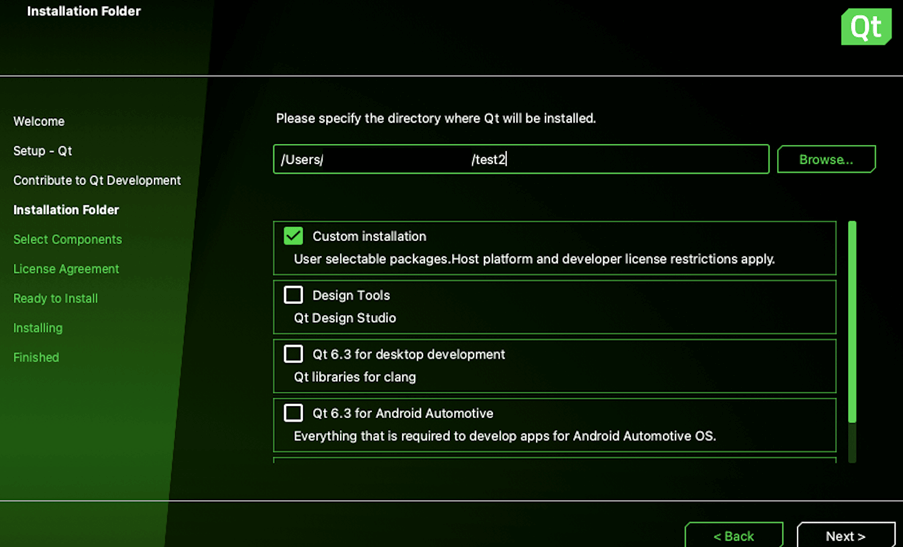
Qt Maintenance Tool允许您修改现有的 Qt 安装。导航至“Custom installation ”,然后选择“Next ”。
选择“Browse QBSP files ”。在文件对话框中,定位并选择您从 Qt 账户下载的.qbsp 文件。
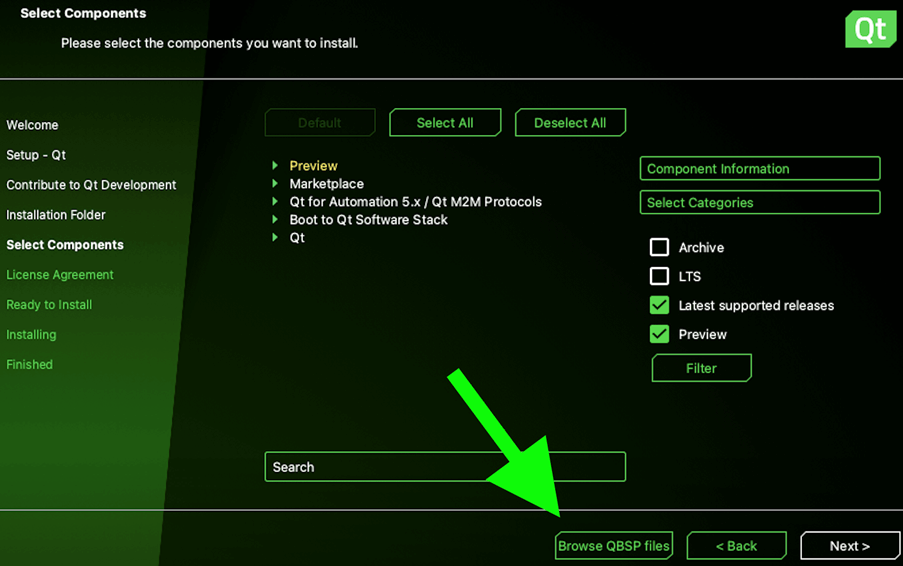
完成此操作后,可用组件列表将更新。在 Boot to Qt Software Stack下,选择“Raspberry Pi ”,然后选择“Next ”。这将安装适用于树莓派的Boot to Qt 系统镜像和工具链。
3. 打开Qt Creator
要完成设置,需要将Boot to Qt 系统镜像刷写到用作 Raspberry Pi 启动驱动器的 SD 卡上。此外,还需要配置Qt Creator ,以便通过有线或无线网络连接到运行Boot to Qt 软件堆栈的设备。
这些步骤在Qt Creator 中完成,详情请参阅Qt Creator :连接Boot to Qt 设备。
© 2026 The Qt Company Ltd. Documentation contributions included herein are the copyrights of their respective owners. The documentation provided herein is licensed under the terms of the GNU Free Documentation License version 1.3 as published by the Free Software Foundation. Qt and respective logos are trademarks of The Qt Company Ltd. in Finland and/or other countries worldwide. All other trademarks are property of their respective owners.
