简单 HTTP 服务器
如何设置 HTTP 服务器的简单示例。

简单 HTTP 服务器展示了如何使用QHttpServer 类设置 HTTP 服务器。它监听两个套接字:一个 TCP 套接字和一个 SSL 套接字。它设置了不同的回调,以演示如何使用route() 函数。
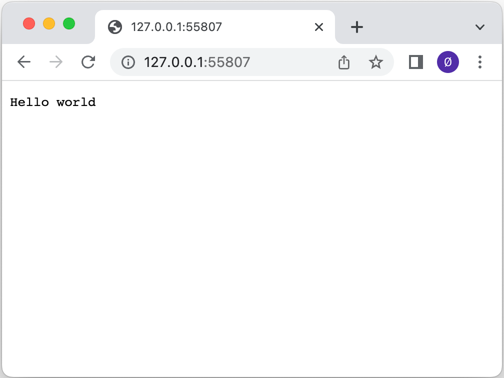
创建了QHttpServer 对象,简单的route() 通过返回Hello world 来处理路径"/" :
QCoreApplication app(argc, argv);

QHttpServer httpServer;
httpServer.route("/", []() {
    return "Hello world";
});
然后,我们注册一个回调,将服务器的资产提供给客户端:
httpServer.route("/assets/<arg>", [] (const QUrl &url) {
    return QHttpServerResponse::fromFile(u":/assets/"_s + url.path());
});
这里我们使用QHttpServerRequest 对象来返回客户端的 IP 地址:
httpServer.route("/remote_address", [](const QHttpServerRequest &request) {
    return request.remoteAddress().toString();
});
在其中一个路径"/auth" 中,使用了基本 HTTP 验证:
httpServer.route("/auth", [](const QHttpServerRequest &request) {
    auto auth = request.value("authorization").simplified();

    if (auth.size() > 6 && auth.first(6).toLower() == "basic ") {
        auto token = auth.sliced(6);
        auto userPass = QByteArray::fromBase64(token);

        if (auto colon = userPass.indexOf(':'); colon > 0) {
            auto userId = userPass.first(colon);
            auto password = userPass.sliced(colon + 1);

            if (userId == "Aladdin" && password == "open sesame")
                return QHttpServerResponse("text/plain", "Success\n");
        }
    }
    QHttpServerResponse resp("text/plain", "Authentication required\n",
                             QHttpServerResponse::StatusCode::Unauthorized);
    auto h = resp.headers();
    h.append(QHttpHeaders::WellKnownHeader::WWWAuthenticate,
             R"(Basic realm="Simple example", charset="UTF-8")");
    resp.setHeaders(std::move(h));
    return std::move(resp);
});
然后,在route() 注册的回调处理完毕后,我们使用addAfterRequestHandler() 函数更改QHttpServerResponse 对象,在响应中添加 HTTP 标头:
httpServer.addAfterRequestHandler(&httpServer, [](const QHttpServerRequest &, QHttpServerResponse &resp) {
    auto h = resp.headers();
    h.append(QHttpHeaders::WellKnownHeader::Server, "Qt HTTP Server");
    resp.setHeaders(std::move(h));
});
使用bind() 函数将监听端口的QTcpServer 与 HTTP 服务器绑定:
autotcpserver=std::make_unique<QTcpServer>();if(!tcpserver->listen()|| !httpServer.bind(tcpserver.get())){    qWarning() << QCoreApplication::translate("QHttpServerExample",
                                             "服务器侦听端口失败。");返回-1; }quint16port=  tcpserver->serverPort(); tcpserver.release();
然后,QSslConfiguration 用于为QHttpServer 创建 SSL 配置,以提供 HTTPS 流量:
QSslConfigurationconf=QSslConfiguration::defaultConfiguration();const autosslCertificateChain=QSslCertificate::fromPath(QStringLiteral(":/assets/certificate.crt"));if(sslCertificateChain.empty()) {    qWarning() << QCoreApplication::translate("QHttpServerExample",
                                             "无法从文件中检索 SSL 证书。");return-1; }QFileprivateKeyFile(QStringLiteral(":/assets/private.key"));if(!privateKeyFile.open(QIODevice::ReadOnly)) {    qWarning() << QCoreApplication::translate("QHttpServerExample",
                                             "Couldn't open file for reading:%1") .arg(privateKeyFile.errorString());return-1; } conf.setLocalCertificate(sslCertificateChain.front()); conf.setPrivateKey(QSslKey(&privateKeyFile、 QSsl::Rsa)); privateKeyFile.close();autosslserver=std::make_unique<QSslServer>(); sslserver->setSslConfiguration(conf);if(!sslserver->listen()|| !httpServer.bind(sslserver.get())){    qWarning() << QCoreApplication::translate("QHttpServerExample",
                                             "服务器侦听端口失败。");return-1; }quint16sslPort=  sslserver->serverPort(); sslserver.release();
一切就绪后,剩下的就是开始处理传入的请求了:
return app.exec();
文件:
图像
© 2025 The Qt Company Ltd. Documentation contributions included herein are the copyrights of their respective owners. The documentation provided herein is licensed under the terms of the GNU Free Documentation License version 1.3 as published by the Free Software Foundation. Qt and respective logos are trademarks of The Qt Company Ltd. in Finland and/or other countries worldwide. All other trademarks are property of their respective owners.

