
Qt Quick 小部件示例
演示了如何使用QQuickWidget 类将Qt Quick 与Qt Widgets 应用程序结合使用。
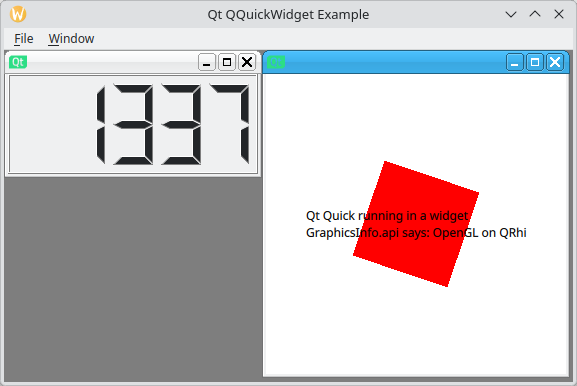
该示例演示了如何将Qt Quick 场景嵌入到Qt Widgets 应用程序中,以及Qt Widgets 与Qt Quick 之间如何在不同的UI方面进行集成。这包括:
- Qt Widgets 与Qt Quick
- QQuickView 在QLayout
运行示例
您可以从以下位置运行示例:
- Qt Creator
打开Welcome 模式,并从Examples 选择该示例。有关更多信息,请参阅Qt Creator :教程:构建和运行。
- Qt Extension for Visual Studio Code
在“Command Palette ”中运行Qt: Open Qt examples 命令,并从列表中选择该示例。有关更多信息,请参阅Qt Extension for Visual Studio Code :教程:构建和运行。
Qt Quick 视图集成
为了演示Qt Quick 视图的无缝集成,该示例实现了多种对Qt Quick 视图进行截图的方法。
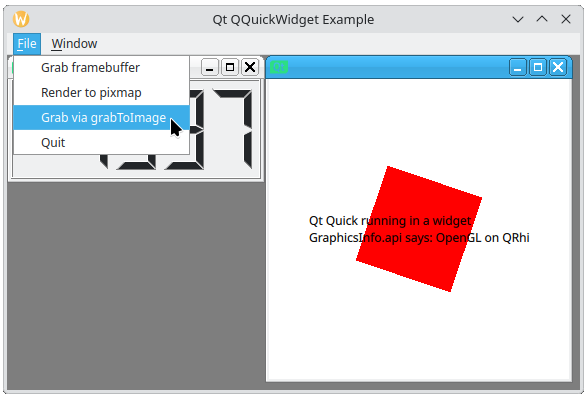
在主菜单中,选择“File ”,然后选择以下任一选项来截取Qt Quick 视图的屏幕截图:
- Grab framebuffer - 使用 `QQuickWidget::grabFramebuffer ` 函数截取屏幕截图。
- Render to pixmap - 使用 `QWidget::render ` 函数并传入 `QPixmap ` 实例作为参数来截取屏幕截图。这种方法在 `Qt Widgets` 中很常见。
- Grab via grabToImage - 调用在 QML 文件中声明的 `
performLayerBasedGrab` 函数。该 `performLayerBasedGrab` 函数会调用 QML 项的 `Item::grabToImage ` 函数来截取屏幕截图。此方法演示了如何从 C++ 调用嵌套视图的 QML API。
MDI 中的 QQuickWidget
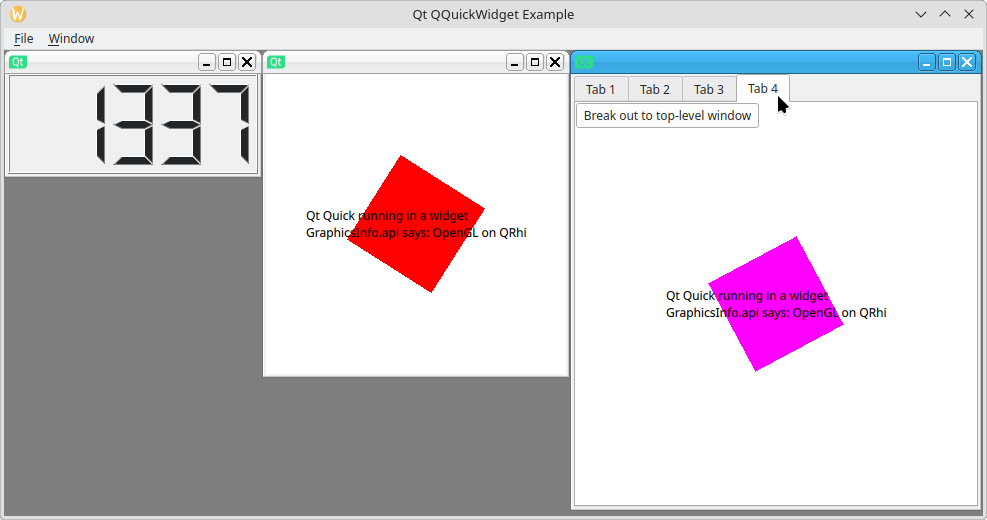
该示例还演示了如何使用QQuickWidget 将支持硬件加速的Qt Quick 场景无缝集成到 Qt Widgets 多文档界面(MDI)应用程序中。
要打开一个新的 MDI 子窗口,请在主菜单中选择“Window ”>“Add tab widget ”。
© 2026 The Qt Company Ltd. Documentation contributions included herein are the copyrights of their respective owners. The documentation provided herein is licensed under the terms of the GNU Free Documentation License version 1.3 as published by the Free Software Foundation. Qt and respective logos are trademarks of The Qt Company Ltd. in Finland and/or other countries worldwide. All other trademarks are property of their respective owners.
