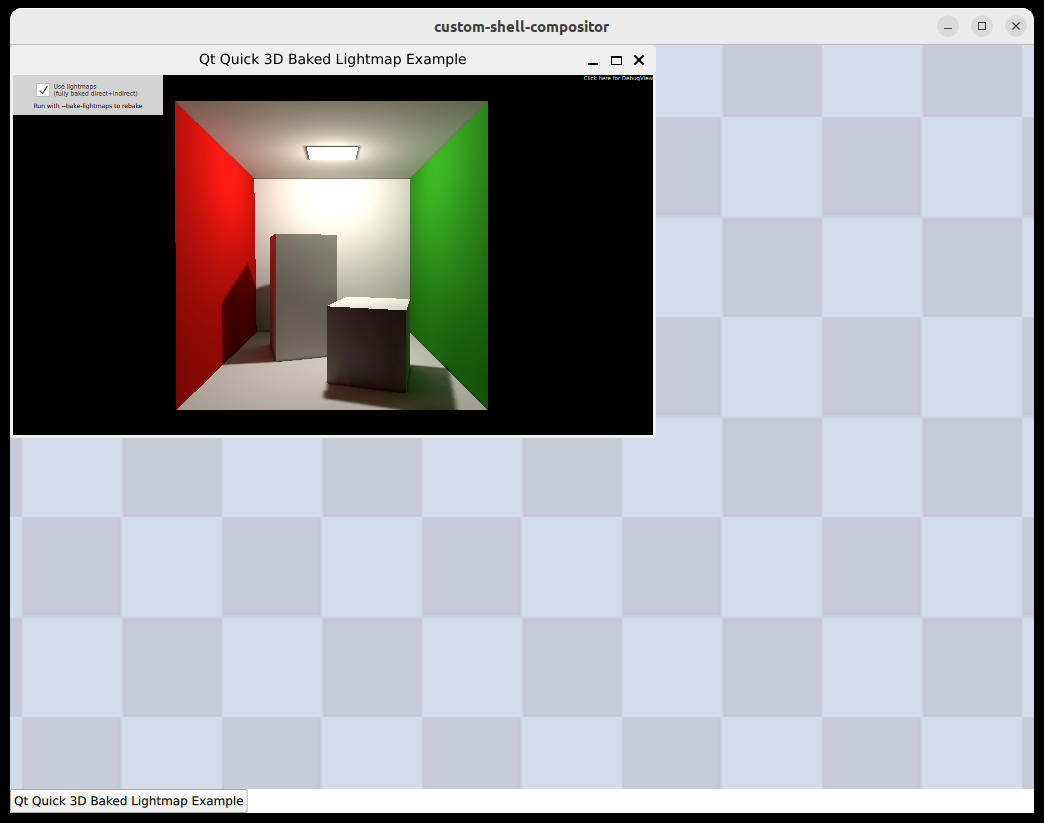
定制外壳
自定义 shell 演示了如何实现自定义 shell 扩展。
Wayland 的Shell 扩展是管理窗口状态、位置和大小的协议。大多数编译器都支持一个或多个内置扩展,但在某些情况下,编写一个包含应用程序所需确切功能的自定义扩展也很有用。

这就要求你在 Wayland 连接的服务器端和客户端都实现 shell 扩展,因此它主要适用于你正在构建一个平台并同时控制合成器及其客户端应用程序的情况。
自定义外壳示例展示了一个简单外壳扩展的实现。它分为三个部分:
- 自定义 shell 接口的协议描述。
- 用于在客户端应用程序中连接该接口的插件。
- 带有该接口服务器端实现的合成器示例。
协议描述遵循wayland-scanner 读取的标准 XML 格式。在此不作详细介绍,但它涵盖了以下功能:
- 为
wl_surface创建外壳表面的接口。这使得协议可以在现有的wl_surfaceAPI 基础上增加功能。 - 在外壳表面设置窗口标题的请求。
- 最小化/取消最小化外壳表面的请求。
- 通知客户端壳表面当前最小化状态的事件。
为了让qtwaylandscanner 作为构建的一部分自动运行,我们使用 CMake 函数qt_generate_wayland_protocol_server_sources()和qt_generate_wayland_protocol_client_sources()分别生成服务器端和客户端的胶水代码。(当使用qmake 时,WAYLANDSERVERSOURCES 和WAYLANDCLIENTSOURCES 变量的作用相同)。
客户端插件
为了让 Qt 客户端发现 shell 集成,我们必须重新实现 QWaylandShellIntegrationPlugin。
class QWaylandExampleShellIntegrationPlugin : public QWaylandShellIntegrationPlugin { Q_OBJECT Q_PLUGIN_METADATA(IID QWaylandShellIntegrationFactoryInterface_iid FILE "example-shell.json") public: QWaylandShellIntegration *create(const QString &key, const QStringList ¶mList) override; }; QWaylandShellIntegration *QWaylandExampleShellIntegrationPlugin::create(const QString &key, const QStringList ¶mList) { Q_UNUSED(key); Q_UNUSED(paramList); return new ExampleShellIntegration(); }
这将把 "example-shell "键附加到 shell 集成,并提供一种方法,让ExampleShellIntegration 类在客户端连接到接口时被实例化。
创建 shell 扩展的 API 可在头文件qwaylandclientshellapi_p.h 中找到。
#include <QtWaylandClient/private/qwaylandclientshellapi_p.h>该头文件需要包含私有 API,因为它与公共 Qt API 不同,没有二进制兼容性保证。这些 API 仍被认为是稳定的,并将保持源代码兼容,在这方面与 Qt 中的其他插件 API 类似。
如上所述,ExampleShellIntegration 是创建外壳表面的客户端入口点。它扩展了 QWaylandShellIntegrationTemplate 类,使用了奇怪重复模板模式(Curiously Recurring Template Pattern)。
class Q_WAYLANDCLIENT_EXPORT ExampleShellIntegration
        : public QWaylandShellIntegrationTemplate<ExampleShellIntegration>
        , public QtWayland::qt_example_shell
{
public:
    ExampleShellIntegration();

    QWaylandShellSurface *createShellSurface(QWaylandWindow *window) override;
};
它还继承自QtWayland::qt_example_shell 类,该类由qtwaylandscanner 根据协议的 XML 描述生成。
构造函数指定了我们支持的协议版本:
ExampleShellIntegration::ExampleShellIntegration()
    : QWaylandShellIntegrationTemplate(/* Supported protocol version */ 1)
{
}
example_shell 协议目前是版本一,因此我们向父类传递一个1 。这将用于协议协商,并确保在合成器使用较新版本的协议时,旧版客户端仍能继续工作。
当ExampleShellIntegration 初始化时,应用程序已连接到服务器,并收到了合成器支持的全局接口广播。如果成功,它就可以发出接口请求。在这种情况下,只有一个请求需要支持:创建外壳表面。它使用内置函数wlSurfaceForWindow() 将 QWaylandWindow 转换为wl_surface ,然后发出请求。然后,它用一个ExampleShellSurface 对象扩展返回的表面,该对象将处理qt_example_shell_surface 接口上的请求和事件。
QWaylandShellSurface *ExampleShellIntegration::createShellSurface(QWaylandWindow *window)
{
    if (!isActive())
        return nullptr;
    auto *surface = surface_create(wlSurfaceForWindow(window));
    return new ExampleShellSurface(surface, window);
}
ExampleShellSurface 扩展了两个类。
class ExampleShellSurface : public QWaylandShellSurface
        , public QtWayland::qt_example_shell_surface
第一个是QtWayland::qt_example_shell_surface 类,该类根据协议的 XML 描述生成。它为事件提供虚拟函数,并为协议中的请求提供普通成员函数。
QtWayland::qt_example_shell_surface 类只有一个事件。
void example_shell_surface_minimize(uint32_t minimized) override;ExampleShellSurface 将其重新实现,以更新其内部窗口状态。当窗口状态发生变化时,它会将待定状态保存至稍后,并调用QWaylandShellSurface 中的applyConfigureWhenPossible() 。状态、大小和位置的变化应该这样组织。这样,我们就能确保更改不会干扰曲面的渲染,而且多个相关更改可以很容易地作为一个整体应用。
当可以安全地重新配置曲面时,就会调用虚拟applyConfigure() 函数。
void ExampleShellSurface::applyConfigure()
{
    if (m_stateChanged)
        QWindowSystemInterface::handleWindowStateChanged(platformWindow()->window(), m_pendingStates);
    m_stateChanged = false;
}
在这里,我们将新的(最小化或去最小化)状态实际提交给窗口。
第二个超类是QWaylandShellSurface 。这是 Wayland 的 QPA 插件和 QWaylandWindow 用于与 shell 通信的接口。ExampleShellSurface 也从该接口重新实现了一些虚拟函数。
    bool wantsDecorations() const override;
    void setTitle(const QString &) override;
    void requestWindowStates(Qt::WindowStates states) override;
    void applyConfigure() override;
例如,当 Qt XML 应用程序设置窗口标题时,这就转化为对虚拟函数setTitle() 的调用。
void ExampleShellSurface::setTitle(const QString &windowTitle)
{
    set_window_title(windowTitle);
}
在ExampleShellSurface 中,这又转化为对我们自定义 shell 表面接口的请求。
合成器
示例的最后一部分是合成器本身。它的一般结构与其他合成器示例相同。有关合成器构件的更多详情,请参阅Minimal QML 示例。 Qt Wayland Compositor.
Custom Shell 编辑器的一个显著区别是 shell 扩展的实例化。Minimal QML 示例实例化了 shell 扩展IviApplication 、XdgShell 和WlShell ,而 Custom Shell 示例只创建了ExampleShell 扩展的实例。
ExampleShell {
    id: shell
    onShellSurfaceCreated: (shellSurface) => {
        shellSurfaces.append({shellSurface: shellSurface});
    }
}
我们将 shell 扩展实例创建为WaylandCompositor 的直接子节点,以便将其注册为全局接口。这将在客户连接时广播给他们,他们就可以按照上一节所述连接到该接口。
ExampleShell 是生成的QtWaylandServer::qt_example_shell 接口的子类,它包含协议 XML 中定义的 API。它也是QWaylandCompositorExtensionTemplate 的子类,这确保了QWaylandCompositor 能将对象识别为扩展。
class ExampleShell
        : public QWaylandCompositorExtensionTemplate<ExampleShell>
        , QtWaylandServer::qt_example_shell
这种双重继承是Qt Wayland Compositor 构建扩展时的典型模式。QWaylandCompositorExtensionTemplate 类创建了QWaylandCompositorExtension 与qtwaylandscanner 生成的qt_example_shell 类之间的连接。
等价地,ExampleShellSurface 类扩展了生成的QtWaylandServer::qt_example_shell_surface 类和QWaylandShellSurfaceTemplate 类,使其成为ShellSurface 类的子类,并在Qt Wayland Compositor 和生成的协议代码之间建立连接。
为了方便Qt Quick 使用该类型,我们使用了Q_COMPOSITOR_DECLARE_QUICK_EXTENSION_CLASS 预处理器宏。除其他事项外,当扩展被添加到Qt Quick 图时,它会自动初始化扩展。
voidExampleShell::initialize() { QWaylandCompositorExtensionTemplate::initialize();    QWaylandCompositor*compositor =  static_cast<QWaylandCompositor*>(extensionContainer());if(!compositor) {        qWarning() << "Failed to find QWaylandCompositor when initializing ExampleShell";
       return; } init(compositor->display(), 1); }
initialize() 函数的默认实现是在合成器中注册扩展。除此之外,我们还要初始化协议扩展本身。为此,我们将调用QtWaylandServer::qt_example_shell_surface 类中生成的init() 函数。
我们还重新实现了为surface_create 请求生成的虚拟函数。
void ExampleShell::example_shell_surface_create(Resource *resource, wl_resource *surfaceResource, uint32_t id)
{
    QWaylandSurface *surface = QWaylandSurface::fromResource(surfaceResource);

    if (!surface->setRole(ExampleShellSurface::role(), resource->handle, QT_EXAMPLE_SHELL_ERROR_ROLE))
        return;

    QWaylandResource shellSurfaceResource(wl_resource_create(resource->client(), &::qt_example_shell_surface_interface,
                                                           wl_resource_get_version(resource->handle), id));

    auto *shellSurface = new ExampleShellSurface(this, surface, shellSurfaceResource);
    emit shellSurfaceCreated(shellSurface);
}
每当客户端在连接上发出请求时,就会调用该虚拟函数。
我们的 shell 扩展只支持单个QWaylandSurfaceRole ,但在为其创建 shell 表面时,将其分配给QWaylandSurface 仍然很重要。这样做的主要原因是,将冲突的角色分配给同一个表面会被视为协议错误,如果发生这种情况,编译器有责任发布此错误。当我们采用曲面时,在曲面上设置一个角色,可以确保在以后以不同的角色重新使用曲面时,协议错误也会发生。
我们使用内置函数在 Wayland 和 Qt XML 类型之间进行转换,并创建ExampleShellSurface 对象。一切准备就绪后,我们会发出shellSurfaceCreated() 信号,QML 代码会截获该信号,并将其添加到外壳表面列表中。
ExampleShell {
    id: shell
    onShellSurfaceCreated: (shellSurface) => {
        shellSurfaces.append({shellSurface: shellSurface});
    }
}
在ExampleShellSurface 中,我们等同于启用了协议扩展的外壳表面部分。
运行示例
为了让客户端成功连接到新的 shell 扩展,需要处理一些配置细节。
首先,客户端必须能够找到 shell 扩展的插件。一个简单的方法是将QT_PLUGIN_PATH 设置为指向插件安装目录。由于 Qt 会按类别查找插件,因此插件路径应指向包含类别wayland-shell-integration 目录的父目录。因此,如果安装的文件是/path/to/build/plugins/wayland-shell-integration/libexampleshellplugin.so ,则应如下设置QT_PLUGIN_PATH :
export QT_PLUGIN_PATH=/path/to/build/plugins
有关配置插件目录的其他方法,请参阅插件文档。
最后一步是确保客户端实际连接到正确的 shell 扩展。Qt XML 客户端会自动尝试附加到内置的 shell 扩展,但这可以通过将QT_WAYLAND_SHELL_INTEGRATION 环境变量设置为要加载的扩展名称来覆盖。
export QT_WAYLAND_SHELL_INTEGRATION=example-shell
这就是全部内容。Custom Shell 示例是一个有限的 shell 扩展,只有很少的功能,但它可以作为构建专门扩展的起点。
© 2025 The Qt Company Ltd. Documentation contributions included herein are the copyrights of their respective owners. The documentation provided herein is licensed under the terms of the GNU Free Documentation License version 1.3 as published by the Free Software Foundation. Qt and respective logos are trademarks of The Qt Company Ltd. in Finland and/or other countries worldwide. All other trademarks are property of their respective owners.

