
Hello Vulkan Window Example
Shows the basics of using
QVulkanWindow.The Hello Vulkan Window Example shows the basics of using
QVulkanWindowin order to display rendering with the Vulkan graphics API on systems that support this.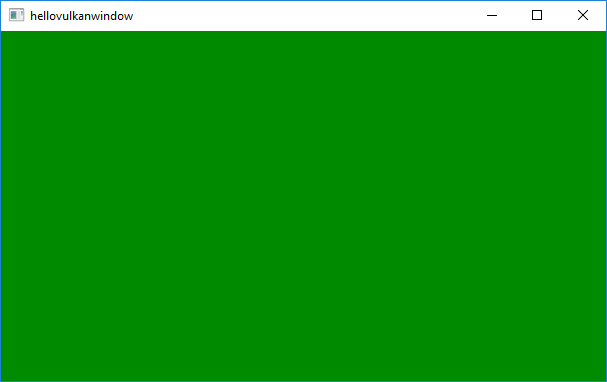
In this example there will be no actual rendering: it simply begins and ends a render pass, which results in clearing the buffers to a fixed value. The color buffer clear value changes on every frame.
Startup
Each Qt application using Vulkan will have to have a
Vulkan instancewhich encapsulates application-level state and initializes a Vulkan library.A
QVulkanWindowmust always be associated with aQVulkanInstanceand hence the example performs instance creation before the window. TheQVulkanInstanceobject must also outlive the window.QVulkanInstance inst; #ifndef Q_OS_ANDROID inst.setLayers(QByteArrayList() << "VK_LAYER_LUNARG_standard_validation"); #else inst.setLayers(QByteArrayList() << "VK_LAYER_GOOGLE_threading" << "VK_LAYER_LUNARG_parameter_validation" << "VK_LAYER_LUNARG_object_tracker" << "VK_LAYER_LUNARG_core_validation" << "VK_LAYER_LUNARG_image" << "VK_LAYER_LUNARG_swapchain" << "VK_LAYER_GOOGLE_unique_objects"); #endif if (!inst.create()) qFatal("Failed to create Vulkan instance: %d", inst.errorCode());The example enables validation layers, when supported. When the requested layers are not present, the request will be ignored. Additional layers and extensions can be enabled in a similar manner.
VulkanWindow w;
w.setVulkanInstance(&inst);

w.resize(1024, 768);
w.show();
Once the instance is ready, it is time to create a window. Note that
wlives on the stack and is declared afterinst.
The QVulkanWindow Subclass
To add custom functionality to a
QVulkanWindow, subclassing is used. This follows the existing patterns fromQOpenGLWindowandQOpenGLWidget. However,QVulkanWindowutilizes a separateQVulkanWindowRendererobject. This resemblesQQuickFramebufferObject, and allows better separation of the functions that are supposed to be reimplemented.class VulkanRenderer : public QVulkanWindowRenderer { public: VulkanRenderer(QVulkanWindow *w); void initResources() override; void initSwapChainResources() override; void releaseSwapChainResources() override; void releaseResources() override; void startNextFrame() override; private: QVulkanWindow *m_window; QVulkanDeviceFunctions *m_devFuncs; float m_green = 0; }; class VulkanWindow : public QVulkanWindow { public: QVulkanWindowRenderer *createRenderer() override; };The
QVulkanWindowsubclass reimplements the factory functioncreateRenderer(). This simply returns a new instance of theQVulkanWindowRenderersubclass. In order to be able to access various Vulkan resources via the window object, a pointer to the window is passed and stored via the constructor.QVulkanWindowRenderer *VulkanWindow::createRenderer() { return new VulkanRenderer(this); } VulkanRenderer::VulkanRenderer(QVulkanWindow *w) : m_window(w) { }Graphics resource creation and destruction is typically done in one of the init - resource functions.
void VulkanRenderer::initResources()
{
    qDebug("initResources");

    m_devFuncs = m_window->vulkanInstance()->deviceFunctions(m_window->device());
}
The Actual Rendering
QVulkanWindowsubclasses queue their draw calls in their reimplementation of . Once done, they are required to call backframeReady(). The example has no asynchronous command generation, so the frameReady() call is made directly from startNextFrame().void VulkanRenderer::startNextFrame() { m_green += 0.005f; if (m_green > 1.0f) m_green = 0.0f; VkClearColorValue clearColor = {{ 0.0f, m_green, 0.0f, 1.0f }}; VkClearDepthStencilValue clearDS = { 1.0f, 0 }; VkClearValue clearValues[2]; memset(clearValues, 0, sizeof(clearValues)); clearValues[0].color = clearColor; clearValues[1].depthStencil = clearDS; VkRenderPassBeginInfo rpBeginInfo; memset(&rpBeginInfo, 0, sizeof(rpBeginInfo)); rpBeginInfo.sType = VK_STRUCTURE_TYPE_RENDER_PASS_BEGIN_INFO; rpBeginInfo.renderPass = m_window->defaultRenderPass(); rpBeginInfo.framebuffer = m_window->currentFramebuffer(); const QSize sz = m_window->swapChainImageSize(); rpBeginInfo.renderArea.extent.width = sz.width(); rpBeginInfo.renderArea.extent.height = sz.height(); rpBeginInfo.clearValueCount = 2; rpBeginInfo.pClearValues = clearValues; VkCommandBuffer cmdBuf = m_window->currentCommandBuffer(); m_devFuncs->vkCmdBeginRenderPass(cmdBuf, &rpBeginInfo, VK_SUBPASS_CONTENTS_INLINE); // Do nothing else. We will just clear to green, changing the component on // every invocation. This also helps verifying the rate to which the thread // is throttled to. (The elapsed time between startNextFrame calls should // typically be around 16 ms. Note that rendering is 2 frames ahead of what // is displayed.) m_devFuncs->vkCmdEndRenderPass(cmdBuf); m_window->frameReady(); m_window->requestUpdate(); // render continuously, throttled by the presentation rate }To get continuous updates, the example simply invokes
requestUpdate()in order to schedule a repaint.
Running the Example
To run the example from Qt Creator , open the Welcome mode and select the example from Examples . For more information, visit Building and Running an Example.
© 2022 The Qt Company Ltd. Documentation contributions included herein are the copyrights of their respective owners. The documentation provided herein is licensed under the terms of the GNU Free Documentation License version 1.3 as published by the Free Software Foundation. Qt and respective logos are trademarks of The Qt Company Ltd. in Finland and/or other countries worldwide. All other trademarks are property of their respective owners.