Qt Quick Examples - Touch Interaction
A collection of QML Touch Interaction examples.

Touch Interaction is a collection of small QML examples relating to touch interaction methods. For more information, visit Important Concepts In Qt Quick - User Input .
Running the Example
To run the example from Qt Creator , open the Welcome mode and select the example from Examples . For more information, visit Building and Running an Example.
Multipoint Flames Example
Multipoint Flames demonstrates distinguishing different fingers in a MultiPointTouchArea , by assigning a different colored flame to each touch point.
The MultipointTouchArea sets up multiple touch points:
MultiPointTouchArea {
    anchors.fill: parent
    minimumTouchPoints: 1
    maximumTouchPoints: 5
    touchPoints: [
        TouchPoint { id: touch1 },
        TouchPoint { id: touch2 },
        TouchPoint { id: touch11 },
        TouchPoint { id: touch21 },
        TouchPoint { id: touch31 }
    ]
}
The flames are then simply bound to the coordinates of the touch point, and whether it is currently pressed, as follows:
ParticleFlame {
    color: "red"
    emitterX: touch1.x
    emitterY: touch1.y
    emitting: touch1.pressed
}
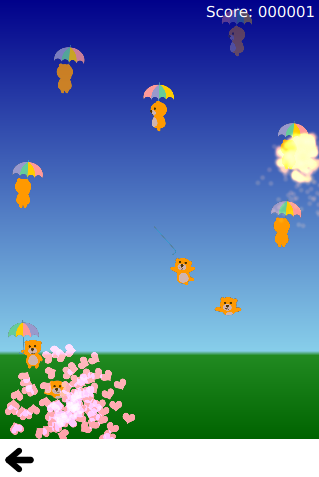
Bear-Whack Example
Bear-Whack demonstrates using MultiPointTouchArea to add multiple finger support to a simple game. The interaction with the game is done through a SpriteGoal that follows the TouchPoint . The TouchPoints added to the MultiPointTouchArea are a component with the relevant logic embedded into it:
TouchPoint {
    id: container
    property ParticleSystem system
    onPressedChanged: {
        if (pressed) {
            timer.restart();
            child.enabled = true;
            system.explode(x,y);
        }
    }
    property QtObject obj: Timer {
        id: timer
        interval: 100
        running: false
        repeat: false
        onTriggered: container.child.enabled = false
    }
    property Item child: SpriteGoal {
        enabled: false
        x: container.area.x - 16
        y: container.area.y - 16
        width: container.area.width + 32
        height: container.area.height + 32 //+32 so it doesn't have to hit the exact center
        system: container.system
        parent: container.system
        goalState: "falling"
    }
}
Flick Resize Example
Flick Resize uses a PinchArea to implement a pinch-to-resize behavior. This is easily achieved by listening to the PinchArea signals and responding to user input.
onPinchStarted: {
    initialWidth = flick.contentWidth
    initialHeight = flick.contentHeight
}

onPinchUpdated: {
    // adjust content pos due to drag
    flick.contentX += pinch.previousCenter.x - pinch.center.x
    flick.contentY += pinch.previousCenter.y - pinch.center.y

    // resize content
    flick.resizeContent(initialWidth * pinch.scale, initialHeight * pinch.scale, pinch.center)
}

onPinchFinished: {
    // Move its content within bounds.
    flick.returnToBounds()
}
Flickable Example
Flickable is a simple example demonstrating the Flickable type.
Rectangle {
    width: 320
    height: 480
    Flickable {
        anchors.fill: parent
        contentWidth: 1200
        contentHeight: 1200
        Rectangle {
            width: 1000
            height: 1000
Corkboards Example
Corkboards shows another use for Flickable , with QML types within the flickable object that respond to mouse and keyboard interaction. This behavior does not require special code as the Qt Quick types already cooperate with the Flickable type for accepting touch events.
© 2022 The Qt Company Ltd. Documentation contributions included herein are the copyrights of their respective owners. The documentation provided herein is licensed under the terms of the GNU Free Documentation License version 1.3 as published by the Free Software Foundation. Qt and respective logos are trademarks of The Qt Company Ltd. in Finland and/or other countries worldwide. All other trademarks are property of their respective owners.
