
Weather Info (C++/QML)
The Weather Info example shows how to use the user’s current position to retrieve local content from a web service in a C++ plugin for QML.
Key Qt Positioning classes used in this example:
QGeoPositionInfo
QGeoPositionInfoSource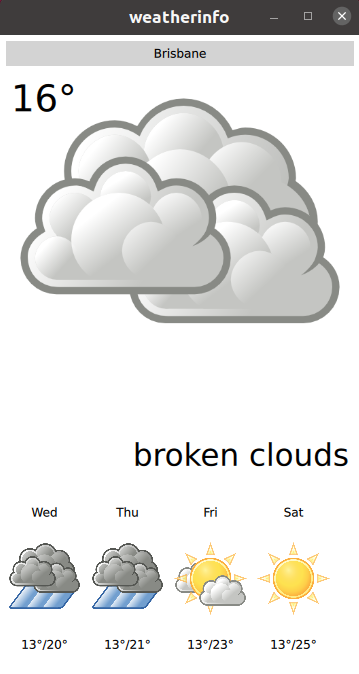
Running the Example
To run the example from Qt Creator , open the Welcome mode and select the example from Examples. For more information, visit Building and Running an Example.
Weather Data Providers
The example uses two unrelated weather data providers:
The provider to be used is selected automatically at runtime and can be changed if the selected provider is not available. However, it can’t be specified manually.
Note
Free plans are used for both providers, which implies certain limitations on the amount of weather requests. If the limits are exceeded, the providers become temporary unavailable. When both providers are unavailable, the application would not be able to show any weather information. In this case it is required to wait until at least one of the providers becomes available again.
Application Data Models
The key part of this example is the application’s data model, contained in the WeatherData and AppModel classes. WeatherData represents the weather information taken from the HTTP service. It is a simple data class, but we use Q_PROPERTY to expose it nicely to QML later. It also uses QML_ANONYMOUS macro, which makes it recognized in QML.
class WeatherData(QObject):
    Q_OBJECT
    Q_PROPERTY(QString dayOfWeek
               dayOfWeek = READ()
               dataChanged) = NOTIFY()
    Q_PROPERTY(QString weatherIcon
               weatherIcon = READ()
               dataChanged) = NOTIFY()
    Q_PROPERTY(QString weatherDescription
               weatherDescription = READ()
               dataChanged) = NOTIFY()
    Q_PROPERTY(QString temperature
               temperature = READ()
               dataChanged) = NOTIFY()
    QML_ANONYMOUS
# public
    WeatherData = explicit(QObject parent = 0)
    WeatherData(WeatherData other)
    WeatherData(WeatherInfo other)
    dayOfWeek = QString()
    weatherIcon = QString()
    weatherDescription = QString()
    temperature = QString()
    def setDayOfWeek(value):
    def setWeatherIcon(value):
    def setWeatherDescription(value):
    def setTemperature(value):
signals:
    def dataChanged():
AppModel models the state of the entire application. At startup, we get the platform’s default position source using createDefaultSource() .
def __init__(self, parent):
        QObject(parent),
        d(AppModelPrivate)        d.src = QGeoPositionInfoSource.createDefaultSource(self)
if (d.src) {
    d.useGps = True
    connect(d.src, SIGNAL(positionUpdated(QGeoPositionInfo)),
            self, SLOT(positionUpdated(QGeoPositionInfo)))
    connect(d.src, SIGNAL(errorOccurred(QGeoPositionInfoSource.Error)),
            self, SLOT(positionError(QGeoPositionInfoSource.Error)))
    d.src.startUpdates()
else:
    d.useGps = False
    d.city = "Brisbane"
    cityChanged.emit()
    requestWeatherByCity()
If no default source is available, we take a static position and fetch weather for that. If, however, we do have a position source, we connect its positionUpdated() signal to a slot on the AppModel and call startUpdates() , which begins regular updates of device position.
When a position update is received, we use the longitude and latitude of the returned coordinate to retrieve weather data for the specified location.
def positionUpdated(self, gpsPos):

    d.coord = gpsPos.coordinate()
    if (not d.useGps)
        return
    requestWeatherByCoordinates()
To inform the UI about this process, the cityChanged() signal is emitted when a new city is used, and the weatherChanged() signal whenever a weather update occurs.
The model also uses QML_ELEMENT macro, which makes it available in QML.
class AppModel(QObject):

    Q_OBJECT
    Q_PROPERTY(bool ready
               ready = READ()
               readyChanged) = NOTIFY()
    Q_PROPERTY(bool hasSource
               hasSource = READ()
               readyChanged) = NOTIFY()
    Q_PROPERTY(bool hasValidCity
               hasValidCity = READ()
               cityChanged) = NOTIFY()
    Q_PROPERTY(bool hasValidWeather
               hasValidWeather = READ()
               weatherChanged) = NOTIFY()
    Q_PROPERTY(bool useGps
               useGps = READ()
               useGpsChanged) = NOTIFY()
    Q_PROPERTY(QString city
               city = READ()
               cityChanged) = NOTIFY()
    Q_PROPERTY(WeatherData weather
               weather = READ()
               weatherChanged) = NOTIFY()
    Q_PROPERTY(QQmlListProperty<WeatherData> forecast
               forecast = READ()
               weatherChanged) = NOTIFY()
    QML_ELEMENT
# public
    AppModel = explicit(QObject parent = 0)
    ~AppModel()
    ready = bool()
    hasSource = bool()
    useGps = bool()
    hasValidCity = bool()
    hasValidWeather = bool()
    def setUseGps(value):
    city = QString()
    def setCity(value):
    weather = WeatherData()
forecast = QQmlListProperty()
slots: = public()
    Q_INVOKABLE void refreshWeather()        signals:
    def readyChanged():
    def useGpsChanged():
    def cityChanged():
    def weatherChanged():
We use a QQmlListProperty for the weather forecast information, which contains the weather forecast for the next days (the number of days is provider-specific). This makes it easy to access the forecast from QML.
Expose Custom Models to QML
To expose the models to the QML UI layer, we use the QML_ELEMENT and QML_ANONYMOUS macros. See the QQmlEngine class description for more details on these macros.
To make the types available in QML, we need to update our build accordingly.
CMake Build
For a CMake-based build, we need to add the following to the CMakeLists.txt:
qmake Build
For a qmake build, we need to modify the weatherinfo.pro file in the following way:
Instantiate the Models in QML
Finally, in the actual QML, we instantiate the AppModel:
import WeatherInfo 1.0

Item {
    id: window        AppModel {
    id: appModel
    onReadyChanged: {
        if (appModel.ready)
            window.state = "ready"
        else
            window.state = "loading"
    }
}        }
Once the model is instantiated like this, we can use its properties elsewhere in the QML document:
BigForecastIcon {
    id: current

    width: main.width -12
    height: 2 * (main.height - 25 - 12) / 3

    weatherIcon: (appModel.hasValidWeather
              ? appModel.weather.weatherIcon
              : "sunny")        }
Files and Attributions
The example bundles the following images from Third-Party sources:
Tango Icons
Public Domain
Tango Weather Icon Pack by Darkobra
Public Domain
© 2022 The Qt Company Ltd. Documentation contributions included herein are the copyrights of their respective owners. The documentation provided herein is licensed under the terms of the GNU Free Documentation License version 1.3 as published by the Free Software Foundation. Qt and respective logos are trademarks of The Qt Company Ltd. in Finland and/or other countries worldwide. All other trademarks are property of their respective owners.