Repository Categories Example
Using the RepositoryCategories element to set up an online installer where repositories are grouped.
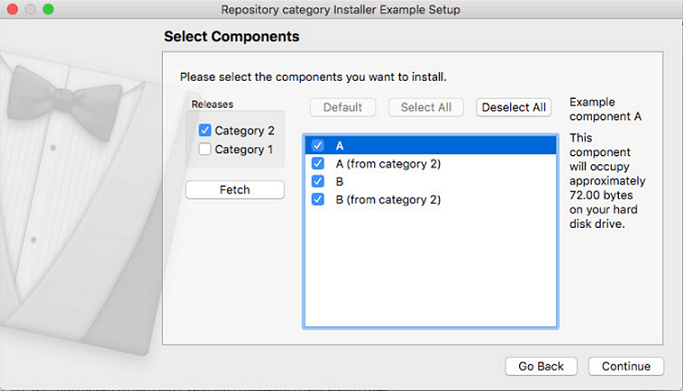
Repository Categories illustrates how to set up an installer where repositories are grouped into categories.
Configuring the Example Installer
The installer configuration file, config.xml, in the config directory specifies the text and default values used in the installer:
- The
<Name>element sets the application name and adds it to the page name and introduction text. - The
<Version>element sets the application version number. - The
<Title>element sets the installer name and displays it on the title bar. - The
<Publisher>element sets the publisher of the software (as shown in the Windows Control Panel, for example). - The
<StartMenuDir>element sets the name of the default program group for the product in the Windows Start menu. - The
<TargetDir>element sets the default target directory location to be within theIfwExamplesdirectory in the home directory of the current user (because it uses the pre-existing variable,@HomeDir@, as part of the value). For more information, see Predefined Variables.
- The
<RepositoryCategories>element shows how to group repositories into categories.<RepositoryCategories>can contain one or several<RemoteRepositories>child elements that specify a connection to repositories. For more information about<RemoteRepositories>see Configuring Repositories.
<?xml version="1.0" encoding="UTF-8"?>
<Installer>
    <Name>Repository category Installer Example</Name>
    <Version>1.0.0</Version>
    <Title>Repository category Installer Example</Title>
    <Publisher>The Qt Company</Publisher>
    <StartMenuDir>Qt IFW Examples</StartMenuDir>
    <TargetDir>@HomeDir@/IfwExamples/repositoryCategories</TargetDir>
    <RemoteRepositories>
        <Repository>
            <Url>http://localhost/repository</Url>
        </Repository>
    </RemoteRepositories>
    <RepositoryCategories>
        <RepositoryCategoryDisplayname>Releases</RepositoryCategoryDisplayname>
        <RemoteRepositories>
            <DisplayName>Category 1</DisplayName>
            <Tooltip>Contains repository1 and repository2</Tooltip>
            <Repository>
                <Url>http://localhost/repository1</Url>
            </Repository>
            <Repository>
                <Url>http://localhost/repository2</Url>
            </Repository>
        </RemoteRepositories>
        <RemoteRepositories>
            <Preselected>true</Preselected>
            <DisplayName>Category 2</DisplayName>
            <Tooltip>Contains repository3</Tooltip>
            <Repository>
                <Url>http://localhost/repository3</Url>
            </Repository>
        </RemoteRepositories>
    </RepositoryCategories>
</Installer>
Creating the Example Package Information File
The installer package information file, package.xml, in the meta directory specifies the components that are available for installation:
- The
<DisplayName>element sets the human-readable name of the component. - The
<Description>element sets the human-readable description of the component. - The
<Version>element sets the version number of the component. - The
<ReleaseDate>element sets the date of release for this component version.
- The
<Default>element is set totrueto preselect the component in the installer.
<?xml version="1.0" encoding="UTF-8"?>
<Package>
    <DisplayName>A</DisplayName>
    <Description>Example component A</Description>
    <Version>1.0.2-1</Version>
    <ReleaseDate>2015-01-01</ReleaseDate>
    <Default>true</Default>
</Package>
Generating the Online Repository
This installer contains four packages that each have two components. The Packages directory contains two components that are not grouped categories. They are always visible in tree view in the component selection page. Packages_forcategory1 and packages2_forcategory1 both contain two components, which are visible when Category 1 is fetched. Packages_forcategory2 contains two components that are visible only when Category 2 is fetched.
The packages need to be converted to a file structure that the installer can fetch at runtime. To use the repogen tool to convert the packages, switch to the example source directory on the command line and enter the following command:
- On Windows:
..\..\bin\repogen.exe -p packages repository ..\..\bin\repogen.exe -p packages_forcategory1 repository1 ..\..\bin\repogen.exe -p packages2_forcategory1 repository2 ..\..\bin\repogen.exe -p packages_forcategory2 repository3 - On Linux or macOS:
../../bin/repogen -p packages repository
../../bin/repogen -p packages_forcategory1 repository1
../../bin/repogen -p packages2_forcategory1 repository2
../../bin/repogen -p packages_forcategory2 repository3
The generated repository, repository1, repository2 and repository3 directories will now contain a full copy of the package data and some additionally generated metadata, such as SHA checksums.
The directories now need to be made available at the URL set in config.xml: http://localhost/repository, http://localhost/repository1, http://localhost/repository2 and http://localhost/repository3. How this is done depends on the platform and web server used. If you do not have a running web server yet, but have Python available, you should be able to start a minimal web server from the command line. Make sure you are in the example directory, and then enter:
python -m SimpleHTTPServer 80You should now be able to open and explore http://localhost/repository in your web browser.
Note: If you do not have enough permissions to set up a web server locally, you can also specify an absolute file:/// URL as the value of the URL element in config.xml. For example, file:///C:/Qt/QtIFW/examples/repositorycategories/repository would be a valid URL on Windows if repository is located in C:\Qt\QtIFW\examples\repositorycategories.
Generating the Example Installer
To create the example installer, switch to the example source directory on the command line and enter the following command:
- On Windows:
..\..\bin\binarycreator.exe --online-only -c config\config.xml -p packages installer.exe - On Linux or macOS:
../../bin/binarycreator --online-only -c config/config.xml -p packages installer
You should now be able to run the installer and install from the repository.
Files:
- repositorycategories/config/config.xml
- repositorycategories/packages/A/data/A.txt
- repositorycategories/packages/A/meta/package.xml
- repositorycategories/packages/B/data/B.txt
- repositorycategories/packages/B/meta/package.xml
- repositorycategories/packages2_forcategory1/A2Cagetory1/data/A2_category1.txt
- repositorycategories/packages2_forcategory1/A2Cagetory1/meta/package.xml
- repositorycategories/packages2_forcategory1/B2Category1/data/B2_category1.txt
- repositorycategories/packages2_forcategory1/B2Category1/meta/package.xml
- repositorycategories/packages_forcategory1/ACagetory1/data/A_category1.txt
- repositorycategories/packages_forcategory1/ACagetory1/meta/package.xml
- repositorycategories/packages_forcategory1/BCategory1/data/B_category1.txt
- repositorycategories/packages_forcategory1/BCategory1/meta/package.xml
- repositorycategories/packages_forcategory2/ACategory2/data/A_category2.txt
- repositorycategories/packages_forcategory2/ACategory2/meta/package.xml
- repositorycategories/packages_forcategory2/BCategory2/data/B_category2.txt
- repositorycategories/packages_forcategory2/BCategory2/meta/package.xml
- repositorycategories/repositorycategories.pro
© 2021 The Qt Company Ltd. Documentation contributions included herein are the copyrights of their respective owners. The documentation provided herein is licensed under the terms of the GNU Free Documentation License version 1.3 as published by the Free Software Foundation. The Qt Company, Qt and their respective logos are trademarks of The Qt Company Ltd in Finland and/or other countries worldwide. All other trademarks are property of their respective owners.
