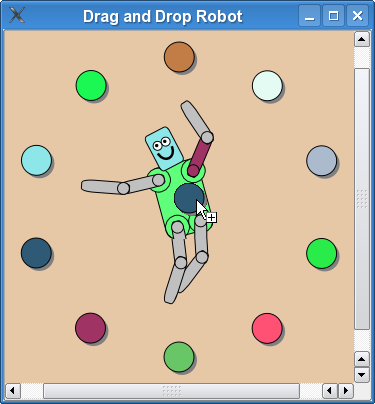
Drag and Drop Robot Example
Demonstrates how to drag and drop items in a graphics view.
The Drag and Drop Robot example shows how to implement Drag and Drop in a QGraphicsItem subclass, as well as how to animate items using Qt's Animation Framework.
Graphics View provides the QGraphicsScene class for managing and interacting with a large number of custom-made 2D graphical items derived from the QGraphicsItem class, and a QGraphicsView widget for visualizing the items, with support for zooming and rotation.
This example consists of a Robot class, a ColorItem class, and a main function: the Robot class describes a simple robot consisting of several RobotPart derived limbs, including RobotHead and RobotLimb, the ColorItem class provides a draggable colored ellipse, and the main() function provides the main application window.
We will first review the Robot class to see how to assemble the different parts so that they can be individually rotated and animated using QPropertyAnimation, and we will then review the ColorItem class to demonstrate how to implement Drag and Drop between items. Finally we will review the main() function to see how we can put all the pieces together, to form the final application.
Robot Class Definition
The robot consists of three main classes: the RobotHead, the RobotTorso, and the RobotLimb, which is used for the upper and lower arms and legs. All parts derive from the RobotPart class, which in turn inherits QGraphicsObject. The Robot class itself has no visual appearance and serves only as a root node for the robot.
Let's start with the RobotPart class declaration.
class RobotPart : public QGraphicsObject
{
public:
    RobotPart(QGraphicsItem *parent = nullptr);

protected:
    void dragEnterEvent(QGraphicsSceneDragDropEvent *event) override;
    void dragLeaveEvent(QGraphicsSceneDragDropEvent *event) override;
    void dropEvent(QGraphicsSceneDragDropEvent *event) override;

    QColor color = Qt::lightGray;
    bool dragOver = false;
};
This base class inherits QGraphicsObject. QGraphicsObject provides signals and slots through inheriting QObject, and it also declares QGraphicsItem's properties using Q_PROPERTY, which makes the properties accessible for QPropertyAnimation.
RobotPart also implements the three most important event handlers for accepting drop events: dragEnterEvent(), dragLeaveEvent(), and dropEvent().
The color is stored as a member variable, along with the dragOver variable, which we will use later to indicate visually that the limb can accept colors that are is dragged onto it.
RobotPart::RobotPart(QGraphicsItem *parent)
    : QGraphicsObject(parent), color(Qt::lightGray)
{
    setAcceptDrops(true);
}
RobotPart's constructor initializes the dragOver member and sets the color to Qt::lightGray. In the constructor body we enable support for accepting drop events by calling setAcceptDrops(true).
The rest of this class's implementation is to support Drag and Drop.
void RobotPart::dragEnterEvent(QGraphicsSceneDragDropEvent *event)
{
    if (event->mimeData()->hasColor()) {
        event->setAccepted(true);
        dragOver = true;
        update();
    } else {
        event->setAccepted(false);
    }
}
The dragEnterEvent() handler is called when a Drag and Drop element is dragged into the robot part's area.
The handler implementation determines whether or not this item as a whole can accept the mime data assiciated with the incoming drag object. RobotPart provides a base behavior for all parts that accepts color drops. So if the incoming drag object contains a color, the event is accepted, we set dragOver to true and call update() to help provide positive visual feedback to the user; otherwise the event is ignored, which in turn allows the event to propagate to parent elements.
void RobotPart::dragLeaveEvent(QGraphicsSceneDragDropEvent *event)
{
    Q_UNUSED(event);
    dragOver = false;
    update();
}
The dragLeaveEvent() handler is called when a Drag and Drop element is dragged away from the robot part's area. Our implementation simply resets dragOver to false and calls update() to help provide visual feedback that the drag has left this item.
void RobotPart::dropEvent(QGraphicsSceneDragDropEvent *event)
{
    dragOver = false;
    if (event->mimeData()->hasColor())
        color = qvariant_cast<QColor>(event->mimeData()->colorData());
    update();
}
The dropEvent() handler is called when a Drag and Drop element is dropped onto an item (i.e., when the mouse button is released over the item while dragging).
We reset dragOver to false, assign the item's new color, and call update().
The declaration and implementation of RobotHead, RobotTorso, and RobotLimb are practically identical. We will review RobotHead in detail, as this class has one minor difference, and leave the other classes as an exercise for the reader.
class RobotHead : public RobotPart
{
public:
    RobotHead(QGraphicsItem *parent = nullptr);

    QRectF boundingRect() const override;
    void paint(QPainter *painter, const QStyleOptionGraphicsItem *option, QWidget *widget = nullptr) override;

protected:
    void dragEnterEvent(QGraphicsSceneDragDropEvent *event) override;
    void dropEvent(QGraphicsSceneDragDropEvent *event) override;

private:
    QPixmap pixmap;
};
The RobotHead class inherits RobotPart and provides the necessary implementations of boundingRect() and paint(). It also reimplements dragEnterEvent() and dropEvent() to provide special handling of image drops.
The class contains a private pixmap member that we can use to implement support for accepting image drops.
RobotHead::RobotHead(QGraphicsItem *parent)
    : RobotPart(parent)
{
}
RobotHead has a rather plain constructor that simply forwards to RobotPart's constructor.
The boundingRect() reimplementation returns the extents for the head. Because we want the center of rotation to be the bottom center of the item, we have chosen a bounding rectangle that starts at (-15, -50) and extends to 30 units wide and 50 units tall. When rotating the head, the "neck" will stay still while the top of the head tilts from side to side.
void RobotHead::paint(QPainter *painter,
           const QStyleOptionGraphicsItem *option, QWidget *widget)
{
    Q_UNUSED(option);
    Q_UNUSED(widget);
    if (pixmap.isNull()) {
        painter->setBrush(dragOver ? color.lighter(130) : color);
        painter->drawRoundedRect(-10, -30, 20, 30, 25, 25, Qt::RelativeSize);
        painter->setBrush(Qt::white);
        painter->drawEllipse(-7, -3 - 20, 7, 7);
        painter->drawEllipse(0, -3 - 20, 7, 7);
        painter->setBrush(Qt::black);
        painter->drawEllipse(-5, -1 - 20, 2, 2);
        painter->drawEllipse(2, -1 - 20, 2, 2);
        painter->setPen(QPen(Qt::black, 2));
        painter->setBrush(Qt::NoBrush);
        painter->drawArc(-6, -2 - 20, 12, 15, 190 * 16, 160 * 16);
    } else {
        painter->scale(.2272, .2824);
        painter->drawPixmap(QPointF(-15 * 4.4, -50 * 3.54), pixmap);
    }
}
In paint() we draw the actual head. The implementation is split into two sections; if an image has been dropped onto the head, we draw the image, otherwise we draw a round rectangular robot head with simple vector graphics.
For performance reasons, depending on the complexity of what is painted, it can often be faster to draw the head as an image rather than using a sequence of vector operations.
void RobotHead::dragEnterEvent(QGraphicsSceneDragDropEvent *event)
{
    if (event->mimeData()->hasImage()) {
        event->setAccepted(true);
        dragOver = true;
        update();
    } else {
        RobotPart::dragEnterEvent(event);
    }
}
The robot head can accept image drops. In order to support this, its reimplementation of dragEnterEvent() checks if the drag object contains image data, and if it does, then the event is accepted. Otherwise we fall back to the base RobotPart implementation.
void RobotHead::dropEvent(QGraphicsSceneDragDropEvent *event)
{
    if (event->mimeData()->hasImage()) {
        dragOver = false;
        pixmap = qvariant_cast<QPixmap>(event->mimeData()->imageData());
        update();
    } else {
        RobotPart::dropEvent(event);
    }
}
To follow up on image support, we must also implement dropEvent(). We check if the drag object contains image data, and if it does, we store this data as a member pixmap and call update(). This pixmap is used inside the paint() implementation that we reviewed before.
RobotTorso and RobotLimb are similar to RobotHead, so let's skip directly to the Robot class.
class Robot : public RobotPart
{
public:
    Robot(QGraphicsItem *parent = nullptr);

    QRectF boundingRect() const override;
    void paint(QPainter *painter, const QStyleOptionGraphicsItem *option, QWidget *widget = nullptr) override;
};
The Robot class also inherits RobotPart, and like the other parts it also implements boundingRect() and paint(). It provides a rather special implementation, though:
QRectF Robot::boundingRect() const
{
    return QRectF();
}

void Robot::paint(QPainter *painter,
                  const QStyleOptionGraphicsItem *option, QWidget *widget)
{
    Q_UNUSED(painter);
    Q_UNUSED(option);
    Q_UNUSED(widget);
}
Because the Robot class is only used as a base node for the rest of the robot, it has no visual representation. Its boundingRect() implementation can therefore return a null QRectF, and its paint() function does nothing.
Robot::Robot(QGraphicsItem *parent)
    : RobotPart(parent)
{
    setFlag(ItemHasNoContents);

    QGraphicsObject *torsoItem = new RobotTorso(this);
    QGraphicsObject *headItem = new RobotHead(torsoItem);
    QGraphicsObject *upperLeftArmItem = new RobotLimb(torsoItem);
    QGraphicsObject *lowerLeftArmItem = new RobotLimb(upperLeftArmItem);
    QGraphicsObject *upperRightArmItem = new RobotLimb(torsoItem);
    QGraphicsObject *lowerRightArmItem = new RobotLimb(upperRightArmItem);
    QGraphicsObject *upperRightLegItem = new RobotLimb(torsoItem);
    QGraphicsObject *lowerRightLegItem = new RobotLimb(upperRightLegItem);
    QGraphicsObject *upperLeftLegItem = new RobotLimb(torsoItem);
    QGraphicsObject *lowerLeftLegItem = new RobotLimb(upperLeftLegItem);
The constructor starts by setting the flag ItemHasNoContents, which is a minor optimization for items that have no visual appearance.
We then construct all the robot parts (head, torso, and upper/lower arms and legs). The stacking order is very important, and we use the parent-child hierarchy to ensure the elements rotate and move properly. We construct the torso first, as this is the root element. We then construct the head and pass the torso to HeadItem's constructor. This will make the head a child of the torso; if you rotate the torso, the head will follow. The same pattern is applied to the rest of the limbs.
    headItem->setPos(0, -18);
    upperLeftArmItem->setPos(-15, -10);
    lowerLeftArmItem->setPos(30, 0);
    upperRightArmItem->setPos(15, -10);
    lowerRightArmItem->setPos(30, 0);
    upperRightLegItem->setPos(10, 32);
    lowerRightLegItem->setPos(30, 0);
    upperLeftLegItem->setPos(-10, 32);
    lowerLeftLegItem->setPos(30, 0);
Each robot part is carefully positioned. For example, the upper left arm is moved precisely to the top-left area of the torso, and the upper right arm is moved to the top-right area.
    QParallelAnimationGroup *animation = new QParallelAnimationGroup(this);

    QPropertyAnimation *headAnimation = new QPropertyAnimation(headItem, "rotation");
    headAnimation->setStartValue(20);
    headAnimation->setEndValue(-20);
    QPropertyAnimation *headScaleAnimation = new QPropertyAnimation(headItem, "scale");
    headScaleAnimation->setEndValue(1.1);
    animation->addAnimation(headAnimation);
    animation->addAnimation(headScaleAnimation);
The next section creates all animation objects. This snippet shows the two animations that operate on the head's scale and rotation. The two QPropertyAnimation instances simply set the object, property, and respective start and end values.
All animations are controlled by one top-level parallel animation group. The scale and rotation animations are added to this group.
The rest of the animations are defined in a similar way.
    for (int i = 0; i < animation->animationCount(); ++i) {
        QPropertyAnimation *anim = qobject_cast<QPropertyAnimation *>(animation->animationAt(i));
        anim->setEasingCurve(QEasingCurve::SineCurve);
        anim->setDuration(2000);
    }

    animation->setLoopCount(-1);
    animation->start();
Finally we set an easing curve and duration on each animation, ensure the toplevel animation group loops forever, and start the toplevel animation.
ColorItem Class Definition
The ColorItem class represents a circular item that can be pressed to drag colors onto robot parts.
class ColorItem : public QGraphicsItem
{
public:
    ColorItem();

    QRectF boundingRect() const override;
    void paint(QPainter *painter, const QStyleOptionGraphicsItem *option, QWidget *widget) override;

protected:
    void mousePressEvent(QGraphicsSceneMouseEvent *event) override;
    void mouseMoveEvent(QGraphicsSceneMouseEvent *event) override;
    void mouseReleaseEvent(QGraphicsSceneMouseEvent *event) override;

private:
    QColor color;
};
This class is very simple. It does not use animations, and has no need for properties nor signals and slots, so to save resources, it's most natural that it inherits QGraphicsItem (as opposed to QGraphicsObject).
It declares the mandatory boundingRect() and paint() functions, and adds reimplementations of mousePressEvent(), mouseMoveEvent(), and mouseReleaseEvent(). It contains a single private color member.
Let's take a look at its implementation.
ColorItem::ColorItem()
    : color(QRandomGenerator::global()->bounded(256), QRandomGenerator::global()->bounded(256), QRandomGenerator::global()->bounded(256))
{
    setToolTip(QString("QColor(%1, %2, %3)\n%4")
              .arg(color.red()).arg(color.green()).arg(color.blue())
              .arg("Click and drag this color onto the robot!"));
    setCursor(Qt::OpenHandCursor);
    setAcceptedMouseButtons(Qt::LeftButton);
}
ColorItem's constructor assigns an opaque random color to its color member by making use of QRandomGenerator. For improved usability, it assigns a tooltip that provides a useful hint to the user, and it also sets a suitable cursor. This ensures that the cursor will chance to Qt::OpenHandCursor when the mouse pointer hovers over the item.
Finally, we call setAcceptedMouseButtons() to ensure that this item can only process Qt::LeftButton. This simplifies the mouse event handlers greatly, as we can always assume that only the left mouse button is pressed and released.
The item's bounding rect is a fixed 30x30 units centered around the item's origin (0, 0), and adjusted by 0.5 units in all directions to allow a scalable pen to draw its outline. For a final visual touch the bounds also compensate with a few units down and to the right to make room for a simple dropshadow.
void ColorItem::paint(QPainter *painter, const QStyleOptionGraphicsItem *option, QWidget *widget)
{
    Q_UNUSED(option);
    Q_UNUSED(widget);
    painter->setPen(Qt::NoPen);
    painter->setBrush(Qt::darkGray);
    painter->drawEllipse(-12, -12, 30, 30);
    painter->setPen(QPen(Qt::black, 1));
    painter->setBrush(QBrush(color));
    painter->drawEllipse(-15, -15, 30, 30);
}
The paint() implementation draws an ellipse with a 1-unit black outline, a plain color fill, and a dark gray dropshadow.
void ColorItem::mousePressEvent(QGraphicsSceneMouseEvent *)
{
    setCursor(Qt::ClosedHandCursor);
}
The mousePressEvent() handler is called when you press the mouse button inside the item's area. Our implementation simply sets the cursor to Qt::ClosedHandCursor.
void ColorItem::mouseReleaseEvent(QGraphicsSceneMouseEvent *)
{
    setCursor(Qt::OpenHandCursor);
}
The mouseReleaseEvent() handler is called when you release the mouse button after having pressed it inside an item's area. Our implementation sets the cursor back to Qt::OpenHandCursor. The mouse press and release event handlers together provide useful visual feedback to the user: when you move the mouse pointer over a CircleItem, the cursor changes to an open hand. Pressing the item will show a closed hand cursor. Releasing will restore to an open hand cursor again.
void ColorItem::mouseMoveEvent(QGraphicsSceneMouseEvent *event)
{
    if (QLineF(event->screenPos(), event->buttonDownScreenPos(Qt::LeftButton))
        .length() < QApplication::startDragDistance()) {
        return;
    }

    QDrag *drag = new QDrag(event->widget());
    QMimeData *mime = new QMimeData;
    drag->setMimeData(mime);
The mouseMoveEvent() handler is called when you move the mouse around after pressing the mouse button inside the ColorItem's area. This implementation provides the most important piece of logic for CircleItem: the code that starts and manages drags.
The implementation starts by checking if the mouse has been dragged far enough to eliminate mouse jitter noise. We only want to start a drag if the mouse has been dragged farther than the application start drag distance.
Continuing, we create a QDrag object, passing the event widget (i.e., the QGraphicsView viewport) to its constructor. Qt will ensure that this object is deleted at the right time. We also create a QMimeData instance that can contain our color or image data, and assign this to the drag object.
    static int n = 0;
    if (n++ > 2 && QRandomGenerator::global()->bounded(3) == 0) {
        QImage image(":/images/head.png");
        mime->setImageData(image);

        drag->setPixmap(QPixmap::fromImage(image).scaled(30, 40));
        drag->setHotSpot(QPoint(15, 30));
This snippet has a somewhat random outcome: once in a while, a special image is assigned to the drag object's mime data. The pixmap is also assiged as the drag object's pixmap. This will ensure that you can see the image that is being dragged as a pixmap under the mouse cursor.
    } else {
        mime->setColorData(color);
        mime->setText(QString("#%1%2%3")
                      .arg(color.red(), 2, 16, QLatin1Char('0'))
                      .arg(color.green(), 2, 16, QLatin1Char('0'))
                      .arg(color.blue(), 2, 16, QLatin1Char('0')));

        QPixmap pixmap(34, 34);
        pixmap.fill(Qt::white);

        QPainter painter(&pixmap);
        painter.translate(15, 15);
        painter.setRenderHint(QPainter::Antialiasing);
        paint(&painter, nullptr, nullptr);
        painter.end();

        pixmap.setMask(pixmap.createHeuristicMask());

        drag->setPixmap(pixmap);
        drag->setHotSpot(QPoint(15, 20));
    }
Otherwise, and this is the most common outcome, a simple color is assigned to the drag object's mime data. We render this ColorItem into a new pixmap to give the user visual feedback that the color is being "dragged".
    drag->exec();
    setCursor(Qt::OpenHandCursor);
}
Finally we execute the drag. QDrag::exec() will reenter the event loop, and only exit if the drag has either been dropped, or canceled. In any case we reset the cursor to Qt::OpenHandCursor.
The main() Function
Now that the Robot and ColorItem classes are complete, we can put all the pieces together inside the main() function.
int main(int argc, char **argv)
{
    QApplication app(argc, argv);
We start off by constructing QApplication, and initializing the random number generator. This ensures that the color items have different colors every time the application starts.
    QGraphicsScene scene(-200, -200, 400, 400);

    for (int i = 0; i < 10; ++i) {
        ColorItem *item = new ColorItem;
        item->setPos(::sin((i * 6.28) / 10.0) * 150,
                     ::cos((i * 6.28) / 10.0) * 150);

        scene.addItem(item);
    }

    Robot *robot = new Robot;
    robot->setTransform(QTransform::fromScale(1.2, 1.2), true);
    robot->setPos(0, -20);
    scene.addItem(robot);
We construct a fixed size scene, and create 10 ColorItem instances arranged in a circle. Each item is added to the scene.
In the center of this circle we create one Robot instance. The robot is scaled and moved up a few units. It is then added to the scene.
    GraphicsView view(&scene);
    view.setRenderHint(QPainter::Antialiasing);
    view.setViewportUpdateMode(QGraphicsView::BoundingRectViewportUpdate);
    view.setBackgroundBrush(QColor(230, 200, 167));
    view.setWindowTitle("Drag and Drop Robot");
    view.show();

    return app.exec();
}
Finally we create a QGraphicsView window, and assign the scene to it.
For increased visual quality, we enable antialiasing. We also choose to use bounding rectangle updates to simplify visual update handling. The view is given a fixed sand-colored background, and a window title.
We then show the view. The animations start immediately after control enters the event loop.
© 2025 The Qt Company Ltd. Documentation contributions included herein are the copyrights of their respective owners. The documentation provided herein is licensed under the terms of the GNU Free Documentation License version 1.3 as published by the Free Software Foundation. Qt and respective logos are trademarks of The Qt Company Ltd. in Finland and/or other countries worldwide. All other trademarks are property of their respective owners.
