C
NXP i.MX8M Mini EVK and NXP i.MX8QuadMax MEK Guide
To successfully set up the Boot to Qt Software Stack, you must closely follow the instructions in this section and perform all the described tasks.
In case of problems, see Troubleshooting.
Note: After you have installed the Boot to Qt software stack and want to connect to the target device with SSH or a serial cable, you can access the device by using the user root and an empty password.
1. Requirements Related to Development Host
Before you install the Boot to Qt Software Stack, you should note the requirements related to the development hosts:
2. Installing Boot to Qt Software Stack
You can install the Boot to Qt Software Stack via the online installer. On Linux, see General Installation Issues for Linux.
Download the Qt online installer via Qt Account Downloads and follow the instructions in the installer. The Select components page in the installer lists all the components that are available for your Qt account.
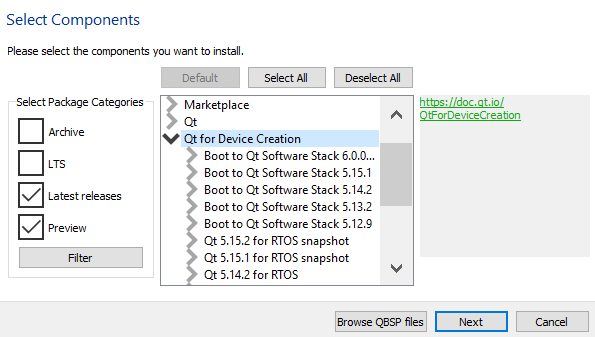
Select the Boot to Qt Software Stack for the NXP device with the following steps:
- Select Boot to Qt Software Stack.
- Select the Boot to Qt Software Stack version.
- Select NXP i.MX 8M Mini EVK or NXP i.MX 8QuadMax MEK.
- Select Next.
To finish the installation, follow the instructions in the installer.
Installation Content
The Boot to Qt Software Stack provides a system image (<target-device> System) and a toolchain (<target-device> Toolchain) for each target device. The system image contains the Boot to Qt Software Stack and needs to be flashed to the SD card or directly to the target device (see 3. Installing Boot to Qt on Target Device). The toolchain is required for building and developing applications for the target devices.
General Installation Issues for Linux
On Linux, remember to allow the execution of the installer binary. You can do this by using one of the following methods:
- On the command line enter the
chmod +x <filename>command. - Right-click the file, and select Properties > Permissions > Allow executing file as program.
Note: Do not execute the installer as a root user or with sudo.
Installation Directory
The installer will let you select a directory where the Boot to Qt Software Stack will be installed. In this documentation, the installation directory is referred to as <INSTALL_DIR>. The default installation directories are:
~/Qton LinuxC:\Qton Windows~/Qton macOS
3. Installing Boot to Qt on Target Device
Before you can test your Qt applications on the target device, you must flash the target device with an image containing the Boot to Qt Software Stack. After you have successfully flashed your device, Boot to Qt Startup Screen automatically appears on the screen when you power on the device.
Use Flashing Wizard to flash the image to your NXP device:
- Connect your SD card reader to the development host. Make sure that the SD card size is at least 2 GB.
- Launch Qt Creator.
- Select Tools > Flash Boot to Qt Device, and follow the instructions in Flashing Wizard.
4. Configuring a Device Kit in Qt Creator
After you have prepared the target device, you must set up the development tools in Qt Creator for your device. That is, you must configure your target device to be used for each build and run kit.
Connect your device to the development host via USB and launch Qt Creator. In Qt Creator:
- Select Edit > Preferences > Kits.
- Select one of the predefined kits starting with Boot to Qt... that matches the type of your device.
- Select the correct device in the Device field.
- Select OK.
You are now ready to start developing with Qt for your device. For detailed information about how to deploy Qt projects to the device, see Tutorial: Deploying Your First Project with Boot to Qt.
5. Powering on with Boot to Qt Startup Screen
After you have successfully flashed your device with Boot to Qt Software Stack, Boot to Qt Startup Screen automatically appears on the screen when you power on the device.
Available under certain Qt licenses.
Find out more.