Intents System UI and Applications Example
Three applications and a System UI communicating over Intents.
Note: Please read this if you want to build the example on a Linux machine.
Introduction
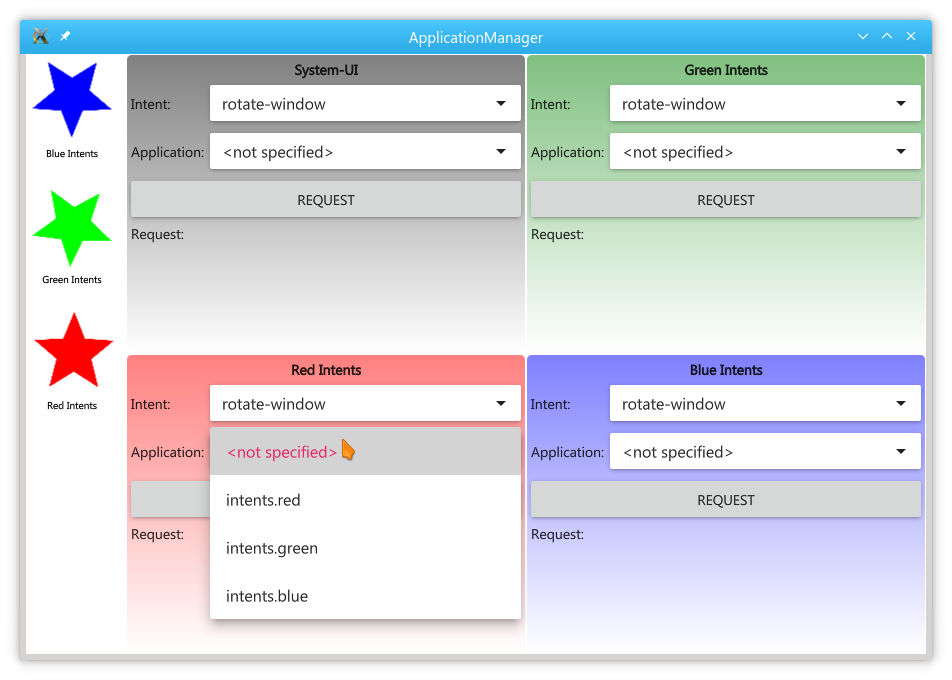
This example shows how the System UI and applications can send and receive Intents. Similar to the System UI Example: "Hello World!", the window management aspect is kept to a minimum to focus only on Intents: the 2x2 grid on the right will always show the System UI part (gray) in the top-left corner, while the three apps (red, green and blue) will dynamically occupy the other corner in the order they are started. You can see the names and icons for the available applications on the left; click on their respective icons to start and stop these applications.
Each application, as well as the System UI, look alike and have the same functionality available in the UI: You can choose from one of the available intent IDs in the top combo-box (labeled Intent), and optionally also specify the corresponding application that should handle the chosen request (labeled Application). Clicking the Request / Broadcast button will create and send the corresponding intent request to the application manager's IntentServer for handling:
- The combination of Intent and Application was valid and the target application was able to handle the request; the result of this request will be shown as JSON text in the lower output field labeled Request.
- Either the combination of Intent and Application was invalid or the target application was not able to handle the request properly; the error message of this request will be shown as plain text in the lower output field labeled Request.
- The Application was not specified, plus the Intent chosen can be handled by more than one application; in this case the example's System UI will display a dialog, prompting the user to disambiguate the request.
Files and Folder Structure
This example comprises of a System UI and three sample applications ("Red Intents", "Green Intents" and "Blue Intents"), resulting in four separate QML applications in total. System UI is also just a QML application in the end, albeit a special one.
Each application is put in its own separate directory as described below. Since the QtQuickControls 2 based UI is used by all the applications and the System UI, its components live in a shared directory.
am-config.yamlsystem-ui.qmlappsintents.blueicon.pnginfo.yamlmain.qml
intents.redicon.pnginfo.yamlmain.qml
intents.greenicon.pnginfo.yamlmain.qml
sharedIntentsApplicationWindow.qmlIntentsUIPage.qml
As you can see above, each application, besides its main QML file, also has an icon and a info.yaml file that contains the application metadata, which also includes the definition of the intents that this application can handle.
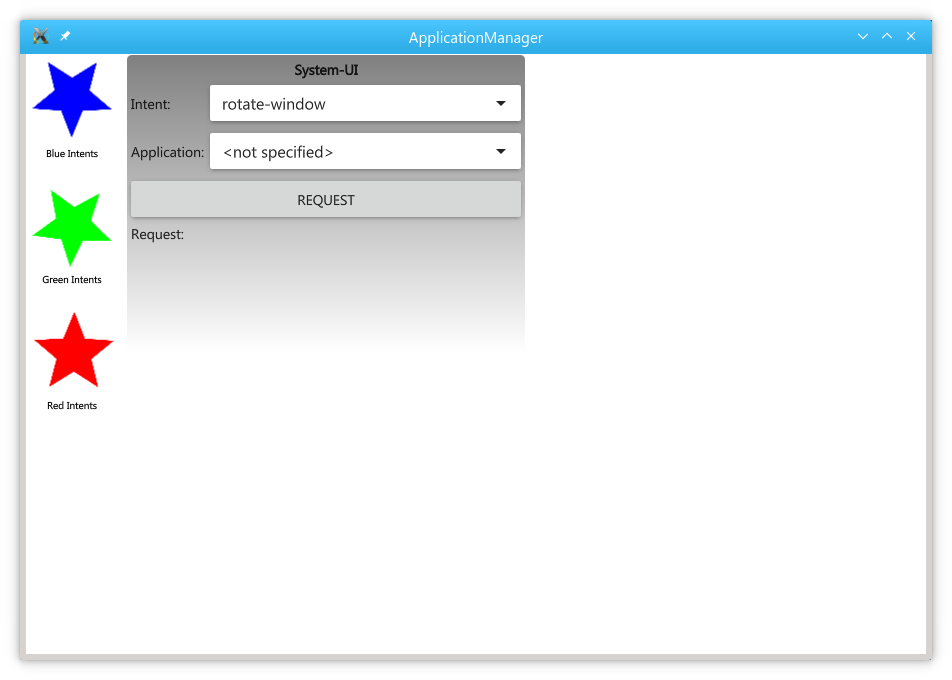
Running the Example
After starting the example you should see the following:
Application Implementation
All the applications (red, green and blue) are identical and their main.qml just instantiates the shared IntentsApplicationWindow component.
import shared

IntentsApplicationWindow { }
The IntentsApplicationWindow component is actually a top-level ApplicationManagerWindow, with its UI contents being defined by instantiating the IntentsUIPage component, that is also shared. This UI component does not have any intent-specific code, so the actual sending is done in the signal handlers attached to the IntentsUIPage request and broadcast signals:
onRequest: (intentId, applicationId, parameters) => {
    let request = IntentClient.sendIntentRequest(intentId, applicationId, parameters)
    request.onReplyReceived.connect(function() {
        intentPage.setResult(request.requestId, request.succeeded,
                             request.succeeded ? request.result : request.errorMessage)
    })
}
and
onBroadcast: (intentId, parameters) => {
    IntentClient.broadcastIntentRequest(intentId, parameters)
}
After calling IntentClient::sendIntentRequest with the parameters as chosen in the UI, the example code will connect a function object to the request's replyReceived signal. The result is placed in the Request field in the UI. Broadcasts on the other hand do not generate replies.
In addition, IntentsApplicationWindow defines all the necessary IntentHandlers for the applications, for example:
IntentHandler {
    intentIds: [ "rotate-window" ]
    onRequestReceived: (request) => {
        rotationAnimation.start()
        request.sendReply({ "done": true })
    }
}
These intent handlers are not complex, with each one just triggering a basic animation that is also defined in this file, so for the rotate-window intent this would be:
RotationAnimation on rotation {
    id: rotationAnimation
    running: false
    duration: 500; from: 0; to: 360
}
In QML, only implementing the IntentHandlers is not sufficient, because the application manager needs to have information on which application supports which intents. This information must be available to the application manager before the applications run, to facilitate auto-starting applications on intent requests. As for every other application configuration in the application manager, this is done through the application's manifest file info.yaml:
The Red application defines three available intents:
intents:
- id: rotate-window
  name:
    en: Rotate Red
- id: scale-window
  name:
    en: Scale Red
- id: broadcast/blink-window
  name:
    en: Blink Red
Additionally, the Red application gains the call-blue capability, which is required by certain intents in the Blue application.
capabilities: 'call-blue'
The Green application defines only two available intents. Note that even though this application has an IntentHandler for the scale-window intent through the shared IntentsApplicationWindow component, this handler is never called, since this intent ID is not registered with the system via the info.yaml manifest:
intents:
- id: rotate-window
  name:
    en: Rotate Green
- id: broadcast/blink-window
  name:
    en: Blink Green
  handleOnlyWhenRunning: yes
On top of that, the broadcast/blink-window intent is marked as handleOnlyWhenRunning: yes, which prevents auto-starting the Green application on broadcasts of this specific intent.
The Blue application has the most complex intent definition. In addition to handling the same three intents as the Red application, it registers the blue-window-private intent that has the attribute visibility: private. Private intents can only be requested from the same application that registered them, so in this case only Blue can successfully request the blue-window-private intent. Furthermore, the rotate-window intent can only be requested by applications that have the call-blue capability: here the Red application comes with the required capability, while the Green doesn't.
intents:
- id: rotate-window
  name:
    en: Rotate Blue
  requiredCapabilities: [ 'call-blue' ]
- id: scale-window
  name:
    en: Scale Blue
- id: broadcast/blink-window
  name:
    en: Blink Blue
- id: blue-window-private
  name:
    en: Blue Private Intent
  visibility: private
System UI Implementation
Apart from the left side bar that deals with starting and stopping the apps, the System UI has two special features that deal with the intent mechanism:
- Handling Intents in the System UI and
- Disambiguation of Intent Requests
Handling Intents in the System UI
Intents can not only be handled in applications, but also in the System UI. Since the System UI is always running, we do not need to rely on info.yaml manifest files to define the supported intents, but instead can declare the needed meta-data directly as properties of the IntentServerHandler component. The IntentServerHandler is actually derived from IntentHandler, so it works the same way as its application side counter part: it only adds the required properties to define all the meta-data (e.g. names, icon, ...) on top.
IntentServerHandler {
    intentIds: [ "rotate-window" ]
    names: { "en": "Rotate System UI" }
    visibility: IntentObject.Public

    onRequestReceived: (request) => {
        rotationAnimation.start()
        request.sendReply({ "wasRequestedBy": request.requestingApplicationId })
    }
}
The handler callback is nearly the same as the one in the applications. The only noteworthy difference here is, that we have access to the requestingApplicationId to identify where the request originated from; for security reasons, this data is not available to intent handlers in applications.
Disambiguation of Intent Requests
The example implements an UI that lets the user choose how to to disambiguate incoming intent requests. Registering for the IntentServer's disambiguation requests is done here:
Connections {
    target: IntentServer
    function onDisambiguationRequest(requestId, potentialIntents) {
        disambiguationDialog.add(requestId, potentialIntents)
    }
}
Since we want to stay flexible with regards to the number of parallel intent requests in the system, we just add the incoming request to a queue (allRequests). The Dialog that consumes that queue is a fairly standard QtQuickControls 2 dialog, that gives you a nice UI showing you the possible application choices coming from the IntentServer::disambiguationRequested() signal. Upon pressing Ok or Cancel, the dialog will notify the IntentServer about the user's decision:
onAccepted: {
    IntentServer.acknowledgeDisambiguationRequest(currentRequest.requestId,
                                                  currentRequest.intents[handlingApplications.currentIndex]);
    showNext()
}
onRejected: {
    IntentServer.rejectDisambiguationRequest(currentRequest.requestId)
    showNext()
}
© 2025 The Qt Company Ltd. Documentation contributions included herein are the copyrights of their respective owners. The documentation provided herein is licensed under the terms of the GNU Free Documentation License version 1.3 as published by the Free Software Foundation. Qt and respective logos are trademarks of The Qt Company Ltd. in Finland and/or other countries worldwide. All other trademarks are property of their respective owners.
