C
Set up your Development Host
Qt for MCUs supports Linux and Windows host environments. The following subsections provide the setup information for these host platforms.
Prerequisites
Intall the following prerequisites and also the Qt for MCUs in addition. You can install Qt for MCUs using the Qt online installer, which can be downloaded from your Qt account page.
- GNU Compiler Collection v7.4.0 or newer
- GNU Make
- X C Binding, xinerama extension library (libxcb-xinerama0)
- CMake 3.15 or newer (you can install it using the Qt Online installer)
All these prerequisites can be installed using the following commands:
sudo apt update
sudo apt install build-essential libxcb-xinerama0 cmake
- MSVC++ compiler v14.20 or newer
- CMake 3.15 or newer (you can install it using the Qt Online installer)
Note: On Linux, if you have installed gcc-12 without g++-12, the GCC headers in the include path lead to missing C++ headers ('cstdint' file not found) when running qmlinterfacegenerator. Either remove gcc-12 or install g++-12 to resolve this issue.
Qt Creator setup
The following instructions help you set up Qt Creator on the Linux and Windows platforms.
To develop for MCUs using the Qt Creator IDE, the MCU plugin is required. The Qt online installer enables it by default when you install the Qt for MCUs SDK.
To enable or disable the plugin, follow these instructions:
- Select Help > About Plugins and choose the MCU Support plugin from the list.
- Restart Qt Creator to apply changes
To build and run your application on MCUs, you must create a kit:
- Select Edit > Preferences > Devices > MCU
- If not already set, provide the path to the Qt for MCUs installation directory.
- Select a Target supported by the Qt for MCUs SDK. For example, Qt for MCUs 2.2 - Desktop 32bpp.
- In the Requirements section, ensure that the platform-specific requirements are met.
- Select Automatically create kits for all available targets on start to create kits automatically.
Note: You could also manually create/remove kits using Create Kit and Remove Kit.
- Click Apply and restart Qt Creator if you choose to create kits automatically.
Note: The Automatically create kits for all available targets on start option is available from Qt Creator v4.14 onwards. On older versions of Qt Creator, you have to explictly create or remove kits using Create kit or Remove kit.
Command line setup
This page uses QUL_ROOT and QUL_TOOLS in command line examples as if they were set as environment variables. For example:
export QUL_ROOT=$HOME/Qt/QtMCUs/2.2
export QUL_TOOLS=$HOME/Qt/Tools/QtMCUs
set QUL_ROOT=C:\Qt\QtMCUs\2.2
set QUL_TOOLS=C:\Qt\Tools\QtMCUs
Setting up the project
To configure a project, run CMake from the command prompt. Navigate to your project directory and enter the following commands, which uses the %QUL_ROOT%\demos\thermo demo as an example.
cd $QUL_ROOT/demos/thermo
mkdir build_linuxqt
cd build_linuxqt
cmake .. -DQUL_PLATFORM=Qt -DQul_ROOT=$QUL_ROOT
cd %QUL_ROOT%\demos\thermo
mkdir build_winqt
cd build_winqt
cmake .. -DQUL_PLATFORM=Qt -DQul_ROOT=%QUL_ROOT%
These commands check for the prerequisites and configure your project.
Building
To build, use the following command:
cmake --build . --target thermo_big --config Release
Note: The prebuilt libraries for the Qt platform are available only for Debug and Release configurations. On Windows other build types might lead to linking errors.
Running the application
Once the thermostat application is built, try to running it:
./thermo_big
The thermo demo is built as a Qt application for Windows, so it requires the Qt runtime libraries in the PATH to run. Qt for MCUs provides all these necessary Qt libraries, which must be added to your PATH.
set PATH=%QUL_ROOT%\bin;%PATH%
Now that your PATH includes the necessary libraries, run the application:
%QUL_ROOT%\demos\thermo\build_winqt>Release\thermo_big.exe
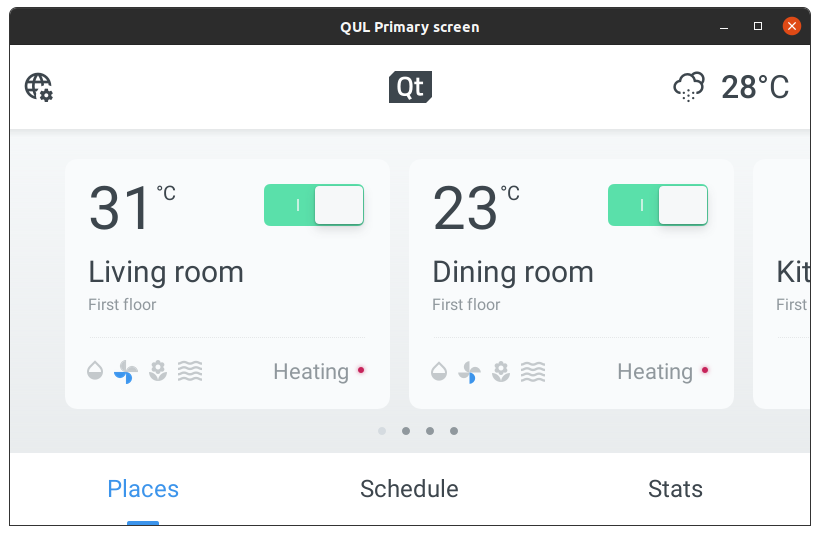
The Thermostat application window should look like this:
Visual Studio setup on Windows
Setting up the project
To configure the project, follow instructions in the Command line setup section.
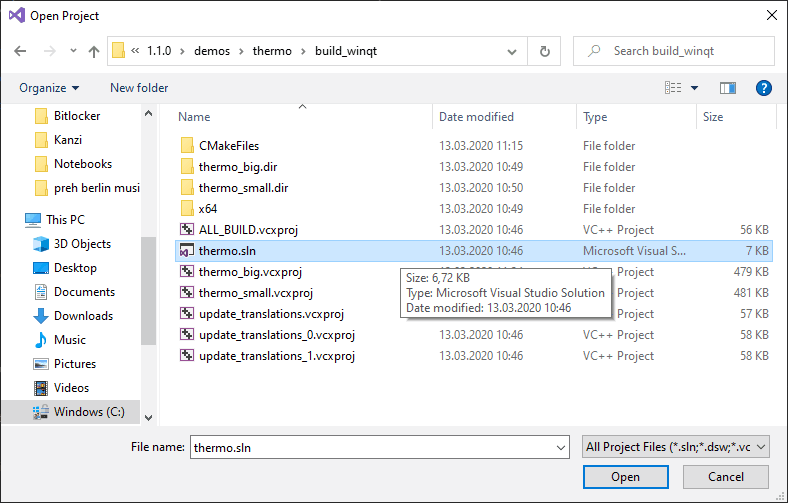
Open the solution in Visual Studio
To work with your project using Microsoft Visual Studio, open the solution created by CMake from the build_winqt folder.
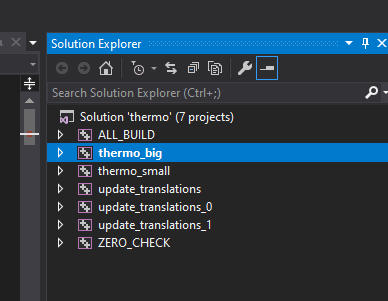
Now, you should see the solution tree structure.
As this is a Windows Qt project, it requires Qt's runtime libraries to run. To make them available for the built application, you must set the runtime environment. To do this:
- Right-click on your project and select Properties from the context menu.
- Click General > Debugging
- To Environment add the PATH variable pointing to the directory containing the Qt libraries. Those should be located inside the bin folder of your Qt for MCUs install root, for example:
PATH=%QUL_ROOT%\bin
After this step (assuming %QUL_ROOT% was set to C:\QtForMCU\1.1.0) the project properties window should look like this:

Build & run
Apply the changes, build the application, and run it. You should see on the screen the thermostat demo.
Available under certain Qt licenses.
Find out more.