
5.5.1. Requirements
The Axivion Visual Studio Code Plugin supports Visual Studio Code 1.95.0 and higher.
Note that using local analyses features (local build and single-file analysis) has additional requirements. They are the requirements of the Analysis as well as those of the Dashboard Server in the respective version of the connected Axivion Suite.
5.5.2. Installation
The Axivion Visual Studio Code Plugin is distributed as a Visual Studio Code
Axivion.VSCodePlugin.vsix package file. You can download this file from the
Axivion Dashboard Server. Alternatively, you can also find this file in the directory
doc/VSCodePlugin in the Axivion Suite installation folder.
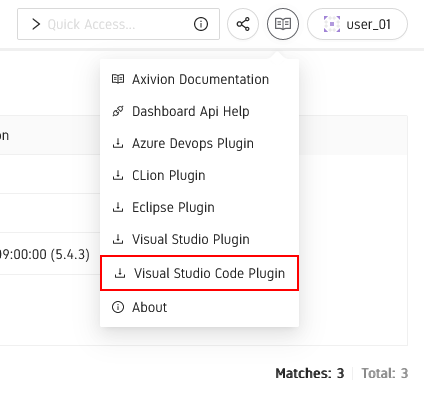
Axivion Visual Studio Code Plugin Download
Please note, that you cannot install the Axivion.VSCodePlugin.vsix package
file via the Windows Visual Studio Installer as this package file is meant for Visual
Studio Code.
To view analysis results from the Axivion Dashboard Server, the Axivion Visual Studio Code Plugin does not require the Axivion Suite to be installed.
Please refer to the official documentation
on how to install the Axivion.VSCodePlugin.vsix package file.
Caution
The installation does not require administrator permissions, and installs the plugin for the current user account only.
After a successful installation, a popup will open in Visual Studio Code notifying you of the successful installation.
Once the plugin is installed you can open the Extensions sidebar panel and
select the Axivion extension to view the extension overview page shown
in figure Axivion Visual Studio Code Plugin. There you can inspect the currently
installed version, the available settings and commands. You will also notice the
Ax icon in the Visual Studio Code status bar. This can be used to
trigger one of the commands the Axivion Visual Studio Code Plugin ships with.
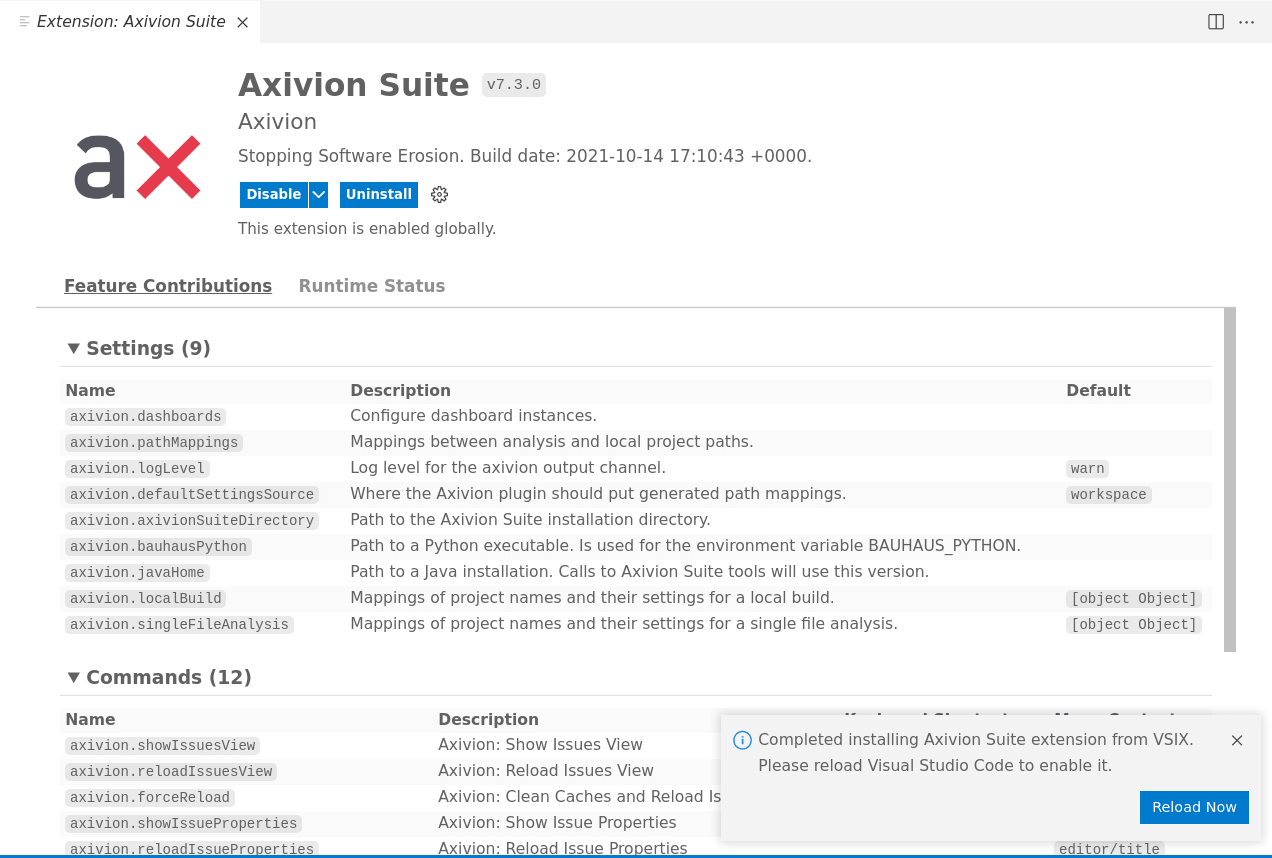
Axivion Visual Studio Code Plugin
To upgrade the plugin to a newer version, simply install the .vsix file of the new
version. The previously installed version will be overwritten; it is not necessary to
uninstall the old version prior to an upgrade.
5.5.3. Installation for remote workspaces
Note
Please refer to the official documentation on remote workspaces first.
To use the Axivion Visual Studio Code Plugin with VSCode remote workspaces, the Axivion Visual Studio Code Plugin needs to be installed on the remote extension host.
This is done in the extensions view by clicking the Install in SSH/Container/WSL: Workspace button next to the extension.
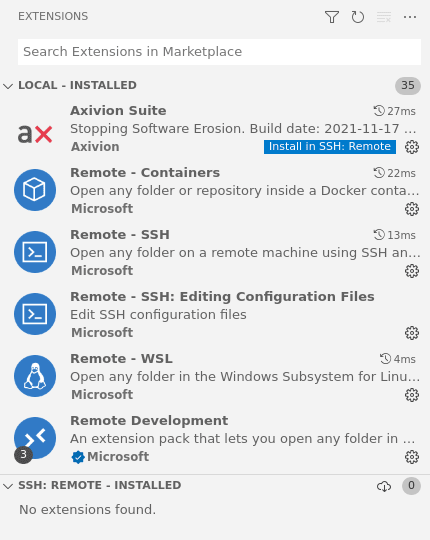
Axivion Visual Studio Code Plugin Remote Extensions
A reload is required to start the extension on the remote host. Please note that features like accessing the Axivion Dashboard Server will be executed on the system of the remote workspace. Keep this in mind when configuring paths for path mappings, the Local Build, the Single File Analysis and the Axivion Suite in the Configuration section.
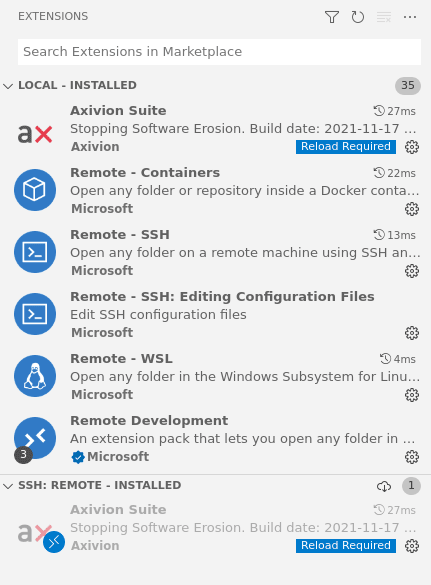
Axivion Visual Studio Code Plugin Remote Extension installed
When using dev containers, it might be useful to have the Axivion Visual Studio Code Plugin already installed at container start.
Therefore, add the Axivion Visual Studio Code Plugin to the devcontainers.json file.
devcontainers.json.¶{
// devcontainers.json
"customizations": {
"vscode": {
"extensions": [
"/opt/bauhaus-suite/doc/VSCodePlugin/Axivion.VSCodePlugin.vsix",
]
}
}
}
The Axivion Visual Studio Code Plugin can be installed either on the UI or the workspace extension host.
Via the devcontainers.json file, the extension is installed on both sides and
needs a IDE reload to function.
In a dev container environment we want to force the plugin to run only on the workspace host.
This makes reloading the IDE obsolete and the Axivion Visual Studio Code Plugin is functionally at IDE start.
{
   // .vscode/settings.json
   "remote.extensionKind": {
      "Axivion.vscodeplugin": [ "workspace" ]
   }
}