
Creating Main Windows in Qt Designer
Qt Designer can be used to create user interfaces for different purposes, and it provides different kinds of form templates for each user interface. The main window template is used to create application windows with menu bars, toolbars, and dock widgets.
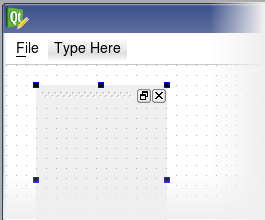
Create a new main window by opening the File menu and selecting the New Form... option, or by pressing Ctrl+N. Then, select the Main Window template. This template provides a main application window containing a menu bar and a toolbar by default -- these can be removed if they are not required.
If you remove the menu bar, a new one can be created by selecting the Create Menu Bar option from the context menu, obtained by right-clicking within the main window form.
An application can have only one menu bar, but several toolbars.
Menus
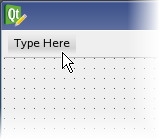
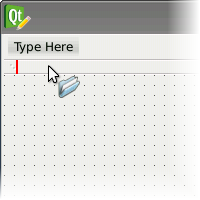
Menus are added to the menu bar by modifying the Type Here placeholders. One of these is always present for editing purposes, and will not be displayed in the preview or in the finished window.
Once created, the properties of a menu can be accessed using the Property Editor, and each menu can be accessed for this purpose via the The Object Inspector.
Existing menus can be removed by opening a context menu over the label in the menu bar, and selecting Remove Menu 'menu_name'.

Creating a Menu
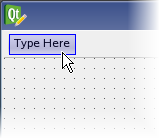
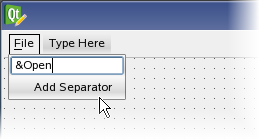
Double-click the placeholder item to begin editing. The menu text, displayed using a line edit, can be modified.
Insert the required text for the new menu. Inserting an ampersand character (&) causes the letter following it to be used as a mnemonic for the menu.
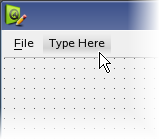
Press Return or Enter to accept the new text, or press Escape to reject it. You can undo the editing operation later if required.
Menus can also be rearranged in the menu bar simply by dragging and dropping them in the preferred location. A vertical red line indicates the position where the menu will be inserted.
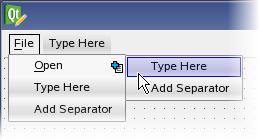
Menus can contain any number of entries and separators, and can be nested to the required depth. Adding new entries to menus can be achieved by navigating the menu structure in the usual way.
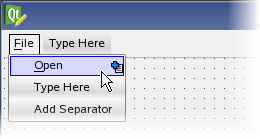
Creating a Menu Entry
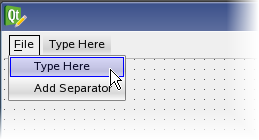
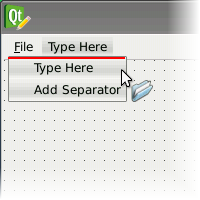
Double-click the Type Here placeholder to begin editing, or double-click Add Separator to insert a new separator line after the last entry in the menu.
The menu entry's text is displayed using a line edit, and can be modified.
Insert the required text for the new entry, optionally using the ampersand character (&) to mark the letter to use as a mnemonic for the entry.
Press Return or Enter to accept the new text, or press Escape to reject it. The action created for this menu entry will be accessible via the Action Editor, and any associated keyboard shortcut can be set there.
Just like with menus, entries can be moved around simply by dragging and dropping them in the preferred location. When an entry is dragged over a closed menu, the menu will open to allow it to be inserted there. Since menu entries are based on actions, they can also be dropped onto toolbars, where they will be displayed as toolbar buttons.
Toolbars
Creating and Removing a Toolbar
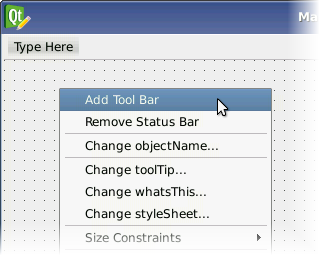
Toolbars are added to a main window in a similar way to the menu bar: Select the Add Tool Bar option from the form's context menu. Alternatively, if there is an existing toolbar in the main window, you can click the arrow on its right end to create a new toolbar.
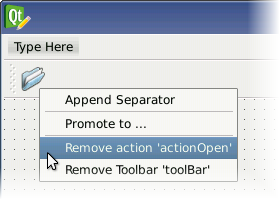
Toolbars are removed from the form via an entry in the toolbar's context menu.
Adding and Removing Toolbar Buttons
Toolbar buttons are created as actions in the Action Editor and dragged onto the toolbar. Since actions can be represented by menu entries and toolbar buttons, they can be moved between menus and toolbars.
To share an action between a menu and a toolbar, drag its icon from the action editor to the toolbar rather than from the menu where its entry is located. See Adding an Action for more information about this process.
Toolbar buttons are removed via the toolbar's context menu.
Actions
With the menu bar and the toolbars in place, it's time to populate them with actions. New actions for both menus and toolbars are created in the action editor window, simplifying the creation and management of actions.
The Action Editor
Enable the action editor by opening the Tools menu, and switching on the Action Editor option.
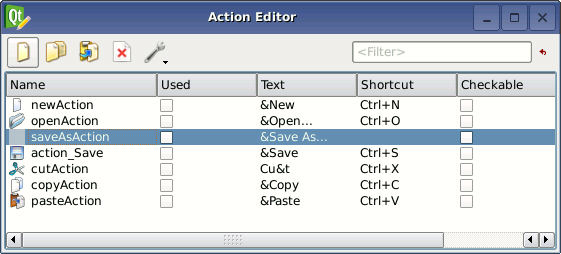
The action editor allows you to create New actions and Delete actions. It also provides a search function, Filter, using the action's text.
Qt Designer's action editor can be viewed in the classic Icon View and Detailed View. The screenshot below shows the action editor in Detailed View. You can also copy and paste actions between menus, toolbars and forms.
Creating an Action
To create an action, use the action editor's New button, which will then pop up an input dialog. Provide the new action with a Text -- this is the text that will appear in a menu entry and as the action's tooltip. The text is also automatically added to an "action" prefix, creating the action's Object Name.
In addition, the dialog provides the option of selecting an Icon for the action, as well as removing the current icon.
Once the action is created, it can be used wherever actions are applicable.
Adding an Action
To add an action to a menu or a toolbar, simply press the left mouse button over the action in the action editor, and drag it to the preferred location.
Qt Designer provides highlighted guide lines that tell you where the action will be added. Release the mouse button to add the action when you have found the right spot.
Dock Widgets
Since dock widgets are container widgets, they can be added to a form in the usual way. Once added to a form, dock widgets are not placed in any particular dock area by default; you need to set the docked property to true for each widget and choose an appropriate value for its dockWidgetArea property.
Adding a Dock Widget
To add a dock widget to a form, drag one from the Containers section of the widget box, and drop it onto the main form area. Do not add the dock widget to an existing layout. Instead, open the Property Editor and enable the docked property to place it in a dock area.
Note that it is sometimes easier to configure a dock widget if it is added to a form before a layout is applied to the central widget. For example, it is possible to undock it and resize it, making it more convenient to add child widgets.
Dock widgets can be optionally floated as independent tool windows. Hence, it is useful to give them window titles by setting their windowTitle property. This also helps to identify them on the form.
© 2019 The Qt Company Ltd. Documentation contributions included herein are the copyrights of their respective owners. The documentation provided herein is licensed under the terms of the GNU Free Documentation License version 1.3 as published by the Free Software Foundation. Qt and respective logos are trademarks of The Qt Company Ltd. in Finland and/or other countries worldwide. All other trademarks are property of their respective owners.