
Android 版 Qt 入门
本教程介绍了如何使用Qt Creator 为Android设备开发Qt Quick 应用程序。
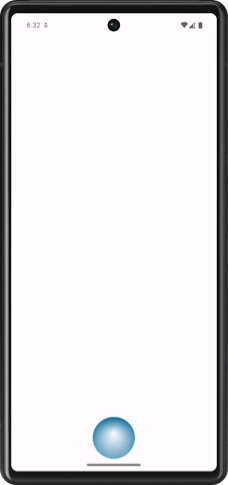
您将开发一个Qt Quick 应用程序,该应用程序根据加速度计值的變化来加速SVG(可缩放矢量图形)图像。
设置开发环境
开始使用 Qt for Android:
- 下载并安装 Qt。请按照“获取和安装 Qt”页面上的说明进行操作。
- 按照《Qt for Android 先决条件》中的说明,安装所有必要工具并配置开发环境。
创建项目
- 打开Qt Creator 。依次进入“File ” > “New Project ” > “Application (Qt) ” > Qt Quick Application。
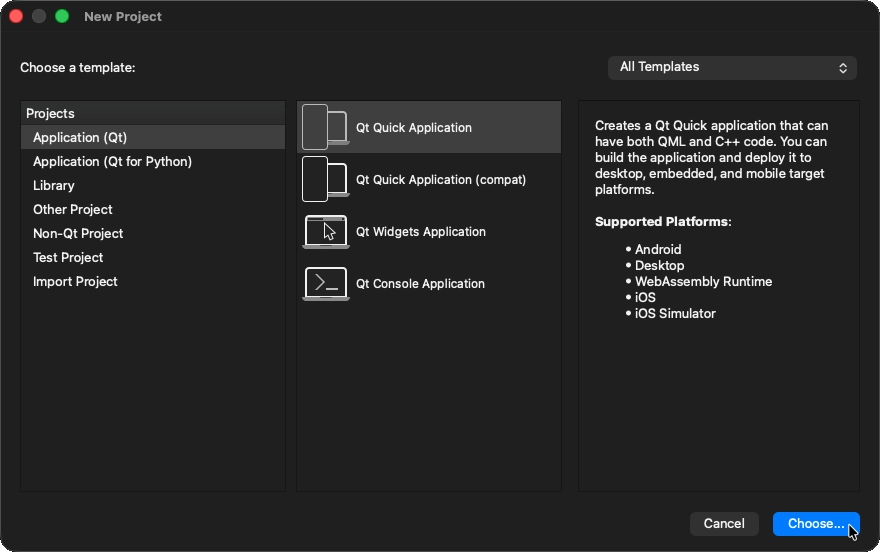
- 选择“Choose... ”以打开“Project Location ”对话框。
- 在“Name ”中,输入应用程序的名称。
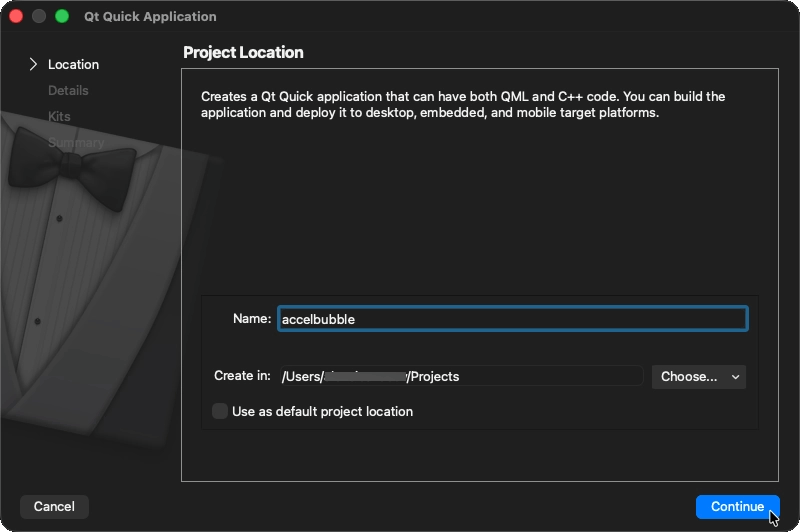
- 在“Create in ”中,输入项目文件的路径。您稍后可以毫无问题地移动项目文件夹。
- 选择“Next ”(或 macOS 上的“Continue ”)以打开“Define Project Details ”对话框。
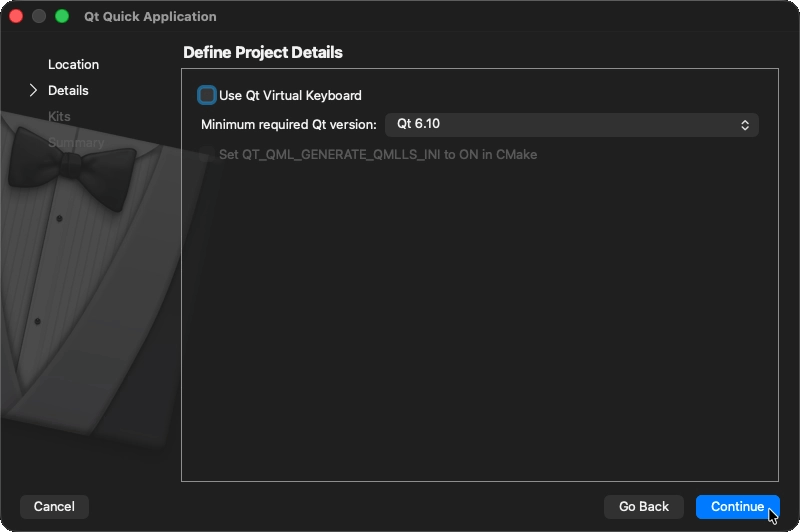
- 选择“Next ”(在 macOS 上为“Continue ”)以打开“Kit Selection ”对话框。
- 为要构建应用程序的平台选择套件。
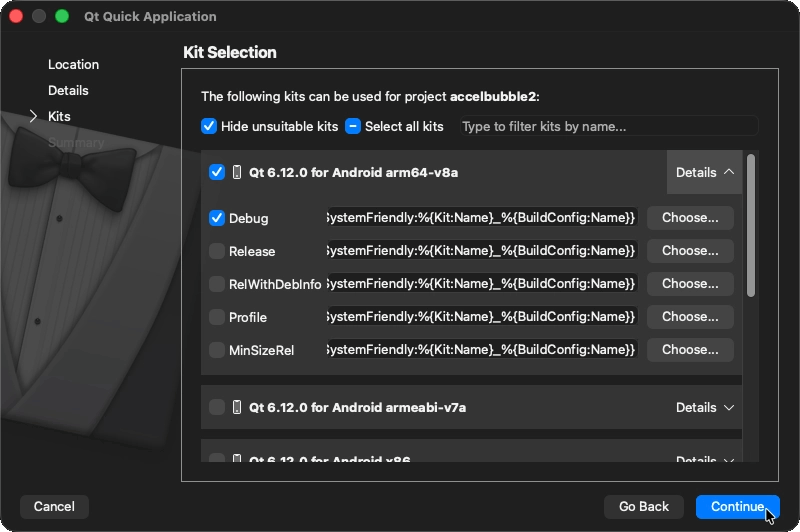
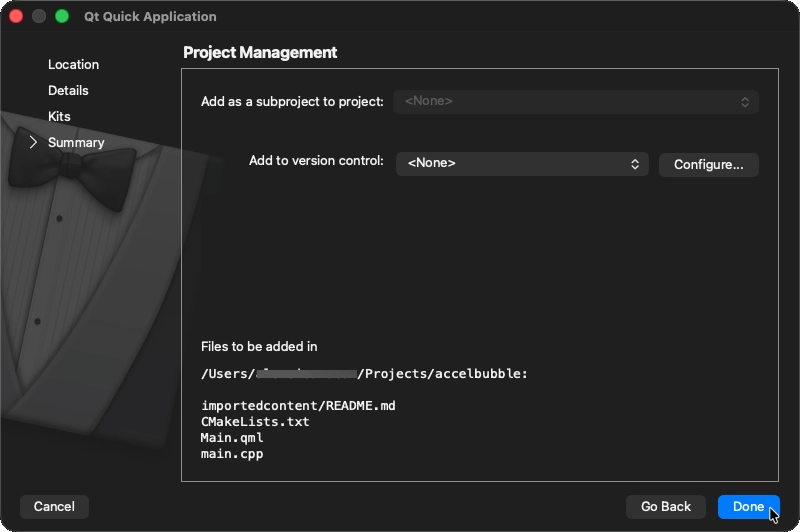
- 选择“Next ”(或 macOS 上的“Continue ”)以打开“Project Management ”对话框。
- 检查项目设置,然后选择“Finish ”(在 macOS 上为“Done ”)以创建项目。
将图片添加为资源
应用程序的主视图会显示一个 SVG 气泡图像,当您倾斜设备时,该图像会在屏幕上移动。
为了在运行应用程序时显示该图像,您必须在向导为您生成的CMakeLists.txt 文件中,将该图像作为资源指定在qt_add_qml_module() 方法的RESOURCES 参数中:
qt_add_qml_module(appaccelbubble
    URI accelbubble
    QML_FILES Main.qml
    RESOURCES Bluebubble.svg
)
创建 Accelbubble 主视图
- 在Projects 视图中,选择
Main.qml。在Main.qml文件中,将内容替换为以下代码:import QtQuick import QtQuick.Controls.Material ApplicationWindow { id: mainWindow width: 320 height: 480 visible: true title: qsTr("Accelerate Bubble") Image { id: bubble source: "Bluebubble.svg" smooth: true } }此代码修改了默认的Window 属性,并将刚刚添加的图像添加到视图中。您也可以使用任何其他图像或组件来代替。
- 添加自定义属性,以根据主窗口的宽度和高度定位图片:
import QtQuick import QtQuick.Controls.Material ApplicationWindow { id: mainWindow width: 320 height: 480 visible: true title: qsTr("Accelerate Bubble") Image { id: bubble source: "Bluebubble.svg" smooth: true property real centerX: mainWindow.contentItem.width / 2 property real centerY: mainWindow.contentItem.height / 2 property real bubbleCenter: bubble.width / 2 x: centerX - bubbleCenter y: centerY - bubbleCenter } } - 添加以下导入语句:
import QtSensors这是必需的,因为我们要根据加速度计传感器的数值来移动气泡。
- 添加Accelerometer 组件并设置必要的属性:
import QtQuick import QtQuick.Controls.Material import QtSensors ApplicationWindow { id: mainWindow ... Accelerometer { id: accel dataRate: 100 active: true } ... - 添加以下 JavaScript 函数,根据当前加速度计的数值计算气泡的 x 和 y 坐标:
import QtQuick import QtQuick.Controls.Material import QtSensors ApplicationWindow { id: mainWindow ... Accelerometer { id: accel ... } function calcPitch(x,y,z) { return -Math.atan2(y, Math.hypot(x, z)) * mainWindow.radians_to_degrees; } function calcRoll(x,y,z) { return -Math.atan2(x, Math.hypot(y, z)) * mainWindow.radians_to_degrees; } ... - 为加速度计组件的
onReadingChanged信号添加以下JavaScript代码,以便在加速度计数值发生变化时使气泡移动:Accelerometer { id: accel dataRate: 100 active: true onReadingChanged: { var newX = (bubble.x + calcRoll(accel.reading.x, accel.reading.y, accel.reading.z) * .1) var newY = (bubble.y - calcPitch(accel.reading.x, accel.reading.y, accel.reading.z) * .1) if (isNaN(newX) || isNaN(newY)) return; if (newX < 0) newX = 0 if (newX > mainWindow.contentItem.width - bubble.width) newX = mainWindow.contentItem.width - bubble.width if (newY < 0) newY = 0 if (newY > mainWindow.contentItem.height - bubble.height) newY = mainWindow.contentItem.height - bubble.height bubble.x = newX bubble.y = newY } }您需要确保气泡的位置始终在屏幕边界范围内。如果加速度计返回非数值(NaN),则忽略该值,且不会更新气泡的位置。
- 在气泡的
x和y属性上添加SmoothedAnimation 行为,以使气泡的移动看起来更平滑。Image { id: bubble source: "Bluebubble.svg" smooth: true ... Behavior on y { SmoothedAnimation { easing.type: Easing.Linear duration: 100 } } Behavior on x { SmoothedAnimation { easing.type: Easing.Linear duration: 100 } } ...
锁定设备方向
默认情况下,当设备方向在纵向和横向之间切换时,屏幕会随之旋转。将屏幕方向锁定为纵向模式,可使本应用程序的显示效果更佳。
在 Android 系统中,您需要在AndroidManifest.xml 文件中设置屏幕方向,该文件可在Qt Creator 中生成。要将屏幕方向锁定为纵向:
- 转至Tools >Android >Manifest XML Source 。Qt Creator 会在项目目录下的android目录中生成该文件,并将其在清单编辑器中打开。
- 在清单编辑器中,选择“XML Source ”,并将“
activity”元素的“android:screenOrientation”属性设置为“portrait”。<?xml version='1.0'?> <manifest ...> <supports-screens.../> <!--%%INSERT_PERMISSIONS--> <!--%%INSERT_FEATURES--> <application ...> <activity ... android:screenOrientation="portrait"> ...有关更多信息,请参阅《编辑 Android 清单文件》。
添加依赖项
该应用程序使用Qt Sensors 和Qt SVG 模块,因此您应将其作为依赖项添加到CMakeLists.txt 文件中。要添加依赖项:
- 将
Sensors和Svg组件添加到find_package函数中。这会指示 CMake 查找 Qt 安装路径并导入这些模块:find_package(Qt6 REQUIRED COMPONENTS Quick Sensors Svg) - 将导入的目标添加到
target_link_libraries函数中:target_link_libraries(appaccelbubble PRIVATE Qt6::Quick Qt6::Sensors Qt6::Svg)这会告知 CMake,
accelbubble可执行文件使用这些模块。随后,CMake 会将必要的参数传递给链接器,并将相应的包含目录和编译器定义传递给 C++ 编译器。 - 要应用配置更改,请转到Build ,然后选择“Run CMake ”。
有关CMakeLists.txt 文件的更多信息,请参阅《CMake 入门指南》。
注意:如果您 尚未安装find_package() 中列出的所有 Qt 模块,Qt Creator 会询问您是否要使用Qt Online Installer 安装它们。
运行应用程序
现在,您可以将应用程序部署到真实的或虚拟的 Android 设备上。
如果您使用的是真实设备:
- 在 Android 设备上启用USB 调试。
- 将设备连接到开发电脑。
如果连接了多台设备,Qt Creator 允许您选择要在其上运行应用程序的设备。
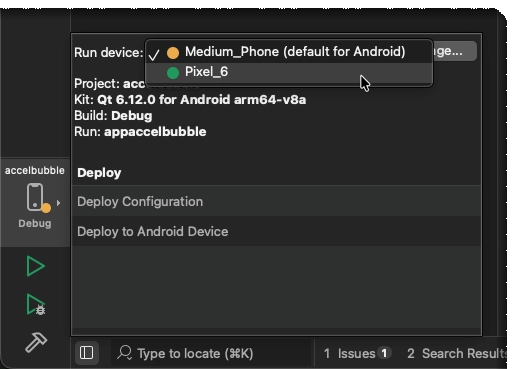
要在设备上运行应用程序,请按Ctrl+R(Cmd+R)。
应用程序在设备上启动后,您可以倾斜设备,观察气泡在屏幕上移动。气泡会沿着倾斜的方向移动,移动速度取决于倾斜角度。倾斜幅度越大,气泡移动得越快。
另请参阅 《Qt Academy:Qt for Android入门》、《如何设计Qt Quick 用户界面》、《Qt Quick 用户界面设计》以及《设计Qt Quick 用户界面》。
© 2026 The Qt Company Ltd. Documentation contributions included herein are the copyrights of their respective owners. The documentation provided herein is licensed under the terms of the GNU Free Documentation License version 1.3 as published by the Free Software Foundation. Qt and respective logos are trademarks of The Qt Company Ltd. in Finland and/or other countries worldwide. All other trademarks are property of their respective owners.
