
Canvas2DContext QML Type
为在Canvas2D 控件上绘图提供了一个2D绘图环境。更多内容...
| Import Statement: | import QtCanvas2D |
| Since: | Qt 6.12 |
| Status: | Technology preview |
此类型处于技术预览阶段,可能会有变动。
属性
- antialias : real
- canvas : Canvas2D
- direction : string
- fillRule : string
- fillStyle : variant
- font : string
- globalAlpha : real
- globalBrightness : real
- globalCompositeOperation : string
- globalContrast : real
- globalSaturation : real
- highQualityStroking : bool
- lineCap : string
- lineJoin : string
- lineWidth : real
- miterLimit : real
- strokeStyle : variant
- textAlign : string
- textAntialias : real
- textBaseline : string
- textLineHeight : real
- textWrapMode : string
- windingEnforce : bool
方法
- void addPath(path2d path, transform2d transform)
- void addPath(path2d path, int start, int count, transform2d transform)
- void arc(real x, real y, real radius, real startAngle, real endAngle, bool anticlockwise)
- void arcTo(real x1, real y1, real x2, real y2, real radius)
- void beginHoleSubPath()
- void beginPath()
- void beginSolidSubPath()
- void bezierCurveTo(real cp1x, real cp1y, real cp2x, real cp2y, real x, real y)
- void circle(real centerX, real centerY, real radius)
- void cleanupResources()
- void clearRect(real x, real y, real width, real height)
- void closePath()
- boxgradient2d createBoxGradient(real x, real y, real width, real height, real feather, real radius)
- boxshadow2d createBoxShadow(real x, real y, real width, real height)
- boxshadow2d createBoxShadow(real x, real y, real width, real height, real blur, string color, real radius)
- boxshadow2d createBoxShadow(real x, real y, real width, real height, real blur, string color, real radiusTopLeft, real radiusTopRight, real radiusBottomRight, real radiusBottomLeft)
- conicalgradient2d createConicalGradient(real x, real y, real angle)
- gridpattern2d createGridPattern(real x, real y, real width, real height, string lineColor, string backgroundColor, real lineWidth, real feather, real angle)
- lineargradient2d createLinearGradient(real x0, real y0, real x1, real y1)
- path2d createPath2D()
- path2d createPath2D(path2d path)
- path2d createPath2D(string svgPath)
- imagepattern2d createPattern(Image image, string repetition)
- radialgradient2d createRadialGradient(real x0, real y0, real r0, real x1, real y1, real r1)
- transform2d createTransform2D()
- void drawBoxShadow(boxshadow2d shadow)
- void drawImage(variant image, real dx, real dy)
- void drawImage(variant image, real dx, real dy, real dw, real dh)
- void drawImage(variant image, real sx, real sy, real sw, real sh, real dx, real dy, real dw, real dh)
- void ellipse(real centerX, real centerY, real radiusX, real radiusY)
- void ellipseRect(real x, real y, real width, real height)
- void fill()
- void fill(string fillRule)
- void fill(path2d path, int pathGroup)
- void fill(path2d path, string fillRule, int pathGroup)
- void fillRect(real x, real y, real width, real height)
- void fillText(text, x, y, maxWidth)
- void fillText(text, x, y, width, height)
- transform2d getTransform()
- void lineTo(real x, real y)
- object measureText(text)
- void moveTo(real x, real y)
- void quadraticCurveTo(real cpx, real cpy, real x, real y)
- void rect(real x, real y, real width, real height)
- void removePathGroup(int pathGroup)
- void reset()
- void resetClipping()
- void resetTransform()
- void restore()
- void rotate(real angle)
- void roundRect(real x, real y, real width, real height, real radius)
- void roundRect(real x, real y, real width, real height, real radiusTopLeft, real radiusTopRight, real radiusBottomRight, real radiusBottomLeft)
- void save()
- void scale(real scale)
- void scale(real sx, real sy)
- void setClipRect(real x, real y, real width, real height)
- void setPathWinding(string winding)
- void setTransform(transform2d transform)
- void setTransform(real a, real b, real c, real d, real e, real f)
- void skew(real angleX, real angleY)
- void stroke()
- void stroke(path2d path, int pathGroup)
- void strokeRect(real x, real y, real width, real height)
- void transform(transform2d transform)
- void transform(real a, real b, real c, real d, real e, real f)
- void translate(real x, real y)
详细说明
可以通过Canvas 项的getContext() 方法创建Canvas2DContext对象:
Canvas2D {
  id: canvas
  onPaint: {
     var ctx = canvas.getContext('2d');
     //...
  }
}
Context2D API 实现了与W3C Canvas 2D Context API 标准相同的规范,并增加了一些增强功能。
Context2D API 提供渲染上下文,该上下文定义了在Canvas 控件上绘制所需的方法和属性。以下代码将 canvas 渲染上下文赋值给context 变量:
var context = mycanvas.getContext("2d")以下是一个使用Canvas2D 创建圆形按钮的简单示例。
 | |
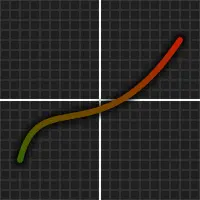
以下是绘制一个简单图表的另一个示例。
 | |
属性文档
antialias : real
存储当前的抗锯齿程度。抗锯齿程度越高,绘制效果越平滑。这仅影响填充和描边绘制,不影响图像或文本。默认值为1.0 ,最大值为10.0 。
抗锯齿效果可以针对每条路径单独调整,因此可以在每次描边/填充之前进行设置。
 | |
另请参阅 textAntialias 。
canvas : Canvas2D
保存上下文进行绘制的画布项。
该属性为只读。
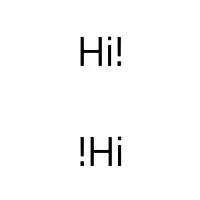
direction : string
保存用于绘制文本的当前方向。可能的取值包括:
| 常量 | 描述 |
|---|---|
"inherit" | (默认)文本方向继承自QGuiApplication 的layoutDirection。参见https://doc.qt.io/qt-6/qguiapplication.html#layoutDirection-prop。 |
"ltr" | 文本方向为从左到右。 |
"rtl" | 文本方向为从右到左。 |
"auto" | 文本方向将根据文本字符串自动检测。参见QString::isRightToLeft()。 |
默认方向为"inherit" 。
 | |
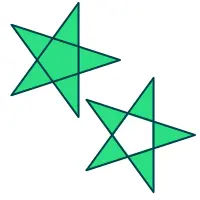
fillRule : string
保存当前用于填充形状的填充规则。该值将应用于规则设置后所有对fill()的调用。默认填充规则为"nonzero"
支持以下填充规则:
| 常量 | 描述 |
|---|---|
"nonzero" | (或“WindingFill”)使用非零绕行规则填充路径。采用此规则时,我们通过以下方法确定点是否位于形状内部:从该点向形状外部绘制一条水平线,并判断该线在每个交点处的方向是向上还是向下。 绕行数通过将每个交点的方向求和来确定。如果该数值不为零,则该点位于形状内部。在大多数情况下,此填充模式也可视为闭合形状的交集。此模式为默认模式。 |
"evenodd" | (或“OddEvenFill”)路径采用奇偶填充规则进行填充。根据该规则,我们通过以下方法判断一个点是否位于图形内部。 从该点向图形外部绘制一条水平线,并统计交叉点数量。若交叉点数量为奇数,则该点位于图形内部。 |
 | |
另请参阅 fill()。
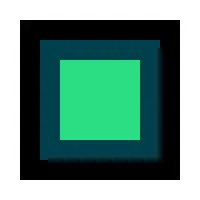
fillStyle : variant
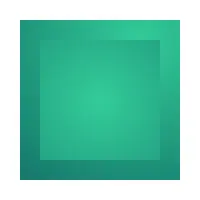
存储当前用于填充形状的样式。默认填充样式为纯黑色('#000000')。该样式可以是包含 CSS 颜色的字符串(QML color ),也可以是 canvas 画笔对象。无效值将被忽略。该属性支持多种颜色语法:
- 'rgb(red, green, blue)'——例如:'rgb(255, 100, 55)' 或 'rgb(100%, 70%, 30%)'
- 'rgba(red, green, blue, alpha)' —— 例如:'rgb(255, 100, 55, 1.0)' 或 'rgb(100%, 70%, 30%, 0.5)'
- 'hsl(色相, 饱和度, 明度)'
- 'hsla(色相, 饱和度, 明度, 透明度)'
- '#RRGGBB' —— 例如:'#00FFCC'
- '#AARRGGBB'——例如:'#8000FFCC'
- SVG 颜色名称——例如:'black'、'green' 或 'lightsteelblue'
- Qt.hsla(色相, 饱和度, 明度, 透明度) - 例如:Qt.hsla(0.3, 0.7, 1, 1.0)
- Qt.rgba(red, green, blue, alpha)——例如:Qt.rgba(0.3, 0.7, 1, 1.0)
如果在循环中多次赋值fillStyle 或strokeStyle ,应选择Qt.rgba()语法,因为其性能最佳——它本身已是有效的QColor 值,无需每次都进行解析。
 | |
 |
另请参阅 createLinearGradient()、createRadialGradient()、createConicalGradient()、createBoxGradient()、createBoxShadow()、createPattern()、createGridPattern(),以及strokeStyle 。
font : string
保存当前的字体设置。
支持W3C 2D 上下文标准中关于字体的子集:
- font-style(可选):normal | italic | oblique
- font-variant(可选):normal | small-caps
- font-weight(可选):normal | bold | 1 ... 1000
- font-size:Npx | Npt(其中 N 为正数)
- font-family:参见http://www.w3.org/TR/CSS2/fonts.html#propdef-font-family
注意: font-size 和 font-family属性是 必填的,且必须按照上述顺序排列。此外,名称中包含空格的字体家族必须用引号括起来。
默认字体值为“10px sans-serif”。
globalAlpha : real
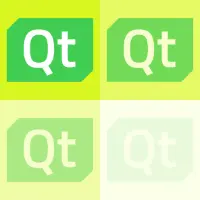
保存当前应用于渲染操作的透明度(alpha)值。该透明度值将应用于所有渲染的形状。原本就透明的路径也会按比例变得更加透明。透明度值应在 0.0(完全透明)和 1.0(完全不透明)之间。默认情况下,透明度值为1.0 。
 | |
globalBrightness : real
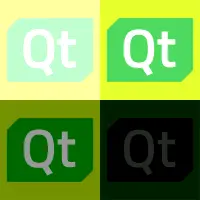
保存当前应用于渲染操作的亮度值。该亮度值将应用于所有渲染的图形。值为 0 时,绘制结果将为纯黑色。该值也可以大于 1.0,以提高亮度。默认情况下,亮度为1.0 。
 | |
globalCompositeOperation : string
保持当前的合成操作。此模式适用于所有绘制操作。允许的操作包括:
| 常量 | 描述 |
|---|---|
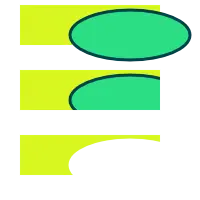
"source-atop" | A 叠加在 B 上。在两张图像均为不透明的区域显示源图像。在目标图像为不透明但源图像为透明的区域显示目标图像。其余区域显示透明部分。 |
"source-over" | (默认) A 叠加在 B 上。在源图像不透明的区域显示源图像;在目标图像不透明而源图像透明的区域显示目标图像;其余区域显示透明。 |
"destination-out" | B 覆盖 A。在目标图像不透明且源图像透明的位置显示目标图像。其余位置显示透明。 注意:为确保 正常工作,合成模式需要启用 |
 | |
globalContrast : real
存储当前应用于渲染操作的对比度值。该对比度将应用于所有渲染的形状。值为 0 时,绘制结果将完全呈灰色(0.5, 0.5, 0.5)。该值也可以大于 1.0,以增加对比度。默认情况下,对比度为1.0 。
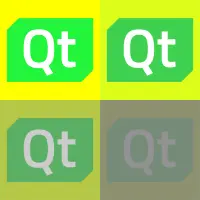 | |
globalSaturation : real
保存当前应用于渲染操作的饱和度值。该饱和度将应用于所有渲染的图形。值为 0 时将禁用饱和度,导致绘制结果完全为灰度。该值也可以大于 1.0,以提高饱和度。默认情况下,饱和度为1.0 。
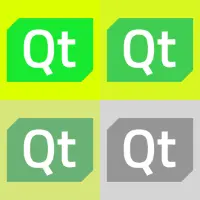 | |
highQualityStroking : bool
保留当前高质量描边启用状态。将此参数设置为true 可在某些不常见的场景下(例如描边重叠且不具备完全不透明度时)获得更准确的渲染效果。启用该功能会导致更高的渲染开销。默认值为false 。
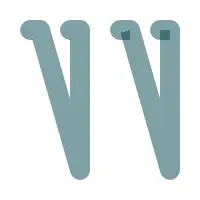 | |
lineCap : string
保存当前的线条末端样式。可用的线条末端样式包括:
| 恒定 | 描述 |
|---|---|
"butt" | (默认)每条线的末端都有一个与线段方向垂直的平直边缘。 |
"round" | 在线条末端添加一个直径等于线条宽度的半圆。 |
"square" | 在线条末端添加一个矩形,其长度等于线条宽度,宽度等于线条宽度的一半,该矩形与垂直于线条方向的边缘紧密贴合。 |
 | |
lineJoin : string
保存当前的线段连接样式。在两条相邻线段共有的子路径中的任意一点,都存在一个连接点。当子路径闭合时,其第一个点(等同于最后一个点)处也存在一个连接点,用于连接该子路径中的第一条和最后一条线段。
可能的线条连接样式包括:
| 常量 | 描述 |
|---|---|
"bevel" | 两条线之间的三角形缺口被填充。 |
"round" | 两条线之间的圆弧区域被填充。 |
"miter" | (默认)两条线的外部边缘向外延伸,以成一定角度相交,该区域被填充。 |
 | |
另请参阅 miterLimit 。
lineWidth : real
保存当前的线宽。默认线宽为1.0 。当启用抗锯齿时,单个像素下的线宽会自动渐变透明度,从而生成平滑的输出效果。
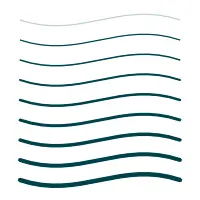 | |
另请参阅 stroke()。
miterLimit : real
保存当前的斜切限制长度。斜切限制控制何时对锐角进行倒角处理。当角的长度超过此限制时,将在两条线之间应用“倒角”lineJoin 。此设置仅在“斜切”线连接方式下生效。默认限制为10.0 。
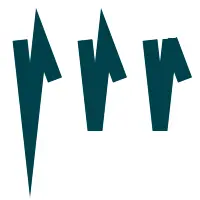 | |
另请参阅 lineJoin 。
strokeStyle : variant
存储用于形状周围线条的当前颜色或样式。该样式可以是包含 CSS 颜色的字符串、QML color ,或者是一个 canvas 画笔对象。无效的值将被忽略。
默认值为黑色('#000000')。
 | |
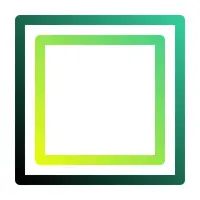 | |
另请参阅 createLinearGradient()、createRadialGradient()、createConicalGradient()、createBoxGradient()、createBoxShadow()、createPattern()、createGridPattern() 以及fillStyle 。
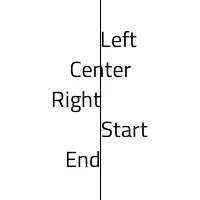
textAlign : string
保存当前的文本对齐设置。可能的取值包括:
| 常量 | 描述 |
|---|---|
"start" | (默认)对齐到文本的起始边缘(从左到右文本中为左侧,从右到左文本中为右侧)。 |
"end" | 对齐到文本的结束边缘(从左到右的文本中为右侧,从右到左的文本中为左侧)。 |
"left" | 对齐到左侧。 |
"right" | 对齐到右侧。 |
"center" | 将文本居中。 |
 | |
另请参阅 textBaseline 。
textAntialias : real
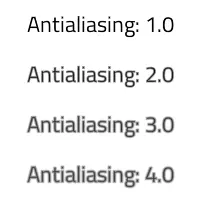
保存当前文本的抗锯齿强度。该值是常规抗锯齿效果的倍数,也就是说,0.0 会禁用抗锯齿,而2.0 则会将其强度翻倍。默认值is 为 1.0。
注意:由于 所使用的文本抗锯齿技术(SDF),最大抗锯齿量相当有限,且在字体尺寸较小时,其影响较小。
 | |
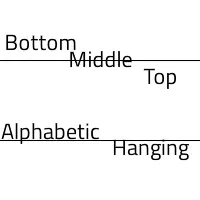
textBaseline : string
保存当前的基线对齐设置。可能的取值包括:
| Constant | 描述 |
|---|---|
"top" | em方块的顶部 |
"hanging" | 悬挂基线 |
"middle" | em方格的中点 |
"alphabetic" | (默认)字母基线 |
"bottom" | em方块的底部 |
 | |
另请参阅 textAlign 。
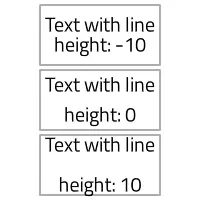
textLineHeight : real
存储当前文本行高调整量(单位为像素)。默认行高为0 。
 | |
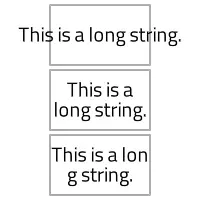
textWrapMode : string
保存当前的文本换行模式,即文本如何换行至多行。可能的取值包括:
| 常量 | 描述 |
|---|---|
"nowrap" | (默认)不进行换行。如果文本中换行符不足,则 contentWidth 将超过设定的宽度。 |
"wrap" | 如果可能,换行将在单词边界处进行;否则,将在行中的适当位置进行换行,即使是在单词中间。 |
"wordwrap" | 仅在单词边界处进行换行。如果某个单词过长,内容宽度将超过设定的宽度。 |
"wrapanywhere" | 换行可在行中的任何位置进行,即使是在单词中间。 |
默认换行模式为"nowrap" 。
 | |
windingEnforce : bool
保存当前强制路径折返的启用状态。将此参数设置为false 将禁用路径折返强制规则,使其符合setPathWinding()中设定的值。禁用该功能后,例如可以通过按顺时针顺序添加点在路径中创建孔洞。禁用该功能还可以提高性能。默认值为true 。
 | |
方法文档
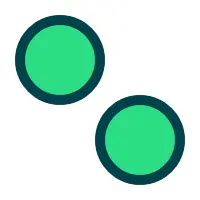
void addPath(path2d path, transform2d transform)
将path 添加到当前路径中,可选地使用transform 来修改路径点。当未提供transform (或其值为单位矩阵)时,由于该操作会复用路径数据,因此执行速度非常快。
 | |
void addPath(path2d path, int start, int count, transform2d transform)
将path 添加到当前路径中,从start 处的命令开始,并包含count 数量的命令。可选地使用transform 来修改路径节点。系统会检查start 和count 的范围,以确保调用的命令数量不超过路径中已有的命令数量。如果路径不应从当前路径位置继续,请先调用moveTo()。
 | |
void arc(real x, real y, real radius, real startAngle, real endAngle, bool anticlockwise)
创建一个新的圆形弧形子路径。弧的中心位于x 、y ,半径为radius ,且从角度startAngle 绘制至endAngle 。默认曲线方向为顺时针。若要将方向改为逆时针,请将anticlockwise 设置为true。角度以弧度为单位。
 | |
另请参阅 arcTo 以及W3C 的 2D 上下文标准中关于 arc() 的说明。
void arcTo(real x1, real y1, real x2, real y2, real radius)
在由最后一个路径点以及两个指定点(x1 、y1 和x2 、y2 )所定义的角处,使用radius 添加一个弧段。如有必要,该弧段会自动通过直线与路径的最新点连接起来。
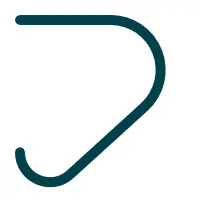 | |
另请参阅 arc 以及W3C 关于 arcTo() 的 2D 上下文标准。
void beginHoleSubPath()
开始一个孔子路径。这相当于setPathWinding("clockwise")
 | |
另请参阅 beginSolidSubPath()。
void beginPath()
在清除当前路径的同时,开始绘制新路径。
void beginSolidSubPath()
开始一个实子路径。这等同于setPathWinding("counterclockwise")
另请参阅 beginHoleSubPath()。
void bezierCurveTo(real cp1x, real cp1y, real cp2x, real cp2y, real x, real y)
添加一个三次贝塞尔曲线段,该曲线段从路径的最后一点出发,经由两个控制点(cp1x 、cp1y 和cp2x 、cp2y ),延伸至指定点(x 、y )。
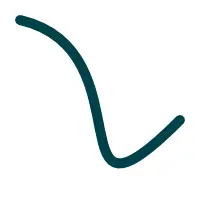 | |
另请参阅 W3C 2D 上下文标准中关于 bezierCurveTo 的说明。
void circle(real centerX, real centerY, real radius)
创建一个新的圆形子路径,其中心位于 (centerX,centerY),半径为radius 。
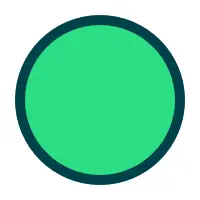 | |
注意: 与arc()相比, 此方法不会在子路径的最后一点与圆的起始点之间添加一条直线。
void cleanupResources()
该函数会从缓存中移除未使用的纹理。
此外,调用此函数时,其他缓存和池可能会被缩减,以尽量减少内存占用。这可能会导致后续的渲染调用开销增加。
void clearRect(real x, real y, real width, real height)
通过将由x 、y 、width 、height 指定的矩形区域填充为透明黑色,来清除该区域内的像素。由于清除操作无需进行混合处理,因此其执行速度可能比fillRect() 更快。
 | |
void closePath()
通过绘制一条连接至当前子路径起始点的直线来关闭该子路径,并自动开始绘制新路径。新路径的当前点即为前一个子路径的起始点。
另请参阅 W3C 2D 绘图环境标准中关于 closePath 的说明。
boxgradient2d createBoxGradient(real x, real y, real width, real height, real feather, real radius)
返回一个boxgradient2d 对象,该对象表示一个覆盖矩形区域(x 、y 、width 、height )的框形渐变,其羽化(平滑)效果为feather ,圆角半径为radius 。
 | |
另请参阅 boxgradient2d::addColorStop(),fillStyle 以及strokeStyle 。
boxshadow2d createBoxShadow(real x, real y, real width, real height)
返回一个boxshadow2d 对象,该对象表示覆盖矩形区域(x 、y 、width 、height )的盒阴影。
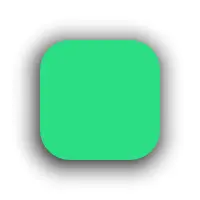 | |
另请参阅 drawBoxShadow()。
boxshadow2d createBoxShadow(real x, real y, real width, real height, real blur, string color, real radius)
返回一个boxshadow2d 对象,其颜色color 表示一个盒阴影,该阴影覆盖矩形区域(x ,y ,width ,height ),具有模糊效果blur 和圆角半径radius 。
另请参阅 drawBoxShadow()。
boxshadow2d createBoxShadow(real x, real y, real width, real height, real blur, string color, real radiusTopLeft, real radiusTopRight, real radiusBottomRight, real radiusBottomLeft)
返回一个boxshadow2d 对象,其颜色为color ,表示一个覆盖矩形区域(x 、y 、width 、height )的盒阴影,具有模糊效果blur 和圆角半径(radiusTopLeft 、radiusTopRight 、radiusBottomRight 、radiusBottomLeft )。
另请参阅 drawBoxShadow()。
conicalgradient2d createConicalGradient(real x, real y, real angle)
返回一个conicalgradient2d 对象,该对象表示一个锥形渐变,该渐变以中心点为圆心(x ,y ),沿逆时针方向对颜色进行插值,起始角度为angle (单位为弧度)。
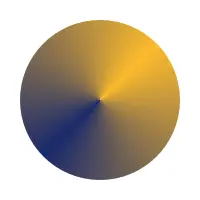 | |
另请参见 conicalgradient2d::addColorStop()、createLinearGradient()、createRadialGradient()、createPattern()、fillStyle 以及strokeStyle 。
gridpattern2d createGridPattern(real x, real y, real width, real height, string lineColor, string backgroundColor, real lineWidth, real feather, real angle)
返回一个gridpattern2d 对象,该对象覆盖矩形区域(x 、y 、width 、height )。该网格使用lineColor 作为线条颜色,backgroundColor 作为背景颜色。线条宽度为lineWidth ,线条羽化效果为feather ,旋转角度为angle (单位为弧度)。
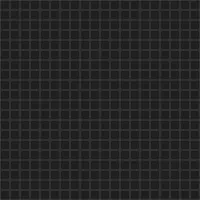 | |
lineargradient2d createLinearGradient(real x0, real y0, real x1, real y1)
返回一个lineargradient2d 对象,该对象表示一个线性渐变,颜色沿一条连线从起点(x0 ,y0 )过渡到终点(x1 ,y1 )。
渐变必须包含两个或更多颜色停点,这些停点表示在渐变起始点和终点之间,从 0 到 1 位置上的颜色变化。
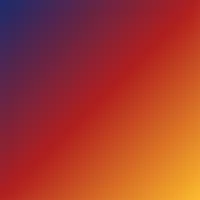 | |
另请参阅 lineargradient2d::addColorStop()、createRadialGradient()、createConicalGradient()、createPattern()、fillStyle 以及strokeStyle 。
path2d createPath2D()
返回一个新的 path2d 对象。调用此方法相当于 HTML canvas 中的“new Path2D()”命令。
path2d createPath2D(path2d path)
返回一个新的 path2d 对象,其中包含path 的副本。调用此方法相当于 HTML canvas 中的“new Path2D(path)”命令。
path2d createPath2D(string svgPath)
返回一个新的 path2d 对象,其内容为svgPath 。调用此方法等同于 HTML canvas 中的“new Path2D(d)”命令。
imagepattern2d createPattern(Image image, string repetition)
返回一个imagepattern2d 对象,该对象使用给定的图像,并按照“repeat”参数指定的方向进行重复。
image 参数必须是有效的 Image 项目或已加载的图片网址。如果没有图片数据,此函数将抛出 INVALID_STATE_ERR 异常。
repetition 的有效值包括:
| 常量 | 描述 |
|---|---|
"repeat" | 双向 |
"repeat-x | 仅水平 |
"repeat-y" | 仅垂直 |
"no-repeat" | 均不 |
如果重复参数为空或为 null,则使用值“repeat”。
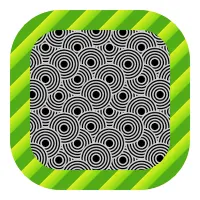 | |
另请参阅 strokeStyle 和fillStyle 。
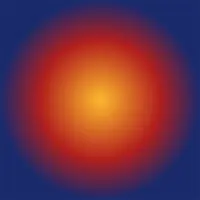
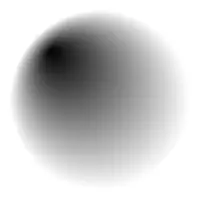
radialgradient2d createRadialGradient(real x0, real y0, real r0, real x1, real y1, real r1)
返回一个radialgradient2d 对象,该对象表示一个径向渐变,该渐变沿由起始圆(原点为(x0,y0),半径为r0 )和终点圆(原点为(x1,y1),半径为r1 )所定义的锥面进行绘制。
由于只有 4 个参数,这些参数被用作 (x, y, r0, r1),其中内圆和外圆的圆心位置相同。
 | |
 | |
另请参阅 radialgradient2d::addColorStop(),createLinearGradient(),createConicalGradient(),createPattern(),fillStyle 以及strokeStyle 。
transform2d createTransform2D()
返回一个新的 transform2d 对象,初始化为单位矩阵。
另请参阅 ` getTransform()`。
void drawBoxShadow(boxshadow2d shadow)
绘制给定的框shadow 。阴影将根据shadow 中定义的位置、大小、颜色、模糊等属性进行渲染。无需在此方法之前调用beginPath()。
| |
另请参阅 createBoxShadow()。
void drawImage(variant image, real dx, real dy)
在画布上 (dx,dy) 位置绘制给定的image 。 注意:image 类型可以是Image项,也可以是图像URL。当作为Image项提供时,如果图像尚未完全加载,此方法将不进行绘制。当作为URL字符串提供时,应先调用Canvas项的Canvas2D::loadImage()方法加载图像。此绘制操作受当前上下文剪切路径的限制。
 | |
另请参阅 Image、Canvas2D::loadImage 、Canvas2D::isImageLoaded 、Canvas2D::imageLoaded ,以及W3C 2D 上下文标准中关于 drawImage 的说明。
void drawImage(variant image, real dx, real dy, real dw, real dh)
这是一个重载函数。将给定的项目作为image 绘制到画布上,坐标为(dx,dy),宽度为dw ,高度为dh 。
 | |
另请参阅 Image、Canvas2D::loadImage()、Canvas2D::isImageLoaded 、Canvas2D::imageLoaded 以及W3C 2D 上下文标准中关于 drawImage 的说明。
void drawImage(variant image, real sx, real sy, real sw, real sh, real dx, real dy, real dw, real dh)
这是一个重载函数。将给定的项目以image 的格式,从源点(sx,sy)、源宽度sw 、源高度sh 绘制到画布上,位置为(dx,dy),宽度为dw ,高度为dh 。
 | |
另请参阅 Image、Canvas2D::loadImage()、Canvas2D::isImageLoaded 、Canvas2D::imageLoaded ,以及W3C 2D 上下文标准中关于 drawImage 的说明。
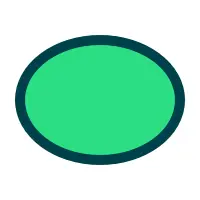
void ellipse(real centerX, real centerY, real radiusX, real radiusY)
创建一个新的椭圆形子路径,其中心位于 (centerX,centerY),半轴长分别为radiusX 和radiusY 。
 | |
void ellipseRect(real x, real y, real width, real height)
在矩形内创建一个新的椭圆形子路径:x 、y 、width 、height 。该椭圆将覆盖矩形区域。
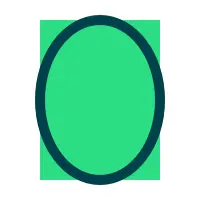 | |
注意:此 方法与QtQuick::Context2D::ellipse() 对应
void fill()
使用当前的填充样式和填充规则填充当前路径。
 | |
另请参阅 fillStyle 、fillRule 以及W3C 2D 上下文标准中关于填充的部分。
void fill(string fillRule)
使用当前填充样式和填充规则fillRule 填充当前路径。
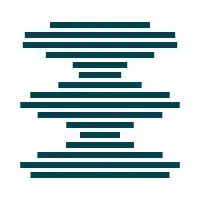
void fill(path2d path, int pathGroup)
使用当前的填充样式和填充规则填充path ,并将结果归入可选的pathGroup 中。当路径包含更多命令且大部分内容静态不变时,通过QCanvasPath 进行绘制是最佳选择。
当pathGroup 为-1 时,路径不会在GPU端被缓存。这是默认行为。若需请求缓存路径数据,请传入一个大于或等于0 的值。有关使用路径缓存组的更多信息,请参阅QCanvasPath 文档。
无需在此方法之前调用beginPath()。
 | |
void fill(path2d path, string fillRule, int pathGroup)
使用当前填充样式并采用fillRule ,填充path 。缓存组参数pathGroup 为可选。
另请参阅 fillStyle 、fillRule 和path2d 。
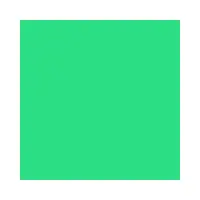
void fillRect(real x, real y, real width, real height)
在指定位置(x 、y )绘制一个填充矩形,其大小为width 、height 。
注意:此方法 仅为方便起见。若需填充多个矩形,建议使用rect()。
 | |
另请参阅 fillStyle 。
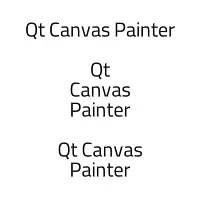
void fillText(text, x, y, maxWidth)
在指定位置(x ,y )绘制字符串text ,并采用当前的textAlign 和textBaseline 。若要使文本换行显示为多行,请使用textWrapMode 将文本换行模式设置为默认值"nowrap" 以外的其他选项。可选参数maxWidth 的默认值为0 。这意味着,例如当设置为"wordwrap" 时,文本将按单词进行换行。将maxWidth 参数设置为所需的行宽(单位为像素)。
 | |
另请参阅 font 、textAlign 、textBaseline 以及textWrapMode 。
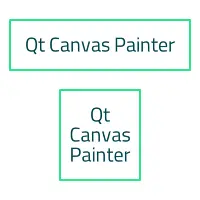
void fillText(text, x, y, width, height)
在矩形(x 、y 、width 、height )内部绘制字符串text ,并使用当前的textAlign 和textBaseline 。rect参数的宽度将作为maxWidth使用。
使用此方法绘制文本时,通常建议将文本基线设置为TextBaseline::Top 或TextBaseline::Middle 。
 | |
另请参阅 font 、textAlign 、textBaseline 以及textWrapMode 。
transform2d getTransform()
返回当前的变换矩阵。
另请参阅 setTransform()。
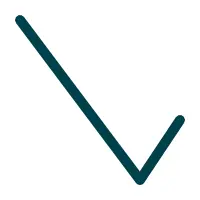
void lineTo(real x, real y)
从当前位置到坐标为 (x,y) 的点绘制一条直线。
 | |
object measureText(text)
返回一个具有width 属性的对象,该属性的值等同于在当前字体中调用QFontMetricsF::horizontalAdvance()并传入给定的text 。
void moveTo(real x, real y)
创建一个新的子路径,其端点位于 (x,y)。
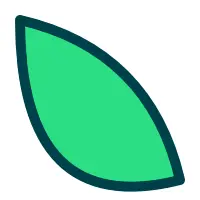
void quadraticCurveTo(real cpx, real cpy, real x, real y)
添加一条二次贝塞尔曲线段,起点为路径的最后一点,经过一个控制点(cpx ,cpy ),终点为指定点(x ,y )。
 | |
另请参阅 W3C 2D 上下文标准中关于 quadraticCurveTo 的说明。
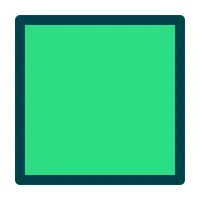
void rect(real x, real y, real width, real height)
在坐标x 、y 处创建一个新的矩形子路径,其尺寸为width 、height 。
 | |
void removePathGroup(int pathGroup)
从绘图器缓存中移除pathGroup 。此后,若对pathGroup 调用fill()或stroke(),将重新生成路径并将其写入组缓存。
注意: 通常无需调用此方法 ,因为路径会在绘图器的析构函数中被移除。仅在不再需要pathGroup 时,或例如当路径中的命令数量远少于以往且需要缩小缓冲区大小时,才应使用此方法来减少内存占用。
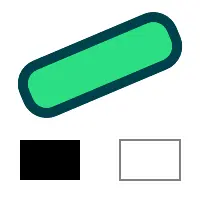
void reset()
将当前绘图器的状态重置为默认值。
注意:此 方法与 HTML canvas 2D 上下文中的 reset() 方法不同,因此不会在视觉上清空画布缓冲区。
 | |
void resetClipping()
重置并禁用剪切功能。
另请参阅 setClipRect()。
void resetTransform()
将变换矩阵重置为默认值(相当于调用setTransform (1 、0 、0 、1 、0 、0 ))。
另请参阅 transform()、setTransform() 以及reset()。
void restore()
弹出并恢复当前的渲染状态。因此,之前保存的状态将被恢复。如果尚未调用save() 且状态栈为空,调用此方法将不执行任何操作。
另请参阅 save()。
void rotate(real angle)
将当前坐标系顺时针旋转angle 。
角度以弧度为单位。
 | |
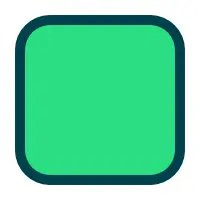
void roundRect(real x, real y, real width, real height, real radius)
在坐标x 、y 处创建一个新的圆角矩形子路径,其尺寸为width 、height 。圆角半径为radius 。
 | |
void roundRect(real x, real y, real width, real height, real radiusTopLeft, real radiusTopRight, real radiusBottomRight, real radiusBottomLeft)
在位置x 、y 处创建一个新的圆角矩形子路径,其尺寸为width 、height 。每个角的圆角半径可以不同,具体参数为radiusTopLeft 、radiusTopRight 、radiusBottomRight 、radiusBottomLeft 。
 | |
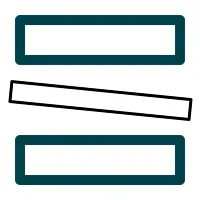
void save()
将当前渲染状态压入并保存到状态栈中。必须使用对应的 `restore()` 方法来恢复该状态。
注意: 当前路径 不属于绘图状态的一部分。可以通过调用beginPath()方法重置路径。
 | |
另请参阅 restore()。
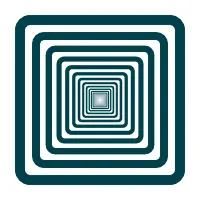
void scale(real scale)
将当前坐标系按scale 的比例进行缩放。x 和 y 坐标均按相同比例缩放。
 | |
void scale(real sx, real sy)
通过将缩放因子乘以当前变换矩阵,来增大或减小画布网格中每个单元格的大小。sx 是水平方向的缩放因子,sy 是垂直方向的缩放因子。
以下代码将画布上绘制的对象的水平尺寸扩大一倍,同时将其垂直尺寸缩小一半:
ctx.scale(2.0, 0.5);void setClipRect(real x, real y, real width, real height)
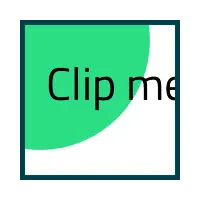
将当前剪裁矩形设置为 (x,y,width,height)。剪裁矩形将根据当前变换进行变换。
注意:裁剪 会带来一定的性能开销,因此应仅在必要时使用。
 | |
另请参阅 resetClipping()。
void setPathWinding(string winding)
将当前子路径winding 设置为“逆时针”(默认)或“顺时针”。“逆时针”绘制实心子路径,而“顺时针”绘制孔洞。
 | |
另请参阅 beginHoleSubPath() 和beginSolidSubPath()。
void setTransform(transform2d transform)
重置当前的转换,并改用transform 。
 | |
另请参阅 transform() 和getTransform()。
void setTransform(real a, real b, real c, real d, real e, real f)
将变换矩阵更改为由以下参数指定的矩阵。
直接修改变换矩阵可让您一步完成缩放、旋转和平移变换。
在绘制任何内容之前,画布上的每个点都会与该矩阵相乘。HTML Canvas 2D 上下文规范定义了变换矩阵,其中:
- a 是水平(x)方向的缩放因子
- c 是 x 方向的倾斜因子
- e 是 x 方向的平移量
- b 是 y(垂直)方向的倾斜因子
- d 是 y 方向的缩放因子
- f 是y方向的平移量
- 最后一行保持不变
缩放因子和倾斜因子均为倍数;e 和f 是坐标空间单位,与 translate(x,y) 方法中的单位相同。
另请参阅 transform()。
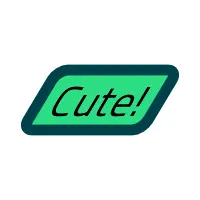
void skew(real angleX, real angleY)
将当前坐标系沿 X 轴按angleX 进行平移,沿 Y 轴按angleY 进行平移。当仅提供一个参数时,angleY 的默认值为0 。角度以弧度为单位。
 | |
void stroke()
使用当前笔画样式绘制当前路径。
 | |
另请参阅 strokeStyle 以及W3C 2D 上下文标准中关于描边的说明。
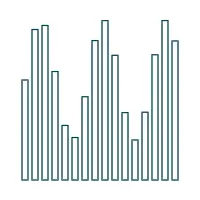
void stroke(path2d path, int pathGroup)
使用当前的描边样式对path 进行描边,并将其归入pathGroup 。当路径包含更多命令且基本保持静态时,通过QCanvasPath 进行描边是最佳选择。
当pathGroup 为-1 时,路径的渲染相关数据将不会被缓存。这是默认行为。若要请求缓存路径数据,请传入一个大于等于0 的值。有关使用路径缓存组的更多信息,请参阅QCanvasPath 文档。
无需在此方法之前调用beginPath()。
 | |
另请参阅 strokeStyle 、path2d 以及W3C 2D 绘制上下文标准中的“笔画”(stroke)相关内容。
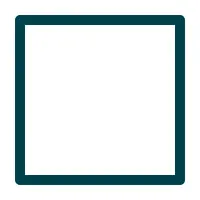
void strokeRect(real x, real y, real width, real height)
在指定位置(x 、y )绘制一个带边框的矩形,其大小为width 、height 。
注意:此功能 仅为方便起见。当需要绘制多个矩形而非单个矩形时,建议使用rect()。
 | |
另请参阅 strokeStyle 、lineWidth 、lineJoin 和miterLimit 。
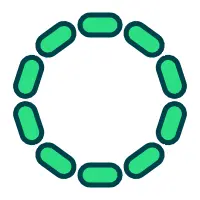
void transform(transform2d transform)
将当前坐标系与指定的transform 相乘。
 | |
另请参阅 setTransform()。
void transform(real a, real b, real c, real d, real e, real f)
将当前坐标系与指定的变换相乘(a 、b 、c 、d 、e 、f )。
该方法与setTransform() 类似,但不同之处在于,它不会替换旧的变换矩阵,而是通过与当前矩阵相乘,将给定的变换矩阵应用到当前矩阵上。
另请参阅 setTransform()。
void translate(real x, real y)
将当前坐标系沿x 和y 方向进行平移。
 | |
© 2026 The Qt Company Ltd. Documentation contributions included herein are the copyrights of their respective owners. The documentation provided herein is licensed under the terms of the GNU Free Documentation License version 1.3 as published by the Free Software Foundation. Qt and respective logos are trademarks of The Qt Company Ltd. in Finland and/or other countries worldwide. All other trademarks are property of their respective owners.
