Qt Quick Demo - Maroon in Trouble
A Qt Quick game for touch devices that uses SpriteSequence, ParticleSystem, Emitter, and Wander types to animate objects and the SoundEffect type to play sound effects.
Maroon in Trouble demonstrates QML features that are useful when developing games:
- Using custom QML types to create different screens for different stages of the game.
- Using the Item and Image types to construct a game background.
- Using the SequentialAnimation, NumberAnimation, ParticleSystem, Emitter, and Wander types to animate background objects.
- Using the Timer and Repeater types to display a countdown sequence before starting the game.
- Using a custom QML type with custom properties to construct a game board.
- Using the SpriteSequence and Sprite types to add animated objects to the game board.
- Using a custom QML type that uses the Image type with some custom properties to add a menu where the players can buy objects.
- Using custom properties with private functions to keep track of game statistics and a custom QML type to display them to the players.
- Using the State type with JavaScript functions to manage game states.
- Using the SoundEffect type to play individual sound effects depending on the object type and the action applied to the object.
- Using signal handlers to specify keyboard shortcuts for some game actions.
- Using resource files to package game resources for deployment and delivery.
Running the Example
To run the example from Qt Creator, open the Welcome mode and select the example from Examples. For more information, visit Building and Running an Example.
Adding Screens
In the Maroon in Trouble app, we use the following custom types that are each defined in a separate .qml file to create the game screens:
- NewGameScreen.qml
- GameCanvas.qml
- GameOverScreen.qml
To use the custom types, we add an import statement to the main QML file, maroon.qml that imports the folder called content where the types are located:
import "content"
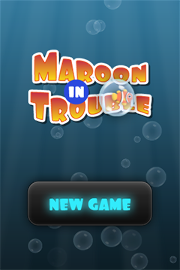
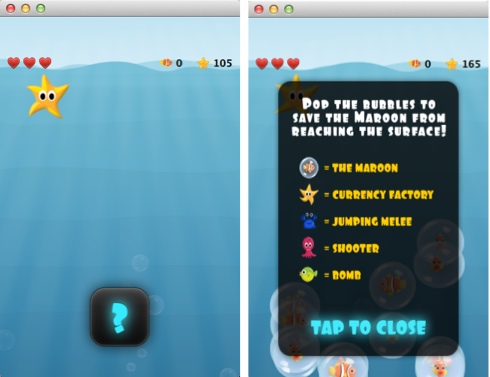
We use the screen types at different stages of the game. The NewGameScreen type is used to create the screen that appears when the players start the app. In NewGameScreen.qml, we use an Image type to create a New Game button that the players can press to start a new game.
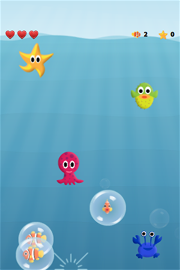
Tapping the button initiates a countdown timer that triggers the creation of the game canvas by using the GameCanvas type. Another Timer type spawns mobs of fish inside bubbles that the players must free before they reach the surface. The players can tap on the screen to open a menu where they can buy different types of weapons (melee, ranged, and bombs) to burst the bubbles.
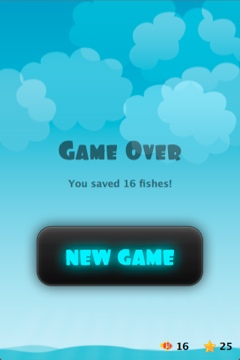
When the game finishes, a screen created by using the GameOverScreen type appears. On this screen, the players can see their score and start a new game.
The screens are all created on the same background and use some of the same images and animations.
Constructing the Background
In the maroon.qml file, we use an Item type with the id root and a fixed width and height to create a main window for the game:
Item {
    id: root
    width: 320
    height: 480
    property var gameState
    property bool passedSplash: false
We declare two custom properties for the root item, gameState and passedSplash that we will use later to manage game states.
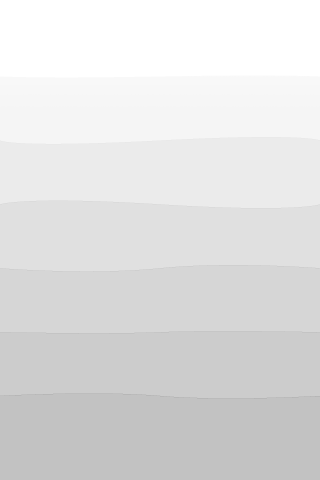
We use an Image item to display the game background image:
    Image {
        source:"content/gfx/background.png"
        anchors.bottom: view.bottom
We want to be able to load the background image only once at app startup and still use different scenes for the game screens. Therefore, background.png is three times the length of the root item and displays a scene that stretches from the bottom of sea to the sky above the horizon.
We use the anchors.bottom property to anchor the background image to the bottom of the Column layout that we use to position the screens:
    Column {
        id: view
        y: -(height - 480)
        width: 320

        GameOverScreen { gameCanvas: canvas }
We set a negative value for the y property to set the first scene at the bottom of the sea. We calculate the position by subtracting the height of a screen from the height property.
Within the column layout, we use an Item type to add objects to the background. Within the item, we use Row layout objects to position Image objects that display waves on the game canvas and the game over screen:
        Item {
            id: canvasArea
            width: 320
            height: 480

            Row {
                height: childrenRect.height
                Image {
                    id: wave
                    y: 30
                    source:"content/gfx/wave.png"
                }
                Image {
                    y: 30
                    source:"content/gfx/wave.png"
                }
    ...
            Row {
                opacity: 0.5
                Image {
                    id: wave2
                    y: 25
                    source: "content/gfx/wave.png"
                }
                Image {
                    y: 25
                    source: "content/gfx/wave.png"
                }
The second row of waves is positioned on the y axis with a slight offset to the first row. We also use the opacity property to make the waves appear lighter in color than the first two waves, which gives the background some depth.
We use Image objects to also display sunlight on the new game screen and on the game canvas:
            Image {
                source: "content/gfx/sunlight.png"
                opacity: 0.02
                y: 0
                anchors.horizontalCenter: parent.horizontalCenter
    ...
            Image {
                source: "content/gfx/sunlight.png"
                opacity: 0.04
                y: 20
                anchors.horizontalCenter: parent.horizontalCenter
We set the opacity property of the images to 0.02 and 0.04 to give some depth to the rays of sunshine. We use the y property to position the images at fixed locations on the y axis and the anchors.horizontalCenter property to center them horizontally in relation to their parent.
We use an Image type to display an image that adds a deepening shadow to the background:
            Image {
                source: "content/gfx/grid.png"
                opacity: 0.5
            }
We set the opacity property of the image to 0.5 to make the background visible behind the shadow.
To make the background more interesting, we animate some of the objects we added to it.
Animating Background Objects
We use NumberAnimation to move the waves horizontally across the screen in opposite directions and SequentialAnimation with NumberAnimation to move them up and down.
We apply the number animation to the x property of wave as a property value source to animate the x value from its current value to the -(wave.width), over 16 seconds. We set the loops property to Animation.Infinite to repeat the animation indefinitely:
NumberAnimation on x { from: 0; to: -(wave.width); duration: 16000; loops: Animation.Infinite }
We apply the sequential animation to the y property of the image as a property value source to animate the y value. We use one number animation to animate the image from the y position of two below the value of y to two above it, over 1600 milliseconds. We use another number animation to subsequently animate the image in the opposite direction, again over 1600 milliseconds. The animation is repeated indefinitely:
                SequentialAnimation on y {
                    loops: Animation.Infinite
                    NumberAnimation { from: y - 2; to: y + 2; duration: 1600; easing.type: Easing.InOutQuad }
                    NumberAnimation { from: y + 2; to: y - 2; duration: 1600; easing.type: Easing.InOutQuad }
                }
We use the easing curve of the type Easing.InOutQuad for a quintic (t^5) function to accelerate the motion until halfway and then decelerate it.
We use sequential animation and number animation to animate wave2 similarly to wave, but in the opposite direction:
                SequentialAnimation on y {
                    loops: Animation.Infinite
                    NumberAnimation { from: y + 2; to: y - 2; duration: 1600; easing.type: Easing.InOutQuad }
                    NumberAnimation { from: y - 2; to: y + 2; duration: 1600; easing.type: Easing.InOutQuad }
                }
We use sequential animation to rotate the rays of sunlight in degrees clockwise around an origin point that we set to Item.Top in the transformOrigin property. The animation is repeated indefinitely:
                transformOrigin: Item.Top
                SequentialAnimation on rotation {
                    loops: Animation.Infinite
                    NumberAnimation { from: -10; to: 10; duration: 8000; easing.type: Easing.InOutSine }
                    NumberAnimation { from: 10; to: -10; duration: 8000; easing.type: Easing.InOutSine }
                }
We use one number animation to rotate the image from -10 degrees to 10 degrees over 8 seconds and another to subsequently rotate it from 10 degrees to -10 degrees over the same duration.
We use the easing curve of the type Easing.InOutSine for a sinusoidal (sin(t)) function to accelerate the motion until halfway and then decelerate it.
We use sequential animation and number animation to animate another sunlight.png image similarly, but in the opposite direction:
                transformOrigin: Item.Top
                SequentialAnimation on rotation {
                    loops: Animation.Infinite
                    NumberAnimation { from: 10; to: -10; duration: 8000; easing.type: Easing.InOutSine }
                    NumberAnimation { from: -10; to: 10; duration: 8000; easing.type: Easing.InOutSine }
                }
For examples of using SequentialAnimation and NumberAnimation on the x and y properties and the width and height properties, see NewGameScreen.qml.
Emitting Particles
In addition to animation, we use particles to generate motion on the game screens. We use the ParticleSystem QML type in maroon.qml to make bubbles appear at the bottom of the new game screen and game canvas and slowly float towards the top on varying trajectories.
To use the ParticleSystem type, we must import Qt Quick Particles QML Types:
import QtQuick.Particles 2.0
To have the particles appear on the game background, we place the ParticleSystem type within the Image type that displays the game background:
    Image {
        source:"content/gfx/background.png"
        anchors.bottom: view.bottom

        ParticleSystem {
            id: particles
            anchors.fill: parent
In the ParticleSystem, we use an Emitter type to emit particles from the location of the emitter at the rate of two per second with the life span of 15 seconds:
            Emitter {
                width: parent.width
                height: 150
                anchors.bottom: parent.bottom
                anchors.bottomMargin: 3
                startTime: 15000

                emitRate: 2
                lifeSpan: 15000

                acceleration: PointDirection{ y: -6; xVariation: 2; yVariation: 2 }

                size: 24
                sizeVariation: 16
            }
The acceleration property uses the PointDirection type to specify random variation of the x and y coordinates, so that the bubbles appear inside a rectangular area around the emitter that is anchored to the bottom of the image.
The size property sets the base size of the particles at the beginning of their life to 24 pixels and the sizeVariation property randomly increases or decreases the particle size by up to 16 pixels, so that we get bubbles in different sizes.
As emitters have no visualization, we use the ImageParticle type to render the catch.png image at the particle location:
            ImageParticle {
                id: bubble
                anchors.fill: parent
                source: "content/gfx/catch.png"
                opacity: 0.25
            }
A Wander type applies a random trajectory to the particles, so that the bubbles follow random routes from the bottom to the top.
            Wander {
                xVariance: 25;
                pace: 25;
            }
For another example of using the ParticleSystem type, see the GameOverScreen.qml file, where an ImageParticle type is used to make clouds move across the sky.
Using Timers
In maroon.qml, we use the Timer type with a Repeater type to display a countdown sequence before using another timer to start a new game. Both timers are started simultaneously in the "gameOn" state, that is when the players tap the New Game button and passedSplash is true. This is explained in more detail in Managing Game States.
We use the countdownTimer to display the countdown sequence:
            Timer {
                id: countdownTimer
                interval: 1000
                running: root.countdown < 5
                repeat: true
                onTriggered: root.countdown++
            }
The onTriggered signal handler is called when the timer is triggered to increment the value of the countdown custom property.
We set the repeat property to true to specify that the timer is triggered at the interval of 1 second as long as the value of countdown is less than 5.
The countdown property is defined in the root item with an initial value of 10, so that countdownTimer is not running by default:
property int countdown: 10
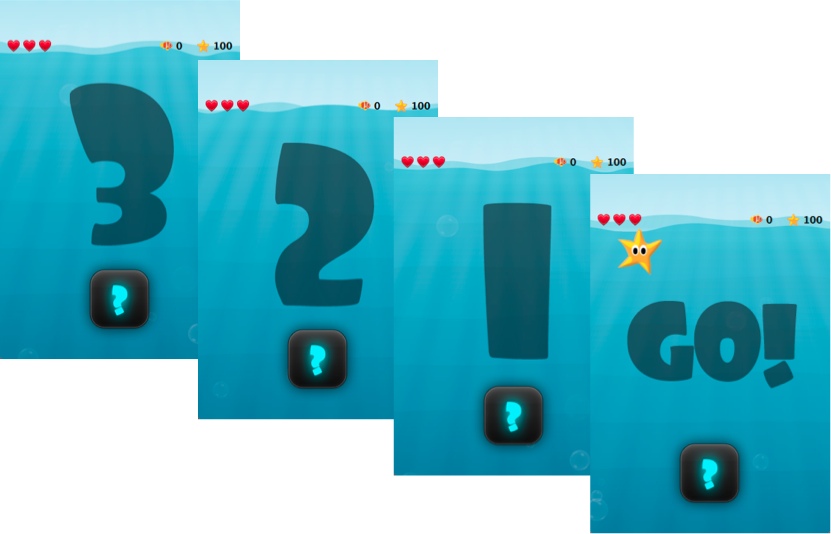
Each time the timer is triggered, an image from the countdown sequence is displayed. We use a Repeater type to instantiate the Image delegate in the context of the repeater's parent, canvasArea item, seeded with data from the model:
            Repeater {
                model: ["content/gfx/text-blank.png", "content/gfx/text-3.png", "content/gfx/text-2.png", "content/gfx/text-1.png", "content/gfx/text-go.png"]
                delegate: Image {
                    visible: root.countdown <= index
                    opacity: root.countdown == index ? 0.5 : 0.1
                    scale: root.countdown >= index ? 1.0 : 0.0
                    source: modelData
                    Behavior on opacity { NumberAnimation {} }
                    Behavior on scale { NumberAnimation {} }
                }
            }
We scale the images from 0.0 to 1.0 and use the visible property to hide the images for the previous steps as the countdown progresses. We also raise the opacity of the image that matches the current countdown step, keeping the others nearly transparent.
By animating the changes in the opacity and scale properties using a Behavior type, we achieve a countdown sequence where numbers zoom in towards the players.
Constructing the Game Board
To construct the game board, we use the GameCanvas custom type that is defined in GameCanvas.qml.
In maroon.qml, we use the GameCanvas type to display the game canvas at the position of 32 on the x axis and 20 pixels from the bottom of its parent item, canvasArea:
            GameCanvas {
                id: canvas
                anchors.bottom: parent.bottom
                anchors.bottomMargin: 20
                x: 32
                focus: true
            }
We set the focus property to true to give canvas active focus on startup.
In GameCanvas.qml, we use an Item type and define custom properties for it to create a grid of equally sized squares divided to 4 columns on 6 rows:
Item {
    id: grid

    property int squareSize: 64
    property int rows: 6
    property int cols: 4
    property Item canvas: grid
We use the custom properties to set the width and height of the grid item as the amount of columns and rows multiplied by square size:
    width: cols * squareSize
    height: rows * squareSize
We use an Image type with a MouseArea type to display a help button that the players can tap to view an image that contains instructions for playing the game:
    Image {
        id: helpButton
        z: 1010
        source: "gfx/button-help.png"
        function goAway() {
            helpMA.enabled = false;
            helpButton.opacity = 0;
        }
        function comeBack() {
            helpMA.enabled = true;
            helpButton.opacity = 1;
        }
        Behavior on opacity { NumberAnimation {} }
        MouseArea {
            id: helpMA
            anchors.fill: parent
            onClicked: {helpImage.visible = true; helpButton.visible = false;}
        }

        anchors.horizontalCenter: parent.horizontalCenter
        anchors.bottom: parent.bottom
        anchors.bottomMargin: 0
    }
We declare the goAway() private function to disable the mouse area and make the image fully transparent and a comeBack() function to enable the mouse area and make the button fully opaque. We use a Behavior type on the opacity property to apply the default number animation when the value of opacity changes.
When the players tap the help button, the onClicked signal handler is called to hide the help button by setting the helpButton.visible property to false and to show the help image by setting the helpImage.visible property to false.
We use anchoring to position the help button at the bottom center of the game canvas.
We use another Image type to display the help image:
    Image {
        id: helpImage
        z: 1010
        source: "gfx/help.png"
        anchors.fill: parent
        visible: false
        MouseArea {
            anchors.fill: parent
            onClicked: helpImage.visible = false;
        }
    }
To hide the help image when the players tap it, the onClicked signal handler within the MouseArea type is called to set the helpImage.visible property to true.
To ensure that the images are placed on top when they are visible, we set a high value for their z property.
The following sections describe how to use timers to add animated objects to the game board and how to create a menu dialog from which the players can add more objects to it.
Animating Objects on the Game Board
We use sprite animation to animate objects on the game board. The Qt Quick sprite engine is a stochastic state machine combined with the ability to chop up images containing multiple frames of an animation.
Spawning Fish
We use a Timer element with the tick() function in GameCanvas.qml to spawn mobs of fish in waves at an increasing rate, starting at 16 milliseconds:
    Timer {
        interval: 16
        running: true
        repeat: true
        onTriggered: Logic.tick()
    }
We use the MobBase custom type that is defined in MobBase.qml to animate mobs of fish that swim inside bubbles. We use an Item type with custom properties and private functions to create the fish and the bubbles and to define the actions that can be applied to them:
Item  {
    id: container
    property string name: "Fish"
    property int col: 0
    property real hp: 3
    property real damage: 1
    property real speed: 0.25
    property int rof: 30 //In ticks
    property int fireCounter: 0
    property bool dying: false
    width: parent ? parent.squareSize : 0
    height: parent ? parent.squareSize : 0
    x: col * width
    z: 1001
    function fire() { }
    ...
We use a SpriteSequence type to animate the fish:
    SpriteSequence {
        id: fishSprite
        width: 64
        height: 64
        interpolate: false
        goalSprite: ""
The SpriteSequence type renders and controls a list of animations defined by Sprite types:
        Sprite {
            name: "left"
            source: "../gfx/mob-idle.png"
            frameWidth: 64
            frameHeight: 64
            frameCount: 1
            frameDuration: 800
            frameDurationVariation: 400
            to: { "front" : 1 }
        }

        Sprite {
            name: "front"
            source: "../gfx/mob-idle.png"
            frameCount: 1
            frameX: 64
            frameWidth: 64
            frameHeight: 64
            frameDuration: 800
            frameDurationVariation: 400
            to: { "left" : 1, "right" : 1 }
        }

        Sprite {
            name: "right"
            source: "../gfx/mob-idle.png"
            frameCount: 1
            frameX: 128
            frameWidth: 64
            frameHeight: 64
            frameDuration: 800
            frameDurationVariation: 400
            to: { "front" : 1 }
        }
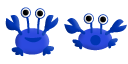
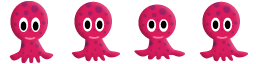
In the fishSprite sprite sequence, each sprite defines one frame within the mob-idle.png file, which shows a fish facing right, front, and left:
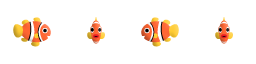
We use the frameWidth, frameHeight, and frameX properties to determine that the first 64x64-pixel square of the image is framed in the "left" sprite, the second in the "front" sprite, and the third in the "right" sprite. For each sprite, the frameCount property is set to 1 to specify that the sprite contains one frame.
We use the frameDuration and frameDurationVariation properties to specify that the duration of an animation can vary from 400 to 1200 milliseconds.
The to property specifies that the sprites have weighted transitions to other sprites. The "left" and "right" sprites always transfer to the "front" sprite. When the "front" animation finishes, the sprite engine chooses "left" or "right" randomly, but at roughly equal proportions, because they both have the weight 1.
When the fish are set free, we want them to swim away in the direction they are facing until they get off the screen. If they were facing front, we use the jumpTo method with the JavaScript Math.random() method in the die() private function to randomly jump to the "left" or "right" sprite:
    function die() {
        if (dying)
            return;
        dying = true;
        bubble.jumpTo("burst");
        if (fishSprite.currentSprite == "front")
            fishSprite.jumpTo(Math.random() > 0.5 ? "left" : "right" );
        fishSwim.start();
        Logic.gameState.score += 1;
        killedSound.play();
        bubble.scale = 0.9
        destroy(350);
    }
We then use the start() function to run a NumberAnimation that applies a number animation to the x value from its current value to -360 or 360, depending on whether the goingLeft custom property is true, in 300 milliseconds:
        NumberAnimation on x {
            id: fishSwim
            running: false
            property bool goingLeft: fishSprite.currentSprite == "right"
            to: goingLeft ? -360 : 360
            duration: 300
        }
Bursting Bubbles
We use another SpriteSequence to animate the bubbles so that they become smaller and finally burst when they are attacked by a shooter or a melee. For this effect, we set the value of the scale property to decrease by 0.2 each time the custom hp property changes:
    SpriteSequence {
        id: bubble
        width: 64
        height: 64
        scale: 0.4 + (0.2  * hp)
        interpolate: false
        goalSprite: ""
We use a Behavior type to apply a NumberAnimation when the value of scale changes. We use the Easing.OutBack easing type for a back (overshooting cubic function: (s+1)*t^3 - s*t^2) easing out curve that decelerates the motion to zero velocity in 150 milliseconds:
        Behavior on scale {
            NumberAnimation { duration: 150; easing.type: Easing.OutBack }
        }
The SpriteSequence consist of two sprites that display different images. The first sprite, "big", uses the catch.png image to display an empty bubble:
        Sprite {
            name: "big"
            source: "../gfx/catch.png"
            frameCount: 1
            to: { "burst" : 0 }
        }
We set the to property to "burst" with the weight 0 to make the second sprite, "burst", a valid goal for the jumpTo method that we use in the die() private function to jump directly to the "burst" sprite without playing the first sprite.
In the "burst" sprite, we set the frameCount property to 3 and the frameX property to 64 to specify that the animation starts at pixel location 64 and loads each frame for the duration of 200 milliseconds.
        Sprite {
            name: "burst"
            source: "../gfx/catch-action.png"
            frameCount: 3
            frameX: 64
            frameDuration: 200
        }
Within the SpriteSequence, we use SequentialAnimation with NumberAnimation to animate the transitions between the frames. To create a pulsating effect on the bubbles, we apply a sequential animation on the width property with two number animations to first increase the bubble width from * 1 to * 1.1 over 800 milliseconds and then bring it back over 1 second:
        SequentialAnimation on width {
            loops: Animation.Infinite
            NumberAnimation { from: width * 1; to: width * 1.1; duration: 800; easing.type: Easing.InOutQuad }
            NumberAnimation { from: width * 1.1; to: width * 1; duration: 1000; easing.type: Easing.InOutQuad }
        }
Similarly, we increase the bubble height from * 1 to * 1.15 over 1200 milliseconds and then bring it back over 1 second:
        SequentialAnimation on height {
            loops: Animation.Infinite
            NumberAnimation { from: height * 1; to: height * 1.15; duration: 1200; easing.type: Easing.InOutQuad }
            NumberAnimation { from: height * 1.15; to: height * 1; duration: 1000; easing.type: Easing.InOutQuad }
        }
We use yet another SpriteSequence to display the effect of squid ink on the bubbles. For more examples of using sprite sequences, see the QML files in the towers directory.
Adding Dialogs
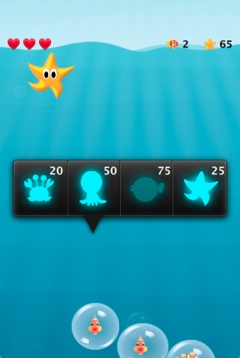
In GameCanvas.qml, we use an Image type with some custom properties to create a menu where the players can buy tower objects:
    Image {
        id: towerMenu
        visible: false
        z: 1500
        scale: 0.9
        opacity: 0.7
        property int dragDistance: 16
        property int targetRow: 0
        property int targetCol: 0
        property bool shown: false
        property bool towerExists: false
We set the visible property to false to hide the menu by default. The z property is set to 1500 to ensure that the menu is displayed in front of all other items when it is visible.
We use a MouseArea type to open or close the menu when players tap on the canvas:
    MouseArea {
        id: ma
        anchors.fill: parent
        onClicked: {
            if (towerMenu.visible)
                towerMenu.finish()
            else
                towerMenu.open(mouse.x, mouse.y)
        }
    }
We set the anchors.fill property to parent to allow the players to tap anywhere on the game canvas. We use a condition in the onClicked signal handler to call the finish() function if the menu is visible and the open() function otherwise.
The finish() function hides the menu by setting the shown custom property to false:
        function finish() {
            shown = false
        }
The open() function displays the menu at the x and y position of the mouse pointer:
        function open(xp,yp) {
            if (!grid.gameRunning)
                return
            targetRow = Logic.row(yp)
            targetCol = Logic.col(xp)
            if (targetRow == 0)
                towerMenu.y = (targetRow + 1) * grid.squareSize
            else
                towerMenu.y = (targetRow - 1) * grid.squareSize
            towerExists = (grid.towers[Logic.towerIdx(targetCol, targetRow)] != null)
            shown = true
            helpButton.goAway();
        }
If gameRunning is true, we call the JavaScript row() function to calculate the value of the targetRow custom property and the col() function to calculate the value of the targetCol custom property. If the value of targetRow equals 0, the y position is set to one square above the mouse pointer. Otherwise, it is set to one square below the mouse pointer.
We use the towerIdx() function to set the value of the towerExists custom property.
We set the shown custom property to true to show the menu and call the helpButton.goAway() function to hide the help button when the menu opens.
We use states and transitions to display the menu when the shown property is true and the gameOver property is false:
        states: State {
            name: "shown"; when: towerMenu.shown && !grid.gameOver
            PropertyChanges { target: towerMenu; visible: true; scale: 1; opacity: 1 }
        }

        transitions: Transition {
            PropertyAction { property: "visible" }
            NumberAnimation { properties: "opacity,scale"; duration: 500; easing.type: Easing.OutElastic }
        }
To set the visibility of the menu to "visible" without animating the property change, we use a PropertyAction type. We do want to animate the changes in opacity and scale, though, so we use number animation to animate the value of the scale property from 0.9 to 1 and the value of opacity property from 0.7 to 1, over 500 milliseconds. We use the Easing.outElastic easing type for an elastic (exponentially decaying sine wave) function easing curve that decelerates from zero velocity.
To construct the menu, we use a BuildButton custom type that is defined in BuildButton.qml. In GameCanvas.qml, we create one build button for each tower object that the players can buy and position them in a Row layout in front of the menu background image, dialog.png:
        x: -32
        source: "gfx/dialog.png"
        Row {
            id: buttonRow
            height: 100
            anchors.centerIn: parent
            spacing: 8
            BuildButton {
                row: towerMenu.targetRow; col: towerMenu.targetCol
                anchors.verticalCenter: parent.verticalCenter
                towerType: 1; index: 0
                canBuild: !towerMenu.towerExists
                source: "gfx/dialog-melee.png"
                onClicked: towerMenu.finish()
            }
            BuildButton {
                row: towerMenu.targetRow; col: towerMenu.targetCol
                anchors.verticalCenter: parent.verticalCenter
                towerType: 2; index: 1
                canBuild: !towerMenu.towerExists
                source: "gfx/dialog-shooter.png"
                onClicked: towerMenu.finish()
            }
            BuildButton {
                row: towerMenu.targetRow; col: towerMenu.targetCol
                anchors.verticalCenter: parent.verticalCenter
                towerType: 3; index: 2
                canBuild: !towerMenu.towerExists
                source: "gfx/dialog-bomb.png"
                onClicked: towerMenu.finish()
            }
            BuildButton {
                row: towerMenu.targetRow; col: towerMenu.targetCol
                anchors.verticalCenter: parent.verticalCenter
                towerType: 4; index: 3
                canBuild: !towerMenu.towerExists
                source: "gfx/dialog-factory.png"
                onClicked: towerMenu.finish()
            }
        }
    }
For each build button, we set the values of towerType and index custom properties that we define in BuildButton.qml.
We use the canBuild custom property to prevent players from adding tower objects in locations where tower objects already exist.
We use the source property to display the image for the tower type.
The onClicked signal handler is called to execute the finish() function that closes the menu when the players tap an enabled build button.
Build buttons are enabled when the players have enough coins to buy the tower objects. We use an Image type in BuildButton.qml to display images on the buttons:
    Image {
        id: img
        opacity: (canBuild && gameCanvas.coins >= Logic.towerData[towerType-1].cost) ? 1.0 : 0.4
    }
We use the opacity property to make the buttons appear enabled. If canBuild is true and the value of the gameCanvas.coins property is larger than or equal to the cost of a tower object, the images are fully opaque, otherwise their opacity is set to 0.4.
We use a Text type to display the cost of each tower item, as specified by the towerData variable, depending on towerType:
    Text {
        anchors.right: parent.right
        font.pointSize: 14
        font.bold: true
        color: "#ffffff"
        text: Logic.towerData[towerType - 1].cost
    }
To display a pointer on the screen at the position where the tower object will be added, we use the Image type. We use the visible property to determine whether the dialog-pointer.png image should be positioned below or above the menu. When the value of the col property equals the index and the value or the row property is not 0, we anchor the image to the bottom of its parent, BuildButton.
When the value or the row property is 0, we anchor the image to the top of BuildButton to position the pointer above the menu and use the rotation property to rotate it by 180 degrees, so that it points upwards:
    Image {
        visible: col == index && row != 0
        source: "gfx/dialog-pointer.png"
        anchors.top: parent.bottom
        anchors.topMargin: 4
        anchors.horizontalCenter: parent.horizontalCenter
    }
    Image {
        visible: col == index && row == 0
        source: "gfx/dialog-pointer.png"
        rotation: 180
        anchors.bottom: parent.top
        anchors.bottomMargin: 6
        anchors.horizontalCenter: parent.horizontalCenter
    }
Keeping Track of Game Statistics
To keep track of the game statistics, we use the InfoBar custom type (that is defined in InfoBar.qml) in maroon.qml:
InfoBar { anchors.bottom: canvas.top; anchors.bottomMargin: 6; width: parent.width }
We use the anchors.bottom and anchors.bottomMargin properties to position the info bar at 6 points from the top of the game canvas. We bind the width property of the info bar to that of its parent.
In InfoBar.qml, we use an Item type to create the info bar. Within it, we use a Row layout type to display the number of lives the players have left, the number of fish that have been saved, and the amount of coins that are available for use.
We use the anchors property to position the rows in relationship to their parent and to each other. In the first Row object, we use the anchors.left and anchors.leftMargin properties to position the heart icons at 10 points from the left border of the parent item:
Item {
    height: childrenRect.height

    // Display the number of lives
    Row {
        anchors.left: parent.left
        anchors.leftMargin: 10
        spacing: 5
        Repeater {
            id: rep
            model: Math.min(10, canvas.lives)
            delegate: Image { source: "gfx/lifes.png" }
        }
    }
We use a Repeater type with a model and a delegate to display as many hearts as the players have lives left. We use the spacing property to leave 5 pixels between the displayed icons.
In the second Row object, we use the anchors.right and anchors.rightMargin properties to position the number of fish saved at 20 points left of the third Row object that displays the number of coins available (and has the id points):
    Row {
        anchors.right: points.left
        anchors.rightMargin: 20
        spacing: 5
        Image { source: "gfx/scores.png" }
        Text {
            text: canvas.score
            font.bold: true
        }
    }

    // Display the number of coins
    Row {
        id: points
        anchors.right: parent.right
        anchors.rightMargin: 10
        spacing: 5
        Image { source: "gfx/points.png" }
        Text {
            id: pointsLabel
            text: canvas.coins
            font.bold: true
        }
    }
}
In these objects, we set spacing to 5 pixels to separate the icons from the numbers that we display by using a Text type.
In GameCanvas.qml, we define custom properties to hold the game statistics:
    property int score: 0
    property int coins: 100
    property int lives: 3
We declare the freshState() function to set the initial game statistics when a new game starts:
    function freshState() {
        lives = 3
        coins = 100
        score = 0
        waveNumber = 0
        waveProgress = 0
        gameOver = false
        gameRunning = false
        towerMenu.shown = false
        helpButton.comeBack();
    }
We use the Logic.gameState.score variable in the die() function that we declare in MobBase.qml to increase the score by one when the players set a fish free:
Logic.gameState.score += 1;
Managing Game States
In maroon.qml, we use a State type and JavaScript to switch between screens according to the game state. The logic.js file contains definitions for the functions. To use the functions in a QML file, we import logic.js as the Logic namespace in that file:
import "content/logic.js" as Logic
The base state displays the new game screen when the application starts. In addition, we call the Component.onCompleted signal handler to initialize a new game:
Component.onCompleted: gameState = Logic.newGameState(canvas);
In NewGameScreen.qml we use the onClicked signal handler to emit the startButtonClicked() signal when the players tap the New Game button:
    Image {
        source: "gfx/button-play.png"
        anchors.bottom: parent.bottom
        anchors.bottomMargin: 60
        MouseArea {
            anchors.fill: parent
            onClicked: newGameScreen.startButtonClicked()
        }
In maroon.qml, we use the onStartButtonClicked signal handler to set the passedSplash property of the root item to true:
        NewGameScreen {
            onStartButtonClicked: root.passedSplash = true
        }
We then use the passedSplash property in the when property of the gameOn state to trigger the gameStarter timer:
        State {
            name: "gameOn"; when: gameState.gameOver == false && passedSplash
            PropertyChanges { target: view; y: -(height - 960) }
            StateChangeScript { script: root.countdown = 0; }
            PropertyChanges { target: gameStarter; running: true }
        },
We also switch to the "gameOn" state and move to the y position -(height - 960) to display the game canvas.
In the gameStarter Timer object we use the onTriggered signal handler to call the startGame() function that starts a new game:
    Timer {
        id: gameStarter
        interval: 4000
        running: false
        repeat: false
        onTriggered: Logic.startGame(canvas);
    }
The game continues until gameState.gameOver is set to true and gameState.gameRunning is set to false by calling the endGame() function when the value of the gameState.lives property becomes less than or equal to 0.
In GameOverScreen.qml, we use a MouseArea type and an onClicked signal handler within an Image type to return to the game canvas when the players tap the New Game button:
    Image {
        source: "gfx/button-play.png"
        anchors.bottom: parent.bottom
        anchors.bottomMargin: 0
        MouseArea {
            anchors.fill: parent
            onClicked: gameCanvas.gameOver = false//This will actually trigger the state change in main.qml
        }
    }
The onClicked signal handler triggers a state change in maroon.qml to display the game canvas:
        State {
            name: "gameOver"; when: gameState.gameOver == true
            PropertyChanges { target: view; y: 0 }
        }
Playing Sound Effects
The app can play sound effects if the Qt Multimedia module is installed. In the SoundEffect.qml file, we proxy a SoundEffect type:
Item {
    id: container
    property QtObject effect: Qt.createQmlObject("import QtMultimedia 5.0; SoundEffect{ source: '" + container.source + "'; muted: Qt.application.state != Qt.ApplicationActive }", container);
    property url source: ""
    onSourceChanged: if (effect != null) effect.source = source;
    function play() {
        if (effect != null)
            effect.play();
    }
We add the qtHaveModule() qmake command to the app .pro file, maroon.pro, to check whether the Qt Multimedia module is present:
QT += qml quick
qtHaveModule(multimedia): QT += multimedia
In each QML file that defines a custom type used on the game canvas, we use a SoundEffect type to specify the audio file to play for that type of objects. For example, in Bomb.qml, we specify the sound that a bomb makes when it explodes:
    SoundEffect {
        id: sound
        source: "../audio/bomb-action.wav"
    }
To play the sound effect when a bomb explodes, we call the sound.play() function that we declare as a member of the private fire() function within the TowerBase custom type:
    function fire() {
        sound.play()
        sprite.jumpTo("shoot")
        animDelay.start()
    }
For more examples of playing sound effects, see the QML files in the towers directory and MobBase.qml.
Adding Keyboard Shortcuts
This is a touch example, so you should not really need to handle key presses. However, we do not want you to have to spend more time playing the game than you want to while testing it, so we use the Keys.onPressed signal handler to specify keyboard shortcuts. You can press Shift+Up to increment the values of the coins property to add coins, Shift+Left to increment the value of lives, Shift+Down to increment the value of the waveProgress property to spawn mobs of fish faster, and Shift+Right to call the endGame() function to quit the game:
    Keys.onPressed: { // Cheat Codes while Testing
        if (event.key == Qt.Key_Up && (event.modifiers & Qt.ShiftModifier))
            grid.coins += 10;
        if (event.key == Qt.Key_Left && (event.modifiers & Qt.ShiftModifier))
            grid.lives += 1;
        if (event.key == Qt.Key_Down && (event.modifiers & Qt.ShiftModifier))
            Logic.gameState.waveProgress += 1000;
        if (event.key == Qt.Key_Right && (event.modifiers & Qt.ShiftModifier))
            Logic.endGame();
    }
Packaging Resources for Deployment
To be able to run the app on mobile devices, we package all QML, JavaScript, image, and sound files into a Qt resource file (.qrc). For more information, see The Qt Resource System.
Files:
- demos/maroon/content/BuildButton.qml
- demos/maroon/content/GameCanvas.qml
- demos/maroon/content/GameOverScreen.qml
- demos/maroon/content/InfoBar.qml
- demos/maroon/content/NewGameScreen.qml
- demos/maroon/content/SoundEffect.qml
- demos/maroon/content/logic.js
- demos/maroon/content/mobs/MobBase.qml
- demos/maroon/content/towers/Bomb.qml
- demos/maroon/content/towers/Factory.qml
- demos/maroon/content/towers/Melee.qml
- demos/maroon/content/towers/Ranged.qml
- demos/maroon/content/towers/TowerBase.qml
- demos/maroon/main.cpp
- demos/maroon/maroon.pro
- demos/maroon/maroon.qml
- demos/maroon/maroon.qmlproject
- demos/maroon/maroon.qrc
Images:
- demos/maroon/content/gfx/background.png
- demos/maroon/content/gfx/bomb-action.png
- demos/maroon/content/gfx/bomb-idle.png
- demos/maroon/content/gfx/bomb.png
- demos/maroon/content/gfx/button-help.png
- demos/maroon/content/gfx/button-play.png
- demos/maroon/content/gfx/catch-action.png
- demos/maroon/content/gfx/catch.png
- demos/maroon/content/gfx/cloud.png
- demos/maroon/content/gfx/currency.png
- demos/maroon/content/gfx/dialog-bomb.png
- demos/maroon/content/gfx/dialog-factory.png
- demos/maroon/content/gfx/dialog-melee.png
- demos/maroon/content/gfx/dialog-pointer.png
- demos/maroon/content/gfx/dialog-shooter.png
- demos/maroon/content/gfx/dialog.png
- demos/maroon/content/gfx/factory-action.png
- demos/maroon/content/gfx/factory-idle.png
- demos/maroon/content/gfx/factory.png
- demos/maroon/content/gfx/grid.png
- demos/maroon/content/gfx/help.png
- demos/maroon/content/gfx/lifes.png
- demos/maroon/content/gfx/logo-bubble.png
- demos/maroon/content/gfx/logo-fish.png
- demos/maroon/content/gfx/logo.png
- demos/maroon/content/gfx/melee-action.png
- demos/maroon/content/gfx/melee-idle.png
- demos/maroon/content/gfx/melee.png
- demos/maroon/content/gfx/mob-idle.png
- demos/maroon/content/gfx/mob.png
- demos/maroon/content/gfx/points.png
- demos/maroon/content/gfx/projectile-action.png
- demos/maroon/content/gfx/projectile.png
- demos/maroon/content/gfx/scores.png
- demos/maroon/content/gfx/shooter-action.png
- demos/maroon/content/gfx/shooter-idle.png
- demos/maroon/content/gfx/shooter.png
- demos/maroon/content/gfx/sunlight.png
- demos/maroon/content/gfx/text-1.png
- demos/maroon/content/gfx/text-2.png
- demos/maroon/content/gfx/text-3.png
- demos/maroon/content/gfx/text-blank.png
- demos/maroon/content/gfx/text-gameover.png
- demos/maroon/content/gfx/text-go.png
- demos/maroon/content/gfx/wave.png
See also QML Applications.
© 2024 The Qt Company Ltd. Documentation contributions included herein are the copyrights of their respective owners. The documentation provided herein is licensed under the terms of the GNU Free Documentation License version 1.3 as published by the Free Software Foundation. Qt and respective logos are trademarks of The Qt Company Ltd. in Finland and/or other countries worldwide. All other trademarks are property of their respective owners.

