C
Qt for Android Automotive quick starter guide
This page lists all the instructions you need to get up an running with Qt for Android Automotive. It uses Qt Creator for automated setup where possible.
The video below demonstrates the process.
Download and installation
Complete the steps on the Installing Qt for Android Automotive page.
Setting up the HVAC example project
- Open the JNI or QtRO sub project in Qt Creator or Qt Design Studio. They should be in the following file locations:
path_to_qtaa_sources/examples/hvac_demos/hvac/hvac_jni/CMakeLists.txt
path_to_qtaa_sources/examples/hvac_demos/hvac/hvac_qtro/CMakeLists.txt
Note: This step is only required if you are working from a repo source package. Please disregard if you have been provided with binaries, or have installed via Qt Online Installer.
Set the build folder location outside the Qt source tree (shadow-build).
- Configure the project settings (Projects mode: Ctrl+5 by default)
- Confirm that the applicable Android Kit for your target device is chosen for compilation.
- Set the signing of the APK Build > Build Steps > build android APK. See: How to: Signing Android Packages for more information.
Note: You must use the same key used to sign the AAOS image of your target. See Creating a Platform Keystore for more information.
- Choose the target , either
qtroorjni. This can be quickly selected from the deploy widget, as shown below: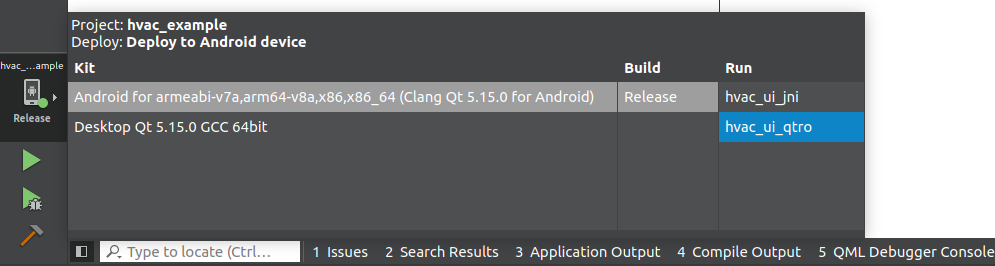
Note: Manually running
CMakefrom the HVAC project's right click context menu, will ensure code that is generated from the templates is generated before the build.
Setting up an Android virtual device in Qt Creator
Build your AOSP image and copy the image into the corresponding location in your Android SDK folder, for example:
path_to_Android_SDK/system-images/android-30/android-automotive/x86_64
Follow the steps outlined in Create an Android Virtual Device (AVD) in the Qt Creator manual, selecting your AOSP image for the AVD. Then, start your AVD to check that it has been configured correctly.
Deploy the app
Click Run. This will complete the build, open the Emulator, and install the app.
See Interacting with the HVAC Control app to see what it can do.
See also HVAC Control.
Available under certain Qt licenses.
Find out more.
