
Tutorial: Deploying Your First Project with Qt Automotive Suite
You can deploy all kinds of Qt projects to your target device: projects that you have created yourself and Qt Examples. In this tutorial, we use Qt Creator's project wizard and create a new Qt Quick project. We build the project, deploy it to a target device, and run the project.
This tutorial guides how you deploy a project to one of the reference target devices with pre-built images (see Supported Target Devices and Development Hosts). However, you should follow similar steps when you deploy to a target device where you have built an image yourself.
The tutorial assumes that you have installed the Qt Automotive Suite to your host platform and flashed it to your target device. That is, the Qt Automotive Suite Neptune 3 UI appears on the device screen when you power on the device.
Note: In Linux, ensure that you have access to plugged in devices. For more information, see Setting Up USB Access to Embedded Devices.
Preparation of Qt Kit
Qt Creator groups build and run specific settings as kits. Each kit consists of a set of values that define one environment, such as a target device, compilers, Qt version, and debugger command to use.
Before deploying, make sure that your kit contains the target device. Connect your target device to the host platform, open Qt Creator, and execute the following steps:
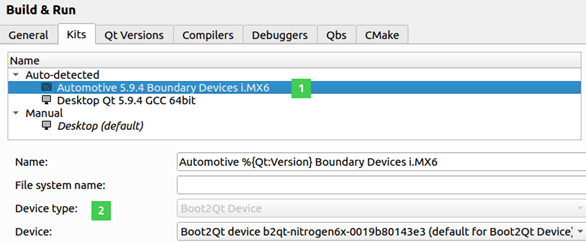
- Select Tools > Options > Build & Run > Kits.
- Select one of the predefined kits starting with Automotive... that matches the type of your device (1).
- Select the appropriate device in the Device field (2).
- Select OK.
Troubleshooting: Device Is Not Found
When your target device is connected to the host platform, Qt Creator should automatically detect it and the device should appear in the kit's Device field. If it does not appear, you can try if replugging the device or rebooting the host platform helps.
Creating New Qt Quick Project
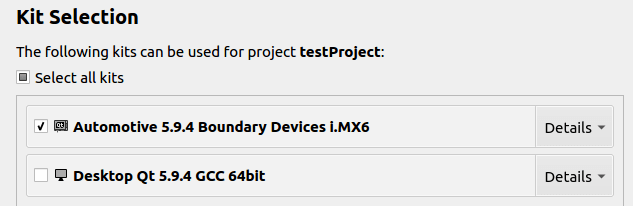
Create a new Qt Quick project with the steps in Creating Qt Quick Applications. When creating the project, you can use the default values defined in the wizard pages. In the Kit Selection page, select the Qt Automotive Suite kit that matches the type of your target device. The following picture illustrates how to select the kit where the device was added in Preparation of Qt Kit:
After you complete the steps in the project wizard, the generated Qt Quick project is automatically opened in the Edit mode (1).
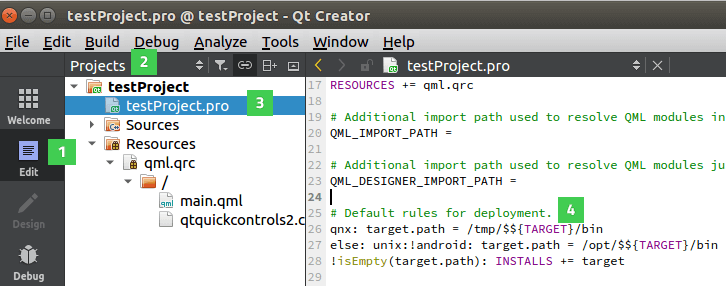
You can see the project's structure by selecting Projects in the sidebar (2). If you select the .pro file (3) under your project, you see its content in the editor view. The last lines in the .pro file (4) define the path where your project is deployed. Qt's project wizard generates the path automatically for Qt Quick projects. For other projects, you need to define the path manually in the project file. For more information, see Deploying Qt Projects with Boot to Qt.
Building, Running, and Deploying Project
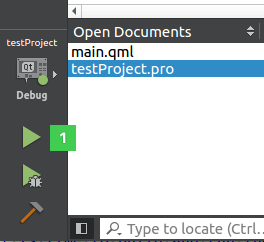
Now it is time to build and run your project, and deploy it to the target device. When you run the project, Qt Creator automatically both builds it and deploys it to the device. Thus, you just need to select the Run button (1) in Qt Creator.
Your project should now be running on the target device.
© 2020 The Qt Company Ltd. Documentation contributions included herein are the copyrights of their respective owners. The documentation provided herein is licensed under the terms of the GNU Free Documentation License version 1.3 as published by the Free Software Foundation. Qt and respective logos are trademarks of The Qt Company Ltd. in Finland and/or other countries worldwide. All other trademarks are property of their respective owners.