Qt Interface Framework Generator Climate Example
This Example shows how to use the Qt Interface Framework Generator.
Introduction
This example shows you how you can use the Qt Interface Framework Generator to build a new component. Based on a single QFace Interface Definition Language (IDL) file, the example generates:
- a shared library with the front-end code
- a back-end simulator plugin
- a demo application that shows the values in the current module
The IDL File
The IDL file used in this example represents a simplified climate control interface that contains a single interface and some enumerated types.
Let's take a look at a minimal version of the same QFace IDL file:
module Example.If.Climate 1.0;

interface ClimateControl {
    bool airConditioning;
    int fanSpeedLevel;
    RecirculationMode recirculationMode;
    AirflowDirection airflowDirections;
}

enum RecirculationMode {
    RecirculationOff = 0x0,
    RecirculationOn = 0x1,
    AutoRecirculation = 0x2
}

flag AirflowDirection {
    Windshield = 1,
    Dashboard = 2,
    Floor = 4
}
Walkthrough
First, we need to define which module we want to describe. The module acts as a namespace, because the IDL file can contain multiple interfaces.
module Example.If.Climate 1.0;
The most important part of the module is its interface definition.
interface ClimateControl {
    bool airConditioning;
    int fanSpeedLevel;
    RecirculationMode recirculationMode;
    AirflowDirection airflowDirections;
}
In this case, we define an interface named ClimateControl consisting of a few properties it should offer. Each property definition must contain at least a type and a name. Most of the basic types are built-in and can be found in the QFace IDL syntax. The last two properties are special as they use custom types, that are defined after the interface definition.
enum RecirculationMode {
    RecirculationOff = 0x0,
    RecirculationOn = 0x1,
    AutoRecirculation = 0x2
}

flag AirflowDirection {
    Windshield = 1,
    Dashboard = 2,
    Floor = 4
}
The first definition is an enum with all the values it supports, including the numeric value of each individual item. The second definition is similar, but using the flag type.
Comments and Annotations
Compared to the minimal IDL we saw in the previous section, the full IDL file contains a lot of comments and annotations.
Comments starting with /** define documentation statements and can be converted into documentation markup like QDoc or Doxygen, by the generation template.
Annotations
Annotations are used to add additional information to the IDL statements. They are YAML fragments that provide a key-value store. The generation template defines the supported annotations.
Here's an overview of all the annotations used in this example and what they do:
| Annotation | Description |
|---|---|
@config: {zoned: true} | Specifies that the interface supports different zones. |
@config: {qml_type: "UiClimateControl"} | Specifies the component name when used from QML. |
@config: {id: "example.interfaceframework.ClimateControl/1.0"} | Specifies the ID used to match backend plugins. |
@config_simulator: { range:[0, 50] } | Specifies a range of valid values for numerical properties. Note: The |
@config_simulator: { minimum: 0; maximum: 50 } | Specifies the minimum and maximum values for numerical properties. |
@config_simulator: { domain: ["cold", "mild", "warm" ] } | Specifies a list of valid values for properties. |
@config: {interfaceBuilder: "echoInterfaceBuilder"} | Specifies that the plugin should use a custom function to generate the backend instances. |
In addition to the IDL file, a YAML file with the same base name is used to add extra configurations. These configurations may also be added directly into the IDL file, but we choose to keep them separate for readability.
Some of these extra configurations are highlighted below:
Example.If.Climate.ClimateControl: config_simulator: zones: { left : FrontLeft, right : FrontRight, rear: Rear } | Defines the names for the supported zones. |
Example.If.Climate.ClimateControl#recirculationMode: config_simulator: default: RecirculationMode.RecirculationOff | Specifies the default value assigned to a property in the simulator back-end plugin. |
Front End Library
Now we want to use the Interface Framework Generator to generate a shared library that contains a C++ implementation of our module and its interface.
In this case, we use the frontend template, that generates a class derived from QIfAbstractZonedFeature including all the specified properties. The generated library uses the Dynamic Backend System from QtInterfaceFramework, providing an easy way to change the behavior implementations. For more details, see Back End Simulator Plugin.
To call the autogenerator for our shared library, it needs to be integrated into the build system.
CMake:
First the InterfaceFramework package needs to be found using find_package:
Afterwards we proceed to build a library and let the autogenerator extend this target with the generated source code by invoking qt6_ifcodegen_extend_target.
qt_add_library(QtIfClimateExample)

# Interface Framework Generator:
qt_ifcodegen_extend_target(QtIfClimateExample
    IDL_FILES ../example-climate.qface
    TEMPLATE frontend
)qmake:
The qmake project file needs to use the ifcodegen qmake feature. The snippet below shows how to do this:
CONFIG += ifcodegen
IFCODEGEN_SOURCES = ../example-climate.qface
By adding ifcodegen to the CONFIG variable, the ifcodegen feature file is loaded and interprets the IFCODEGEN_SOURCES variable just like the SOURCES variable in normal qmake projects.
However, activating the qmake feature using the CONFIG variable has one disadvantage: it doesn't report any errors if this feature is not available. But, you can use the following additional code to report errors:
QT_FOR_CONFIG += interfaceframework
!qtConfig(ifcodegen): error("No ifcodegen available")
The other part of the project file is a normal library setup which should work on Linux, macOS, and Windows.
Back End Simulator Plugin
Since the front-end library uses the Dynamic Backend System, we need a corresponding back-end plugin, for the library to provide some functionality. To generate a mock version of the back-end plugin called "Simulator Backend", you can use the backend_simulator template from the same IDL file as the front-end library uses the Dynamic Backend System, we need a corresponding back-end plugin, fo library. The build system integration works in the same way, but it uses a different generation template.
CMake:
A plugin is defined and extended by calling the codegenerator, this time with the backend_simulator template:
qt_add_plugin(climate_backend_simulator PLUGIN_TYPE interfaceframework)
qmake:
As we want to generate a plugin instead of a plain library, we need to instruct qmake to do so by adding plugin to the CONFIG variable.
CONFIG += ifcodegen plugin
IFCODEGEN_TEMPLATE = backend_simulator
IFCODEGEN_SOURCES = ../example-climate.qface
PLUGIN_TYPE = interfaceframework
PLUGIN_CLASS_NAME = ClimateSimulatorPlugin
For the plugin to compile correctly it needs to get the backend interface header from the previously created library. However, this header is not part of our source tree but the build tree, because it is also generated. We provide this header by adding it to the include path using the following code:
qmake:
INCLUDEPATH += $$OUT_PWD/../frontend
CMake:
target_link_libraries(climate_backend_simulator PUBLIC
    QtIfClimateExample
)
The backend_simulator template makes use of the @config_simulator annotations explained above. This means that the generated back end provides the default values defined in the annotations and checks the boundaries of new values using the minimum/maximum or range annotations.
Using the zones annotations, the generated back end provides individual values for every zone and communicates the available zones to the front-end library.
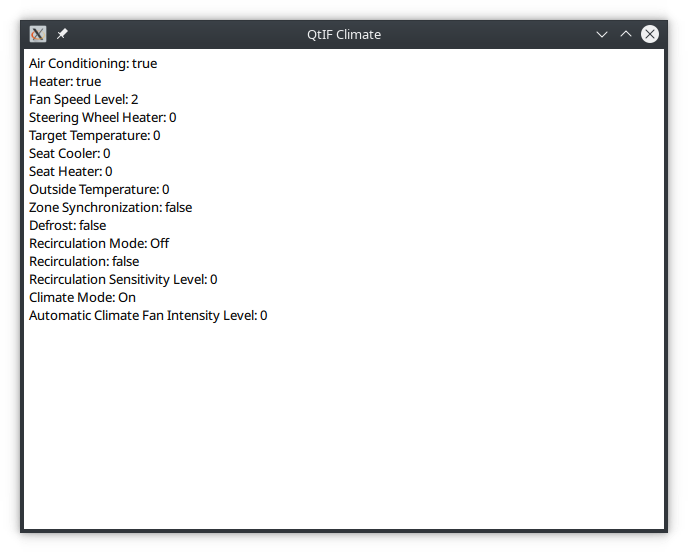
Demo Application
The demo application presents a simple QML interface with all the properties of the generated interface.
Since we do not provide a QML plugin, the application needs to link to the generated front-end library and call the ClimateModule::registerTypes and ClimateModule::registerQmlTypes methods that are generated in the module singleton to register all auto-generated interfaces and types with the QML engine.
In our QML application, we still need to import the module using the same module URI used in the IDL file. Afterwards, the interface can be instantiated like a regular QML item.
import Example.If.ClimateModule

Window {

    visible: true
    width: 640
    height: 480
    title: qsTr("QtIF Climate")

    UiClimateControl {
        id: climateCtrl
    }

    Column {
        anchors.fill: parent
        anchors.margins: 5

        Text {
            text: "Air Conditioning: " + climateCtrl.airConditioning
        }
...
Our application doesn't know about our back-end plugin, so, we need to put this plugin in the folder where our application looks for plugins. By default, Qt looks in the plugins folder within its installation directory or in the application's current working directory. For QtInterfaceFramework plugins to be found, they need to be placed within a interfaceframework sub-folder.
To make sure this is done automatically, we add the following line to our back-end build system file:
CMake:
set_target_properties(climate_backend_simulator PROPERTIES LIBRARY_OUTPUT_DIRECTORY ../interfaceframework)
qmake:
DESTDIR = ../interfaceframework
© 2024 The Qt Company Ltd. Documentation contributions included herein are the copyrights of their respective owners. The documentation provided herein is licensed under the terms of the GNU Free Documentation License version 1.3 as published by the Free Software Foundation. Qt and respective logos are trademarks of The Qt Company Ltd. in Finland and/or other countries worldwide. All other trademarks are property of their respective owners.
