
Qt Quick Exemple d'ancrages spatiaux 3D - XR
Cet exemple montre comment utiliser les ancrages spatiaux dans Qt Quick 3D XR.
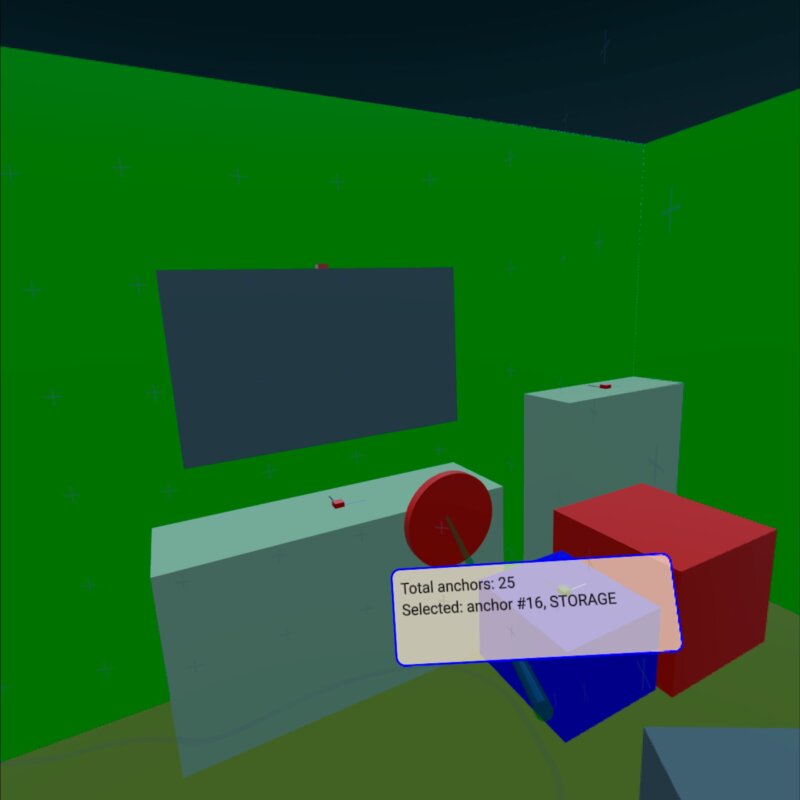
Cet exemple montre comment utiliser l'XrSpatialAnchorListModel pour afficher des objets physiques réels dans l'environnement et interagir avec eux. Il prend en charge à la fois le mode « passthrough » et le mode entièrement immersif. La structure de base suit l'exemple xr_simple.
La partie la plus importante de l’exemple est une Repeater3D sur une XrSpatialAnchorListModel. Pour chaque ancrage, nous créons un cuboïde qui remplit le volume de l’ancrage d’une couleur. Le choix de la couleur dépend de la classification de l’ancrage. Ce cuboïde est invisible en mode « passthrough ». De plus, nous visualisons la position et l’orientation de l’ancrage à l’aide de petits cuboïdes :
Repeater3D {
    id: spatialAnchors
    model: XrSpatialAnchorListModel {

    }
    delegate: Node {
        id: anchorNode
        required property XrSpatialAnchor anchor
        required property int index
        position: anchor.position
        rotation: anchor.rotation

        Model {
            pickable: true
            z: anchorNode.anchor.has3DBounds ? anchorNode.anchor.offset3D.z / 2 * 100 : 0 // Position is center of 2D surface also for 3D anchors
            scale: anchorNode.anchor.has3DBounds ? anchorNode.anchor.extent3D : Qt.vector3d(anchorNode.anchor.extent2D.x, anchorNode.anchor.extent2D.y, 0.01)
            materials: PrincipledMaterial {
                // Make anchor objects invisible in passthrough mode
                baseColor: xrView.passthroughEnabled ? Qt.rgba(0, 0, 0, 0) : anchorColor(anchor)
                alphaMode: xrView.passthroughEnabled ? PrincipledMaterial.Blend : PrincipledMaterial.Opaque
                roughness: 0.7
            }
            source: anchorNode.anchor.has3DBounds ? "#Cube" : "#Rectangle"
            property string anchorInfo: "anchor #" + anchorNode.index + ", " + anchorNode.anchor.classificationString
        }

        Model {
            // Visualize anchor orientation
            materials: PrincipledMaterial {
                baseColor: anchorNode.anchor.has3DBounds ? anchorNode.anchor.has2DBounds ? "green" : "red" : "blue"
            }
            scale: Qt.vector3d(0.05, 0.05, 0.05)
            source: "#Cube"

            Model {
                materials: PrincipledMaterial {
                    baseColor: "black"
                }
                scale: Qt.vector3d(0.1, 3, 0.1)
                source: "#Cube"
                y: 150
            }
            Model {
                materials: PrincipledMaterial {
                    baseColor: "white"
                }
                scale: Qt.vector3d(3, 0.1, 0.1)
                source: "#Cube"
                x: 150
            }
        }
        visible: anchor.has2DBounds || anchor.has3DBounds
    }
}
Le rectangle correspondant à l’ancrage est sélectionnable et dispose d’une propriété de type chaîne de caractères anchorInfo qui contient l’ classificationString de l’ancrage. Nous effectuons ensuite la sélection en fonction de la position du contrôleur. (Voir l’exemple xr_input pour plus de détails.) Si nous touchons l’un des rectangles d’ancrage, nous affichons une étiquette contenant les informations relatives à l’ancrage :
Node {
    id: labelNode
    position: rightController.position
    rotation: rightController.rotation

    property int numAnchors: spatialAnchors.count
    property string anchorInfo: "(no anchor)"

    Node {
        y: 15
        x: -15
        scale: Qt.vector3d(0.1, 0.1, 0.1)
        Rectangle {
            width: 300
            height: 100
            color: Qt.rgba(1,0.9,0.8,0.7)
            radius: 10
            border.width: 2
            border.color: "blue"
            Text {
                anchors.fill: parent
                anchors.margins: 10
                textFormat: Text.StyledText
                text: "Total anchors: " + labelNode.numAnchors + "<br>" + "Selected: " + labelNode.anchorInfo + "<br>" + "Press A to Capture/Update anchors"
            }
        }
    }
}© 2026 The Qt Company Ltd. Documentation contributions included herein are the copyrights of their respective owners. The documentation provided herein is licensed under the terms of the GNU Free Documentation License version 1.3 as published by the Free Software Foundation. Qt and respective logos are trademarks of The Qt Company Ltd. in Finland and/or other countries worldwide. All other trademarks are property of their respective owners.
