Android で Qt を使ってスプラッシュ・スクリーンを実装する
Qt for Android でスプラッシュ画面を表示する方法を紹介します。
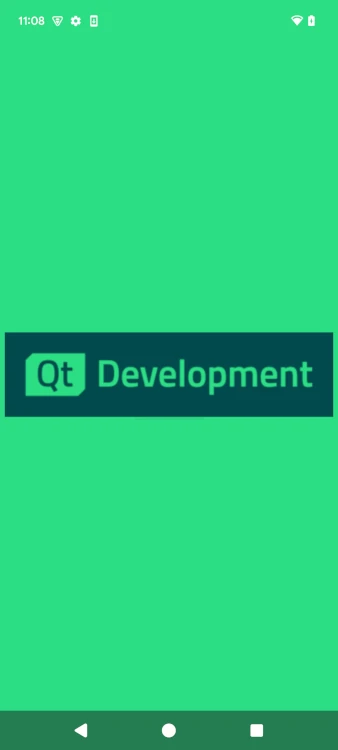
これは、Qtでスプラッシュ画面を表示する1つの方法を示す簡単な例です。アプリが起動すると、ロゴと背景色の Qt スプラッシュ画面が 2 秒間表示されます。その後、Qtのスプラッシュスクリーンはフェードアウトし、アプリのメインビューが表示されます。メイン・ビューは、シンプルなラベルと閉じるボタンで構成されています。
この例では、Androidデフォルトのスプラッシュ画面(Android 12以降)は非表示になっています。
この例は、スプラッシュ・スクリーンを示す2つの同様の例のうちの1つです。この例では、AndroidManifestフラグを使用しています。
AndroidでQtスプラッシュスクリーンを使う
Android用のQtスプラッシュスクリーンは、AndroidManifest.xmlで定義されています。Androidプロジェクト・ファイルは、手動で作成するか、Qt Creator テンプレート・ジェネレーターを使って作成します。Qt Creator テンプレート・ジェネレーターを使用して Android プロジェクト・ファイルを作成します:
- 開くProjects
- Build Steps のサブセクションに移動します。
- 開くBuild Android APK
- Application のサブセクションからCreate Templates を選択します。
            <meta-data android:name="android.app.splash_screen_drawable"
                android:resource="@drawable/qtsplashscreen"/>
            <meta-data android:name="android.app.splash_screen_sticky"
                android:value="true"/>
前のスニペットでは
- android.app.splash_screen_drawableは、Qtスプラッシュ・スクリーンを定義するリソース・ファイルを定義します。
- android.app.splash_screen_stickyは、QNativeInterface::QAndroidApplication::hideSplashScreen ()関数が呼び出されるまで、Qtスプラッシュ・スクリーンをスクリーン上に保持します。
QNativeInterface::QAndroidApplication::hideSplashScreen(2000);
Android 12以降、Androidにはデフォルトのスプラッシュ・スクリーンがあります。起動時に、アプリケーションの最初のビューが表示される前に、デフォルトのスプラッシュ画面が表示されます。スプラッシュ・スクリーンを変更する方法とAPIがあります。Androidのスプラッシュ画面を参照してください。
デフォルトでは、Androidはアプリケーションのアイコンをスプラッシュ・スクリーンに使用します。Qtアプリケーションでは、これをそのまま使用するか、アプリケーションのスプラッシュ・スクリーンとして使用するように変更するか、Qtスプラッシュ・スクリーンと組み合わせることができます。起動時のユーザー・エクスペリエンスをプラットフォーム間で一貫させるために、Androidのスプラッシュ・スクリーンを非表示にする必要があるかもしれません。そのためには、Androidのスプラッシュ・スクリーンを効果的に隠す半透明のテーマを定義します。
<?xml version="1.0" encoding="UTF-8"?>
<resources>
    <style name="splashStartTheme">
        <item name="android:windowNoTitle">true</item>
        <item name="android:windowDisablePreview">true</item>
        <item name="android:windowIsTranslucent">true</item>
    </style>
</resources>
しかし問題がある。半透明のテーマを使うと、向きの変更が効かなくなるのだ。これは、Androidビューの向きがその下にあるビューから取得されるという事実が原因です。通常、このビューはApplication Drawerで、向きを変更することはありません。そして、アクティビティ・ビューが設定された後にテーマを変更することはできないので、結局、アプリケーションは1つの向きで止まってしまいます。
回避策として、Androidのスプラッシュ画面用に半透明のテーマを持つ捨てActivityを作成することができます。このアクティビティは、私たちのアプリケーションが必要とするすべての機能を備えています。
        <activity
            android:name=".SplashActivity"
            android:exported="true"
            android:theme="@style/splashStartTheme"
            android:noHistory="true">
            <intent-filter>
                <action android:name="android.intent.action.MAIN" />
                <category android:name="android.intent.category.LAUNCHER" />
            </intent-filter>
        </activity>
Qtスプラッシュスクリーンを起動するには、Android ActivityonCreate をオーバーライドし、QtActivityを起動するIntentを使用する必要があります。
package io.qt.qtsplashscreeninandroid;

import android.app.Activity;
import android.os.Bundle;
import android.view.View;
import android.util.Log;
import android.content.Intent;
import android.view.ViewTreeObserver;
import org.qtproject.qt.android.bindings.QtActivity;

public class SplashActivity extends Activity {

    private static final String TAG = "SplashActivity";

    @Override
    public void onCreate(Bundle savedInstanceState) {
        super.onCreate(savedInstanceState);
        // Set up an OnPreDrawListener to the root view.
        final View content = findViewById(android.R.id.content);
                content.getViewTreeObserver().addOnPreDrawListener(
                        new ViewTreeObserver.OnPreDrawListener() {
            @Override
            public boolean onPreDraw() {
                Intent intent = new Intent(SplashActivity.this, QtActivity.class);
                intent.setFlags(Intent.FLAG_ACTIVITY_NO_ANIMATION);
                startActivity(intent);

                content.getViewTreeObserver().removeOnPreDrawListener(this);
                finish();
                return true;
            }
        });
    }
}
この例では、メイン・ビューには、終了ボタンがある1つのビューだけが含まれています。
import QtQuick
import QtQuick.Controls

Window {
    visible: true
    title: qsTr("Qt Splash Screen Example")
    color: "#2CDE85"

    Text {
        id: textLabel
        text: "First View"
        anchors.centerIn: parent
    }
    Button {
        id: closeButton
        anchors.horizontalCenter: parent.horizontalCenter
        anchors.top: textLabel.bottom
        anchors.topMargin: 5
        background: Rectangle {
            color: "#00414A"
            radius: 2
        }
        text: "Close"
        contentItem: Text {
            color: "#FFFFFF"
            text: closeButton.text
            horizontalAlignment: Text.AlignHCenter
            verticalAlignment: Text.AlignVCenter
        }
        onClicked: {
            Qt.callLater(Qt.quit)
        }
    }
}
© 2026 The Qt Company Ltd. Documentation contributions included herein are the copyrights of their respective owners. The documentation provided herein is licensed under the terms of the GNU Free Documentation License version 1.3 as published by the Free Software Foundation. Qt and respective logos are trademarks of The Qt Company Ltd. in Finland and/or other countries worldwide. All other trademarks are property of their respective owners.
