Qt 3D:简单的 C++ 示例
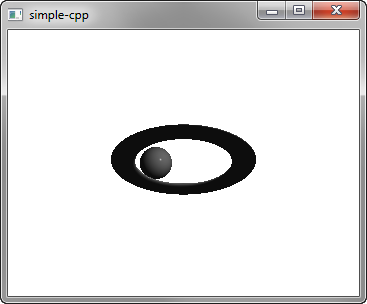
一个 C++ 应用程序,演示如何在Qt 3D.NET 环境中渲染场景。

Simple演示如何在Qt 3D 中渲染场景。
运行示例
要运行来自 Qt Creator,打开Welcome 模式,然后从Examples 中选择示例。更多信息,请参阅Qt Creator: 教程:构建并运行。
设置场景
我们在main.cpp文件中设置场景。
要使用 Q3D Core、Q3D Render、Qt 3D Input 和Qt 3D Extras 模块中的类和函数,我们必须包含这些类:
#include <Qt3DCore/QEntity>
#include <Qt3DRender/QCamera>
#include <Qt3DRender/QCameraLens>
#include <Qt3DCore/QTransform>
#include <Qt3DCore/QAspectEngine>

#include <Qt3DInput/QInputAspect>

#include <Qt3DRender/QRenderAspect>
#include <Qt3DRender/QGeometryRenderer>
#include <Qt3DExtras/QForwardRenderer>
#include <Qt3DExtras/QPhongMaterial>
#include <Qt3DExtras/QSphereMesh>
#include <Qt3DExtras/QTorusMesh>
首先,我们设置场景并指定其根实体:
我们要指定用于 Phong 渲染的材质:
Qt3DRender::QMaterial *material = new Qt3DExtras::QPhongMaterial(rootEntity);
根实体只是一个空壳,其行为由其引用的组件定义。我们指定环形实体及其网格、变换和材质组件:
    Qt3DCore::QEntity *torusEntity = new Qt3DCore::QEntity(rootEntity);
    Qt3DExtras::QTorusMesh *torusMesh = new Qt3DExtras::QTorusMesh;
    torusMesh->setRadius(5);
    torusMesh->setMinorRadius(1);
    torusMesh->setRings(100);
    torusMesh->setSlices(20);

    Qt3DCore::QTransform *torusTransform = new Qt3DCore::QTransform;
    torusTransform->setScale3D(QVector3D(1.5, 1, 0.5));
    torusTransform->setRotation(QQuaternion::fromAxisAndAngle(QVector3D(1, 0, 0), 45.0f));

    torusEntity->addComponent(torusMesh);
    torusEntity->addComponent(torusTransform);
    torusEntity->addComponent(material);
我们还指定了一个球体实体及其组件:
    Qt3DCore::QEntity *sphereEntity = new Qt3DCore::QEntity(rootEntity);
    Qt3DExtras::QSphereMesh *sphereMesh = new Qt3DExtras::QSphereMesh;
    sphereMesh->setRadius(3);
    sphereMesh->setGenerateTangents(true);

    Qt3DCore::QTransform *sphereTransform = new Qt3DCore::QTransform;
    OrbitTransformController *controller = new OrbitTransformController(sphereTransform);
    controller->setTarget(sphereTransform);
    controller->setRadius(20.0f);

    QPropertyAnimation *sphereRotateTransformAnimation = new QPropertyAnimation(sphereTransform);
    sphereRotateTransformAnimation->setTargetObject(controller);
    sphereRotateTransformAnimation->setPropertyName("angle");
    sphereRotateTransformAnimation->setStartValue(QVariant::fromValue(0));
    sphereRotateTransformAnimation->setEndValue(QVariant::fromValue(360));
    sphereRotateTransformAnimation->setDuration(10000);
    sphereRotateTransformAnimation->setLoopCount(-1);
    sphereRotateTransformAnimation->start();

    sphereEntity->addComponent(sphereMesh);
    sphereEntity->addComponent(sphereTransform);
    sphereEntity->addComponent(material);
我们使用属性动画来制作球体变换的动画。
最后,我们将初始化一个使用Qt 3D 窗口的Qt GUI 应用程序:
int main(int argc, char* argv[])
{
    QGuiApplication app(argc, argv);
    Qt3DExtras::Qt3DWindow view;

    Qt3DCore::QEntity *scene = createScene();

    // Camera
    Qt3DRender::QCamera *camera = view.camera();
    camera->lens()->setPerspectiveProjection(45.0f, 16.0f/9.0f, 0.1f, 1000.0f);
    camera->setPosition(QVector3D(0, 0, 40.0f));
    camera->setViewCenter(QVector3D(0, 0, 0));

    // For camera controls
    Qt3DExtras::QOrbitCameraController *camController = new Qt3DExtras::QOrbitCameraController(scene);
    camController->setLinearSpeed( 50.0f );
    camController->setLookSpeed( 180.0f );
    camController->setCamera(camera);

    view.setRootEntity(scene);
    view.show();

    return app.exec();
}
© 2025 The Qt Company Ltd. Documentation contributions included herein are the copyrights of their respective owners. The documentation provided herein is licensed under the terms of the GNU Free Documentation License version 1.3 as published by the Free Software Foundation. Qt and respective logos are trademarks of The Qt Company Ltd. in Finland and/or other countries worldwide. All other trademarks are property of their respective owners.

