QML 相机应用程序
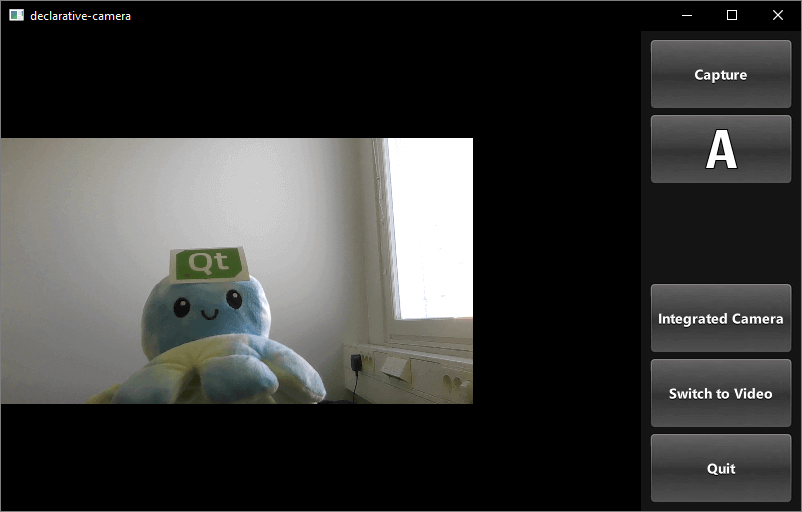
这个基于Qt Quick 的应用程序展示了如何使用 API 捕捉静态图像或视频。

该示例演示了如何通过 QML 访问相机功能。它展示了如何更改设置和捕捉图像或视频。
运行示例
要从 Qt Creator,打开Welcome 模式,并从Examples 选择示例。更多信息,请参阅Qt Creator: Tutorial:构建和运行。
应用程序结构
本示例中的大部分 QML 代码都支持用户界面。使用现有的Qt Quick 控件实现了支持需求的自定义类型。
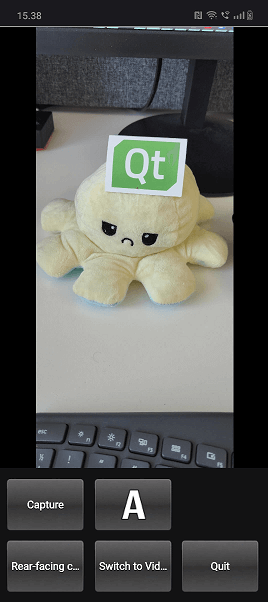
使用屏幕方向选择布局
方向和控件布局状态逻辑封装在一个单独的项目中,controlLayout :
    Item {
        id: controlLayout

        readonly property bool isMobile: Qt.platform.os === "android" || Qt.platform.os === "ios"
        readonly property bool isLandscape: Screen.desktopAvailableWidth >= Screen.desktopAvailableHeight
        property int buttonsWidth: state === "MobilePortrait" ? Screen.desktopAvailableWidth / 3.4 : 114

        states: [
            State {
                name: "MobileLandscape"
                when: controlLayout.isMobile && controlLayout.isLandscape
            },
            State {
                name: "MobilePortrait"
                when: controlLayout.isMobile && !controlLayout.isLandscape
            },
            State {
                name: "Other"
                when: !controlLayout.isMobile
            }
        ]

        onStateChanged: {
            console.log("State: " + controlLayout.state)
        }
    }
stillControls 和videoControls 对象都绑定到该 Item 的state 和buttonsWidth 属性,如stillControls 所示:
    PhotoCaptureControls {
        id: stillControls
        state: controlLayout.state
        anchors.fill: parent
        buttonsWidth: controlLayout.buttonsWidth
        buttonsPanelPortraitHeight: cameraUI.buttonsPanelPortraitHeight
        buttonsPanelWidth: cameraUI.buttonsPanelLandscapeWidth
        captureSession: captureSession
        visible: (cameraUI.state === "PhotoCapture")
        onPreviewSelected: cameraUI.state = "PhotoPreview"
        onVideoModeSelected: cameraUI.state = "VideoCapture"
        previewAvailable: imageCapture.preview.length !== 0
    }
为了支持调试,布局状态变化的信息会被记录下来。
下面是肖像布局:

可以看到state 属性最初设置为PhotoCapture 。
然后像这样定义states 本身:
    states: [
        State {
            name: "PhotoCapture"
            StateChangeScript {
                script: {
                    camera.start()
                }
            }
        },
        State {
            name: "PhotoPreview"
        },
        State {
            name: "VideoCapture"
            StateChangeScript {
                script: {
                    camera.start()
                }
            }
        },
        State {
            name: "VideoPreview"
            StateChangeScript {
                script: {
                    camera.stop()
                }
            }
        }
    ]
捕捉控件
用于捕捉的控件在PhotoCaptureControls.qml 和 VideoCaptureControls.qml 中实现。它们都基于一个FocusScope ,该 定义了控件按钮使用的通用按钮尺寸和边距,然后声明了按钮。
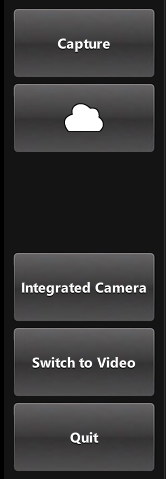
这将在屏幕右侧生成一列,从上到下包括以下控件:
Capture或Record按钮,用于启动捕捉。capture properties按钮,显示当前所选白平衡模式的图标,按下后会弹出一个窗口,显示以下选项的图标:- 闪光灯模式(如有)
- 白平衡模式
- 曝光补偿
View按钮,一旦拍摄完成。- 一个按钮,显示当前选择的拍摄设备,按下后会弹出可用设备的切换列表。
Switch To按钮,根据当前活动选择显示备用捕捉模式(视频或照片),按下后可切换模式。Quit按钮,用于退出应用程序。


图像捕捉
触发此操作的按钮在 CameraButton.qml 中定义:但它与摄像头的交互在控件类型中,让我们看看 PhotoCaptureControls:
            CameraButton {
                text: "Capture"
                implicitWidth: captureControls.buttonsWidth
                visible: captureControls.captureSession.imageCapture.readyForCapture
                onClicked: captureControls.captureSession.imageCapture.captureToFile("")
            }
缩放控件
在ZoomControl.qml 中实现的 ZoomControl 类型基于 Item,并创建了一个表示缩放级别的条形图,该条形图还可以拖动。它使用指数计算方法来确定给定grove 位置的缩放系数。
只有当 initialZoom 大于 1 时,条形图才可见,这意味着当前活动相机具有变焦功能。

Item {
    id : zoomControl
    property real currentZoom : 1
    property real maximumZoom : 1
    property real minimumZoom : 1
    signal zoomTo(real target)

    visible: zoomControl.maximumZoom > zoomControl.minimumZoom

    MouseArea {
        id : mouseArea
        anchors.fill: parent

        property real initialZoom : 0
        property real initialPos : 0

        onPressed: {
            initialPos = mouseY
            initialZoom = zoomControl.currentZoom
        }

        onPositionChanged: {
            if (pressed) {
                var target = initialZoom * Math.pow(5, (initialPos-mouseY)/zoomControl.height);
                target = Math.max(zoomControl.minimumZoom, Math.min(target, zoomControl.maximumZoom))
                zoomControl.zoomTo(target)
            }
        }
    }

    Item {
        id : bar
        x : 16
        y : parent.height/4
        width : 24
        height : parent.height/2

        Rectangle {
            anchors.fill: parent

            smooth: true
            radius: 8
            border.color: "white"
            border.width: 2
            color: "black"
            opacity: 0.3
        }

        Rectangle {
            id: groove
            x : 0
            y : parent.height * (1.0 - (zoomControl.currentZoom-zoomControl.minimumZoom) / (zoomControl.maximumZoom-zoomControl.minimumZoom))
            width: parent.width
            height: parent.height - y
            smooth: true
            radius: 8
            color: "white"
            opacity: 0.5
        }

        Text {
            id: zoomText
            anchors {
                left: bar.right; leftMargin: 16
            }
            y: Math.min(parent.height - height, Math.max(0, groove.y - height / 2))
            text: "x" + Math.round(zoomControl.currentZoom * 100) / 100
            font.bold: true
            color: "white"
            style: Text.Raised; styleColor: "black"
            opacity: 0.85
            font.pixelSize: 18
在 PhotoCaptureControls.qml 和 VideoCaptureControls.qml 中,信号zoomTo 会将所选摄像机的zoomFactor 属性设置为计算出的target 值,同时更新 ZoomControl 栏。
    ZoomControl {
        x : 0
        y : 0
        width : 100
        height: parent.height - (flashControl.visible * flashControl.height) -
                (captureControls.state === "MobilePortrait" ? buttonPaneShadow.height : 0)

        currentZoom: captureControls.captureSession.camera.zoomFactor
        maximumZoom: captureControls.captureSession.camera.maximumZoomFactor
        minimumZoom: captureControls.captureSession.camera.minimumZoomFactor
        onZoomTo: (target) => captureControls.captureSession.camera.zoomFactor = target
    }
闪光灯和电筒控制

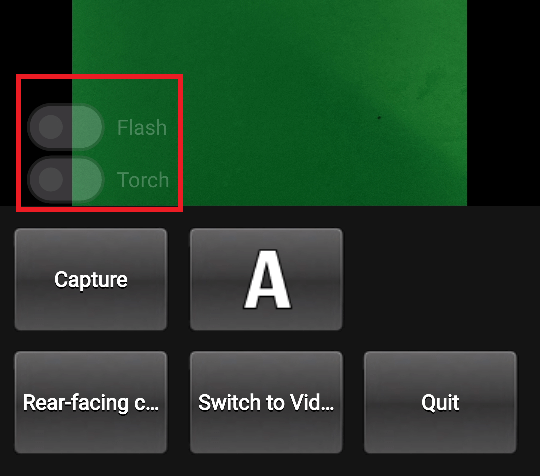
该功能在FlashControl.qml 中定义,可通过开关切换闪光灯模式选择和电筒功能。与缩放控制一样,只有当活动设备支持这些功能时,预览窗口顶部才会显示开关。
在此,我们将检查是否支持这些功能:
    property Camera cameraDevice
    property bool mIsFlashSupported: (cameraDevice && cameraDevice.active) ? cameraDevice.isFlashModeSupported(Camera.FlashOn) : false
    property bool mIsTorchSupported: (cameraDevice && cameraDevice.active) ? cameraDevice.isTorchModeSupported(Camera.TorchOn) : false
在这里,我们实现了flashModeControl 开关,它也可以直接控制相机设备。
        Switch {
            id: flashModeControl
            visible: flashControl.mIsFlashSupported
            opacity: checked ? 0.75 : 0.25
            text: "Flash"
            contentItem: Text {
                text: flashModeControl.text
                color: "white"
                leftPadding: flashModeControl.indicator.width + flashModeControl.spacing
            }

            onPositionChanged: {
                if (position) {
                    if (torchModeControl.checked)
                        torchModeControl.toggle();
                    flashControl.cameraDevice.flashMode = Camera.FlashOn

                } else {
                    flashControl.cameraDevice.flashMode = Camera.FlashOff
                }
            }
        }
火炬控制的实现方式与此类似。
© 2025 The Qt Company Ltd. Documentation contributions included herein are the copyrights of their respective owners. The documentation provided herein is licensed under the terms of the GNU Free Documentation License version 1.3 as published by the Free Software Foundation. Qt and respective logos are trademarks of The Qt Company Ltd. in Finland and/or other countries worldwide. All other trademarks are property of their respective owners.

