
Qt Quick 3D 包含 2D 内容的场景
3D 世界中的 2D 元素
Qt Quick 3D 可高效创建和渲染融合了3D与2D元素的场景。
所谓“3D-2D组合场景”是指什么?
从本质上讲,View3D 对象(在2D场景中代表3D视口)可以轻松地与Qt Quick 项(例如Rectangle、Image、Text)组合,这些项位于View3D 对象的周围、下方或上方,而 对象本身是一个Qt Quick Item 。
请看以下示例:
import QtQuick
import QtQuick3D

Rectangle {
    gradient: Gradient {
        GradientStop { position: 0; color: "steelblue" }
        GradientStop { position: 1; color: "black" }
    }
    Text {
        text: "Hello 2D World"
        font.pointSize: 32
        color: "red"
        anchors.top: parent.top
        anchors.horizontalCenter: parent.horizontalCenter
    }
    Item {
        width: 400; height: 400
        anchors.centerIn: parent
        View3D {
            anchors.fill: parent
            environment: SceneEnvironment { backgroundMode: SceneEnvironment.Color; clearColor: "lightGray" }
            PerspectiveCamera { z: 600 }
            DirectionalLight { }
            Model {
                source: "#Cube"
                materials: PrincipledMaterial { baseColor: "green"; metalness: 0.0; roughness: 0.0 }
                eulerRotation: Qt.vector3d(30, 45, 0)
            }
        }
    }
}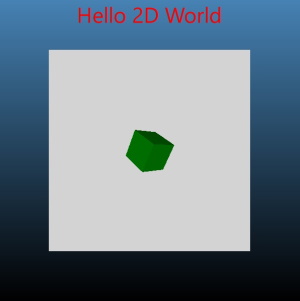
此处,3D 场景是灰色背景的区域。窗口的其余部分由 2DQt Quick 项目组成。这些项目可以与View3D 重叠,但不属于 3D 世界,不使用 3D 坐标系,也不会参与 3D 场景的变换。
如果我们希望在3D世界中放置2D对象,并且让它们真正参与所有3D变换,该怎么办?例如,能否将Rectangle 和Text 对象放置在3D世界中,使其跟随立方体的旋转,并始终位于立方体上方?

在接下来的章节中,我们将探讨如何实现这一点。虽然示例中使用了Rectangle 和Text ,但任何Qt Quick 上的内容,包括Qt Quick Controls 、Shape 、ShaderEffect 、ParticleSystem ,都可以通过这种方式使用。
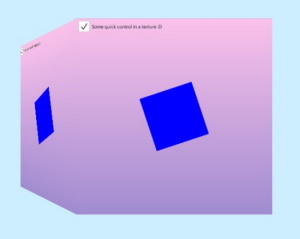
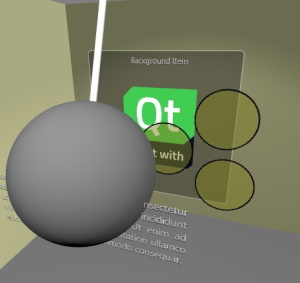
注意:还有 其他方法可以将 2D 内容与 3D 对象集成。 将 2D 项目添加到 3D 节点中,允许在 3D 世界中自由组合 2D 和 3D 对象,但无法将 2D 内容渲染在 3D 对象的表面上。如果目标是使用Qt Quick 生成的内容为 3D 网格贴图,请改用the sourceItem property 或Texture 。
| Qt Quick 用作纹理贴图的内容 | Qt Quick 3D 场景中的项目 |
|---|---|
|
|
将 2D 项目添加到 3D 节点
关键在于Object3D 能够接受Item 子对象,并以特殊方式处理它们。Object3D 是Node 类型的基类。这意味着任何Node ,以及Model 等类型,都接受Item 子对象。
从 Qt 6.0 开始,将 2D 项添加到 3D 节点中时,不再触发将 2D 内容渲染为 OpenGL 纹理、Vulkan 图像或类似格式。相反,默认模式是将 2D 项与 3D 场景的其余部分在同一渲染通道中内联渲染。 2D 项会应用所有 3D 变换。这些变换由其外层节点 `Node` 继承而来。
import QtQuick
import QtQuick3D

Rectangle {
    gradient: Gradient {
        GradientStop { position: 0; color: "steelblue" }
        GradientStop { position: 1; color: "black" }
    }
    Text {
        text: "Hello 2D World"
        font.pointSize: 32
        color: "red"
        anchors.top: parent.top
        anchors.horizontalCenter: parent.horizontalCenter
    }
    Item {
        width: 400; height: 400
        anchors.centerIn: parent
        View3D {
            anchors.fill: parent
            environment: SceneEnvironment { backgroundMode: SceneEnvironment.Color; clearColor: "lightGray" }
            PerspectiveCamera { z: 600 }
            DirectionalLight { }
            Model {
                Node {
                    y: 150
                    Rectangle {
                        anchors.horizontalCenter: parent.horizontalCenter
                        color: "white"
                        width: text3d.width
                        height: text3d.height
                        Text {
                            id: text3d
                            text: "Hello 3D World"
                            font.pointSize: 32
                        }
                    }
                }
                source: "#Cube"
                materials: PrincipledMaterial { baseColor: "green"; metalness: 0.0; roughness: 0.0 }
                eulerRotation: Qt.vector3d(30, 45, 0)
            }
        }
    }
}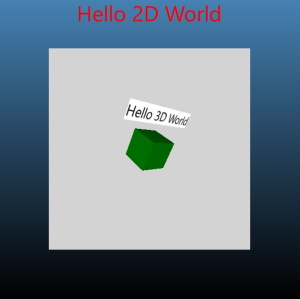
与第一个代码片段相比,Model 节点现在有一个子节点,其变换使其位置略高于立方体。150 在3D坐标系中相对于立方体的中心。
Model {
    Node {
y: 150此外还有Rectangle 项。当将其添加到Node 下方时,系统内部会跨越3D和2D世界的边界,但这对于应用程序设计者而言是透明的。 系统会自动生成一个不可见的content item ,从而使Rectangle能够引用parent 并执行锚定操作。来自该节点的3D变换将应用于整个2D子树。在示例中,这意味着旋转将与立方体的旋转保持一致。
Node {
    y: 150
    Rectangle {
        anchors.horizontalCenter: parent.horizontalCenter
2D和3D坐标系
2D 项目继续使用Qt Quick 的坐标系:Y 轴从上到下,单位以像素为单位。而 3D 节点则使用 3D 坐标系:Y 轴向上,单位以厘米为单位,并受Camera 的透视投影影响。
默认情况下,顶层元素的左上角位于节点的原点处。 这意味着,2D 子树中的顶级项目通常需要指定一个锚点,例如anchors.centerIn: parent ,或者如示例中所示,将水平中心锚定到父节点的水平中心,从而将 2D 内容在 3D 节点上水平居中。
进一步的考虑
- 虽然 2D 项目与 3D 对象内联渲染,但它们不参与照明,也不会投射阴影。
- Clipping 可能无法按预期运行,应予以避免。如果剪切对 2D 项的设计至关重要,应用程序应显式地回退到纹理渲染。这可以通过在 3D 节点下的顶级
Item中添加layer.enabled: true来实现。 - 自 Qt 6.2 起,输入会根据需要传递给 2D 项。来自指点设备的输入必须发生在已声明项的childrenRect 内。
- 虽然将 2D 项树添加到 3D 场景中的开销较小,但应避免在 3D 场景中包含过多的(数百个或更多)2D 子树,因为数量过多可能会导致内存和图形资源消耗增加。 请注意,此处指的是 3D 节点下独立的Item 子树数量,而非这些子树中 2D 项的总数。例如,上面的 QML 代码片段中仅包含一个 2D 子树。
另请参阅 Qt Quick 3D - Quick Items 示例和QQuickItem::mapFromGlobal()。
© 2026 The Qt Company Ltd. Documentation contributions included herein are the copyrights of their respective owners. The documentation provided herein is licensed under the terms of the GNU Free Documentation License version 1.3 as published by the Free Software Foundation. Qt and respective logos are trademarks of The Qt Company Ltd. in Finland and/or other countries worldwide. All other trademarks are property of their respective owners.
