Qt Quick 3D - 烘焙光贴图示例
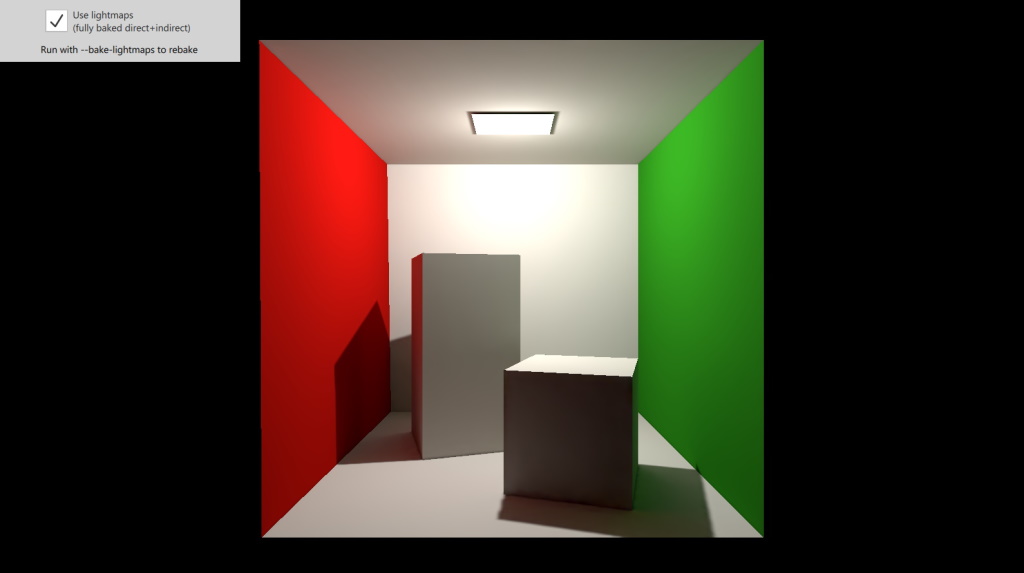
演示在 3D 场景中使用烘焙光贴图。

本示例演示了在场景中使用完全烘焙光照。结果,渲染后的场景看起来更加逼真,主要是因为增加了间接照明。在复选框的帮助下,还可以禁用光贴图,从而比较实时和完全烘焙两种方法的渲染效果。
设置灯光
场景中只有一个点光源。选中复选框后,灯光的bakeMode 设置为 Light.BakeModeAll。
PointLight {
    bakeMode: root.lightBakeMode
    y: 190
    brightness: brightnessSlider.value
    castsShadow: true
    shadowFactor: 75
    shadowBias: 20
}
将该属性设置为Light.BakeModeDisabled 以外的值有双重作用:在光贴图烘焙时,它表示灯光是光贴图场景的一部分,对其有贡献。在运行时,当正常渲染场景时,它表示灯光是完全或部分烘焙的灯光,这将导致禁用光贴图模型材质中的某些实时计算。这就是为什么复选框会切换both 灯光的烘焙模式(bakeMode)属性以及与模型对象相关的BakedLightmap 的启用属性。
设置模型
科内尔方框是一个包含 8 个子网格的模型。它被封装为盒子类型,其实例在主场景中被实例化。
Box {
    usedInBakedLighting: true
    bakedLightmap: BakedLightmap {
        enabled: root.lmEnabled
        key: "box"
    }
    scale: Qt.vector3d(100, 100, 100)
}
该模型既参与了光贴图场景,也为其制作了光贴图。前者由usedInBakedLighting 属性表示。仅凭这一点并不能确保我们的盒状微型场景获得光照贴图,只能确保它参与了光照贴图(即在计算间接光照时光线可以从模型上反弹)。
为了在烘焙过程中完全生成并存储光贴图,还需要设置一个BakedLightmap 对象,并将enabled 设置为true 。key 指定了一个唯一标识符。
对于简单的部署,应用程序可以通过 Qt XML 资源系统将生成的光线贴图(lightmaps.bin 文件)打包到可执行文件中。重新制作光贴图时,需要再次构建应用程序,以便获取更改后的文件。光贴图文件的来源在Lightmapper 中通过source 属性设置。
© 2025 The Qt Company Ltd. Documentation contributions included herein are the copyrights of their respective owners. The documentation provided herein is licensed under the terms of the GNU Free Documentation License version 1.3 as published by the Free Software Foundation. Qt and respective logos are trademarks of The Qt Company Ltd. in Finland and/or other countries worldwide. All other trademarks are property of their respective owners.

