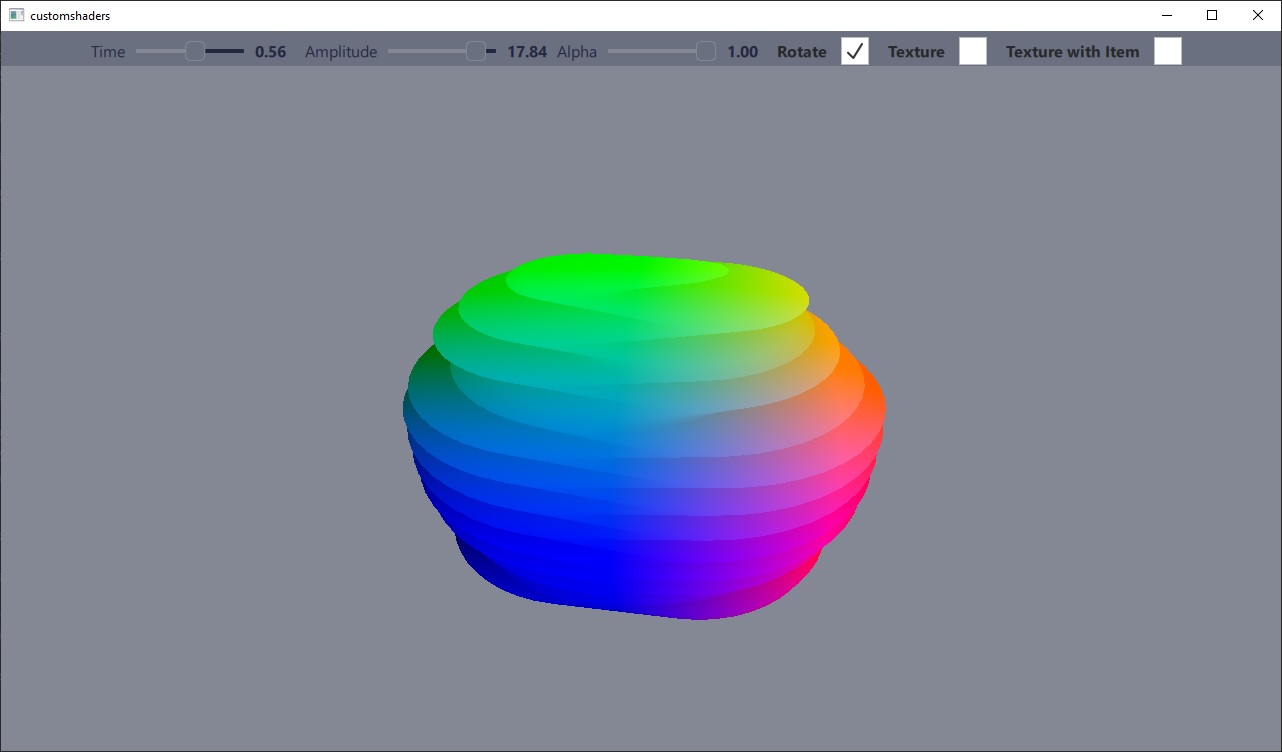
Qt Quick 3D - 自定义着色器示例
演示自定义顶点和片段着色器的使用。
本示例演示使用完全自定义顶点和片段着色器代码的材质。

本示例与custommaterials示例相对应,后者演示了另一组自定义材质:shaded 材质,其中着色器代码片段增强了PrincipledMaterial ,而不是取而代之。
实现自定义材质
在本示例中,顶点着色器根据正弦函数对网格进行变形。最终结果由与正弦函数的时间值和振幅值相对应的两个滑块控制。
片段着色器用于根据顶点的位置值为网格着色。其中包含两种片段着色器:带纹理和不带纹理。有纹理版本从图像文件或实时Qt Quick 图层中采样纹理。
该材质不参与默认的照明或阴影系统,因此其shadingMode 属性设置为CustomMaterial.Unshaded 。
有关自定义材质功能的详细说明,请参阅CustomMaterial 。
CustomMaterial {
    id: root
    property real time: 0.0
    property real amplitude: 5.0
    property real alpha: 1.0

    property bool texturing: false
    property bool textureFromItem: false
    property Item texSrc
    Texture {
        id: texFromFile
        source: "qt_logo.png"
    }
    Texture {
        id: texFromItem
        sourceItem: root.texSrc
    }
    property TextureInput tex: TextureInput {
        enabled: root.texturing
        texture: root.textureFromItem ? texFromItem : texFromFile
    }

    shadingMode: CustomMaterial.Unshaded
    sourceBlend: root.alpha < 1.0 ? CustomMaterial.SrcAlpha : CustomMaterial.NoBlend
    destinationBlend: root.alpha < 1.0 ? CustomMaterial.OneMinusSrcAlpha : CustomMaterial.NoBlend
    cullMode: CustomMaterial.BackFaceCulling

    vertexShader: "example.vert"
    fragmentShader: root.texturing ? "example_tex.frag" : "example.frag"
}
使用自定义材质
使用自定义着色器的自定义材质的使用方法与其他材质相同。着色器中的制服可通过 QML 属性绑定轻松更新。
Model {
    position: Qt.vector3d(0, 0, 0)
    NumberAnimation on eulerRotation.y {
        from: 0
        to: 360
        duration: 3000
        loops: -1
        running: control.animateRotation
    }
    scale: Qt.vector3d(2, 2, 2)
    source: "#Sphere"
    materials: [
        ExampleMaterial {
            id: exampleMaterial
            time: control.time
            amplitude: control.amplitude
            alpha: control.alpha
            texturing: control.texturing
            textureFromItem: control.textureFromItem
            texSrc: Rectangle {
                layer.enabled: true
                layer.textureMirroring: ShaderEffectSource.NoMirroring
                visible: false
                SequentialAnimation on color {
                    ColorAnimation { from: "black"; to: "yellow"; duration: 2000 }
                    ColorAnimation { from: "yellow"; to: "cyan"; duration: 1000 }
                    ColorAnimation { from: "cyan"; to: "black"; duration: 500 }
                    loops: -1
                }
                width: 512
                height: 512
                Image {
                    source: "qt_logo.png"
                    anchors.centerIn: parent
                }
            }
        }
    ]
}
© 2025 The Qt Company Ltd. Documentation contributions included herein are the copyrights of their respective owners. The documentation provided herein is licensed under the terms of the GNU Free Documentation License version 1.3 as published by the Free Software Foundation. Qt and respective logos are trademarks of The Qt Company Ltd. in Finland and/or other countries worldwide. All other trademarks are property of their respective owners.

