Qt Quick 3D - 灯光示例
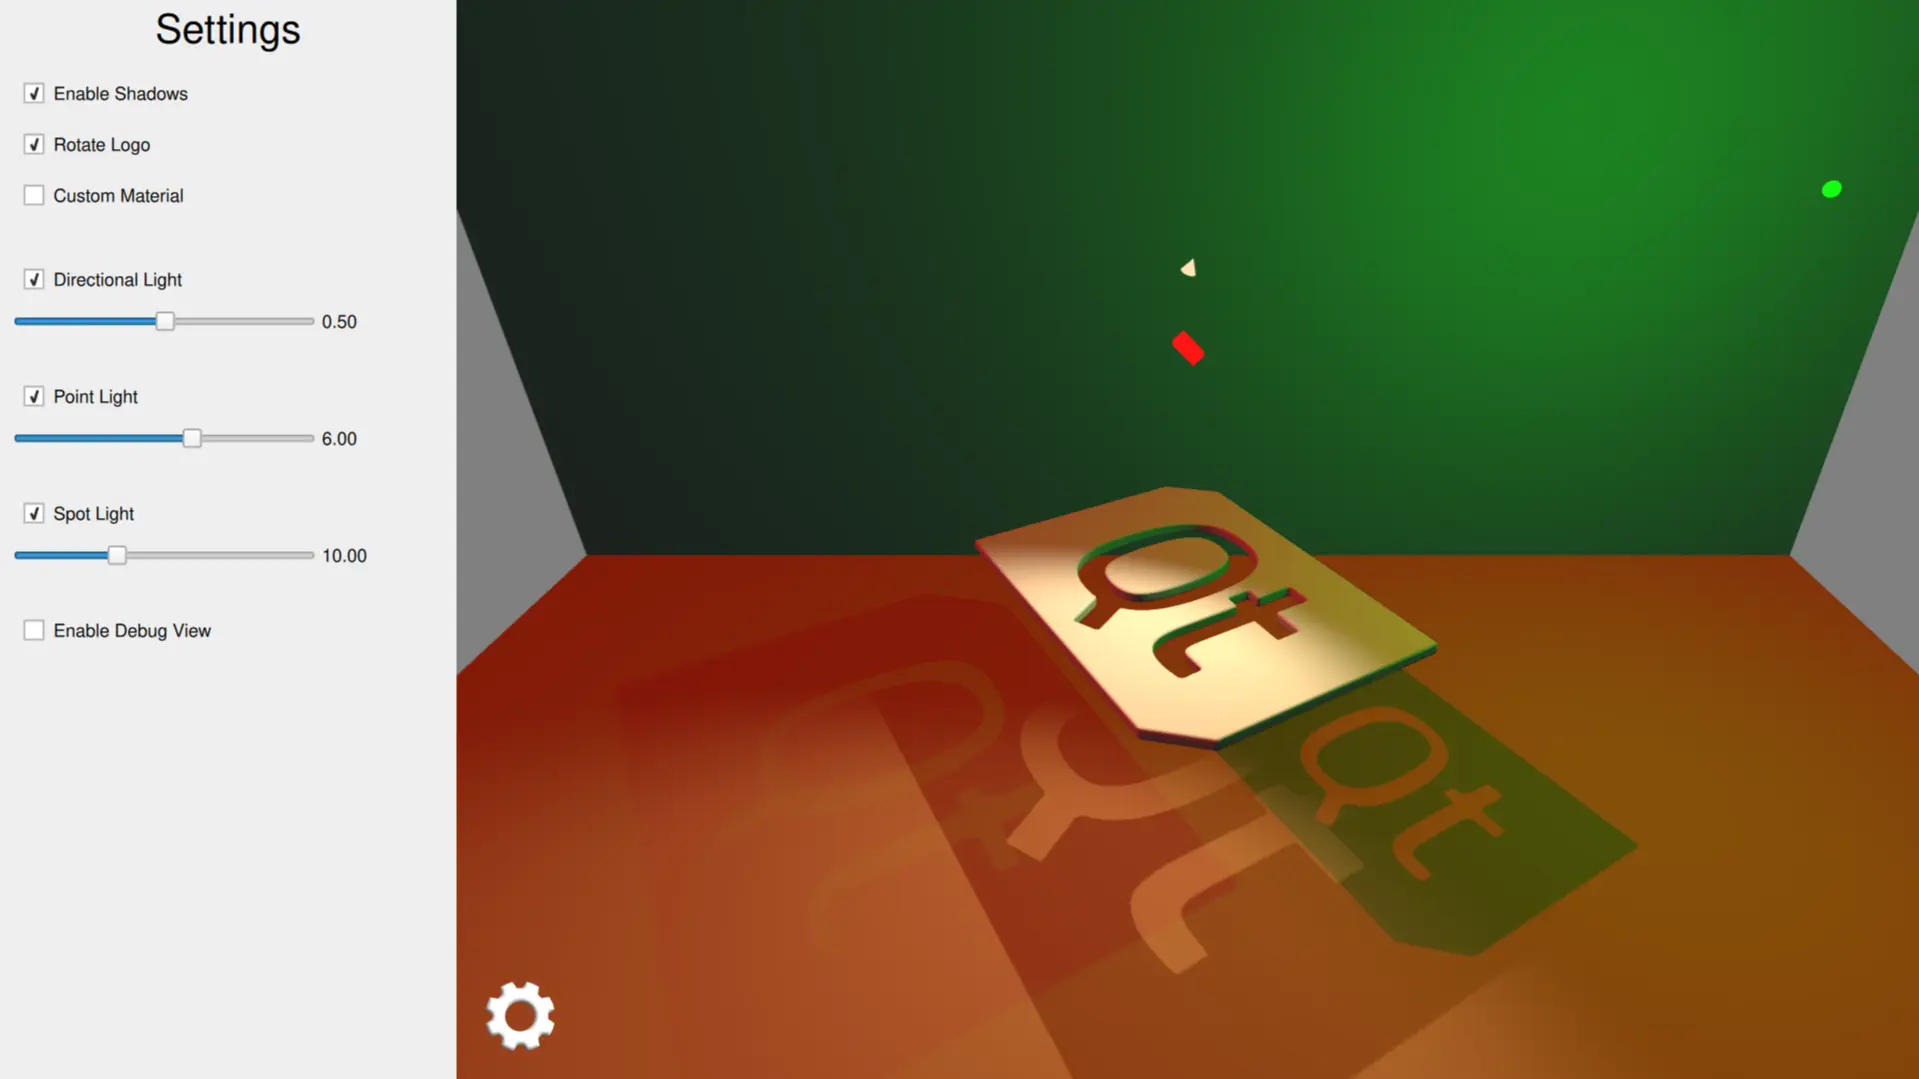
演示不同灯光类型的使用。

该示例演示了在应用程序中使用三种不同的灯光类型。
设置场景灯光
定向光
定向光从无限远处的一个无法识别的光源向一个方向发射光线。这与现实生活中阳光的作用方式类似。定向光的范围是无限的,并且不会减弱。
我们将定向光设置为发射红色,并将其围绕 x 轴旋转制作成动画。
DirectionalLight {
    id: light1
    color: Qt.rgba(1.0, 0.1, 0.1, 1.0)
    ambientColor: Qt.rgba(0.1, 0.1, 0.1, 1.0)
    position: Qt.vector3d(0, 200, 0)
    rotation: Quaternion.fromEulerAngles(-135, -90, 0)
    shadowMapQuality: Light.ShadowMapQualityVeryHigh
    pcfFactor: 1
    visible: directionalLightCheckBox.checked
    castsShadow: checkBoxShadows.checked
    brightness: directionalLightSlider.value
    SequentialAnimation on rotation {
        loops: Animation.Infinite
        QuaternionAnimation {
            to: Quaternion.fromEulerAngles(-45, -90, 0)
            duration: 2000
            easing.type: Easing.InOutQuad
        }
        QuaternionAnimation {
            to: Quaternion.fromEulerAngles(-135, -90, 0)
            duration: 2000
            easing.type: Easing.InOutQuad
        }
    }
}
点光源
点光源可以描述为一个球体,从光源中心向各个方向发出强度相同的光。这与灯泡的发光方式类似。
我们将点光源设置为发射绿色,并以 x 坐标为其位置设置动画。
PointLight {
    id: light2
    color: Qt.rgba(0.1, 1.0, 0.1, 1.0)
    ambientColor: Qt.rgba(0.1, 0.1, 0.1, 1.0)
    position: Qt.vector3d(0, 300, 0)
    shadowMapFar: 2000
    shadowMapQuality: Light.ShadowMapQualityHigh
    visible: pointLightCheckBox.checked
    castsShadow: checkBoxShadows.checked
    brightness: pointLightSlider.value
    SequentialAnimation on x {
        loops: Animation.Infinite
        NumberAnimation {
            to: 400
            duration: 2000
            easing.type: Easing.InOutQuad
        }
        NumberAnimation {
            to: 0
            duration: 2000
            easing.type: Easing.InOutQuad
        }
    }
}
点光源
点光源与点光源类似,不同之处在于它以锥形朝一个方向发光,而不是朝所有方向发光。除了圆锥角度外,聚光灯与点光源具有相同的特性和属性。
我们将聚光灯设置为发射暖色,并将其旋转 Y 坐标设置为动画。
SpotLight {
    id: light4
    color: Qt.rgba(1.0, 0.9, 0.7, 1.0)
    ambientColor: Qt.rgba(0.0, 0.0, 0.0, 0.0)
    position: Qt.vector3d(0, 250, 0)
    eulerRotation.x: -45
    shadowMapFar: 2000
    shadowMapQuality: Light.ShadowMapQualityHigh
    visible: spotLightCheckBox.checked
    castsShadow: checkBoxShadows.checked
    brightness: spotLightSlider.value
    coneAngle: 110
    innerConeAngle: 70
    PropertyAnimation on eulerRotation.y {
        loops: Animation.Infinite
        from: 0
        to: -360
        duration: 10000
    }
}
设置场景模型
首先,我们添加两个矩形模型作为场景的地板和后墙。这些模型有助于观察光影。
Model {
    source: "#Rectangle"
    y: -200
    scale: Qt.vector3d(15, 15, 15)
    eulerRotation.x: -90
    materials: [
        PrincipledMaterial {
            baseColor: Qt.rgba(0.8, 0.6, 0.4, 1.0)
        }
    ]
}
Model {
    source: "#Rectangle"
    z: -400
    scale: Qt.vector3d(15, 15, 15)
    materials: [
         PrincipledMaterial {
            baseColor: Qt.rgba(0.8, 0.8, 0.9, 1.0)
        }
    ]
}
然后,我们添加围绕 Y 轴旋转的主徽标模型。
Model {
    id: logoDefault
    source: "qtlogo.mesh"
    scale: Qt.vector3d(5000, 5000, 5000)

    property variant material
    materials: [ material ]

    property bool animate: true
    NumberAnimation on eulerRotation.y {
        running: logoDefault.animate
        loops: Animation.Infinite
        duration: 5000
        from: 0
        to: -360
    }
}
我们还添加了小立方体模型来演示每种灯光的位置和旋转。当用户访问相关滑块时,这些立方体的比例会变大。
Model {
    // Directional Light Marker
    property real size: directionalLightSlider.highlight ? 0.2 : 0.1
    source: "#Cube"
    position: light1.position
    rotation: light1.rotation
    scale: Qt.vector3d(size, size, size * 2)
    materials: [
        PrincipledMaterial {
            baseColor: light1.color
            lighting: PrincipledMaterial.NoLighting
        }
    ]
    castsShadows: false
    visible: directionalLightCheckBox.checked
}
Model {
    // Point Light Marker
    source: "#Sphere"
    position: light2.position
    rotation: light2.rotation
    property real size: pointLightSlider.highlight ? 0.2 : 0.1
    scale: Qt.vector3d(size, size, size)
    materials: [
        PrincipledMaterial {
            baseColor: light2.color
            lighting: PrincipledMaterial.NoLighting
        }
    ]
    castsShadows: false
    visible: pointLightCheckBox.checked
}
Node {
    // Spot Light Marker
    position: light4.position
    rotation: light4.rotation
    property real size: spotLightSlider.highlight ? 0.2 : 0.1
    scale: Qt.vector3d(size, size, size)
    Model {
        source: "#Cone"
        castsShadows: false
        eulerRotation.x: 90
        materials: PrincipledMaterial {
            baseColor: light4.color
            lighting: PrincipledMaterial.NoLighting
        }
    }
    visible: spotLightCheckBox.checked
}
用户可以通过设置面板启用阴影,并分别控制每种灯光的可见度和亮度。
© 2025 The Qt Company Ltd. Documentation contributions included herein are the copyrights of their respective owners. The documentation provided herein is licensed under the terms of the GNU Free Documentation License version 1.3 as published by the Free Software Foundation. Qt and respective logos are trademarks of The Qt Company Ltd. in Finland and/or other countries worldwide. All other trademarks are property of their respective owners.

