
複数の軸の使用
注:これは 「ウィジェット付きチャート ギャラリー」のサンプルの一部です。
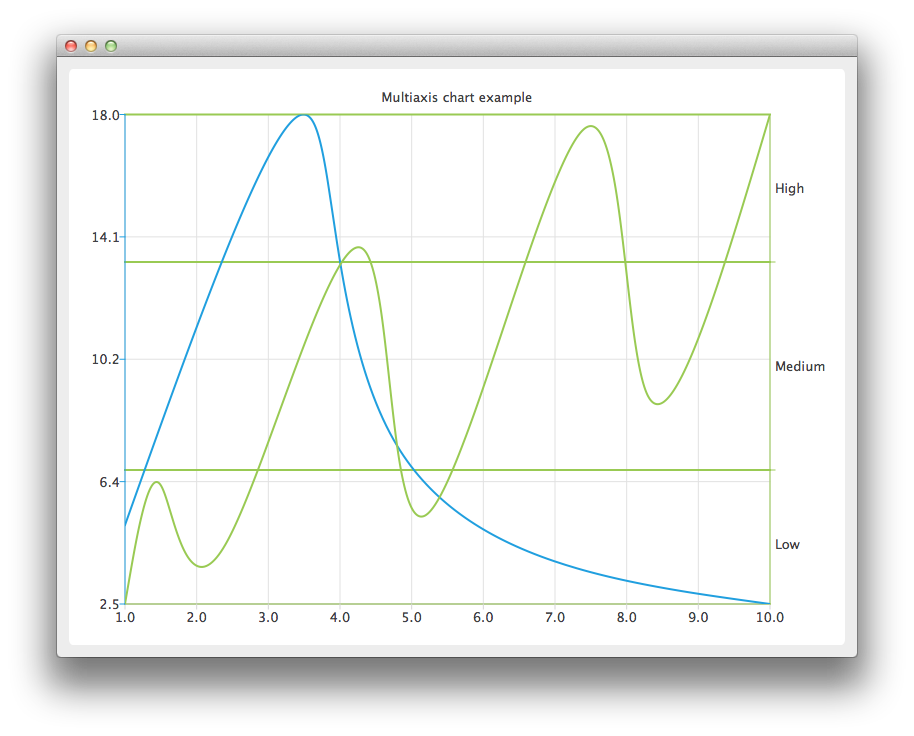
QChartインスタンスを作成し、チャートの凡例を非表示にして、タイトルを設定します。
auto chart = new QChart;
chart->legend()->hide();
chart->setTitle("Multiple Vertical Axes in Chart");
両方の系列で水平軸として使用される QValueAxis インスタンスを作成し、チャートの下部に追加します。軸は複数の系列で共有できますが、各系列には垂直軸と水平軸をそれぞれ1つずつしか設定できません。
auto axisX = new QValueAxis;
axisX->setTickCount(10);
chart->addAxis(axisX, Qt::AlignBottom);
最初のシリーズを作成し、データを追加します。 最後に、シリーズをチャートに追加します。シリーズ専用の Y 軸をインスタンス化し、チャートに追加します。その後、共通の X 軸とシリーズ固有の Y 軸の両方をシリーズに紐付けます。この例では、どの軸がどのシリーズに紐付けられているかを区別できるように、軸線の色をシリーズの色と同じに設定しています。
auto series = new QSplineSeries;
*series << QPointF(1, 5) << QPointF(3.5, 18) << QPointF(4.8, 7.5) << QPointF(10, 2.5);
chart->addSeries(series);

auto axisY = new QValueAxis;
axisY->setLinePenColor(series->pen().color());

chart->addAxis(axisY, Qt::AlignLeft);
series->attachAxis(axisX);
series->attachAxis(axisY);
同様に、別の系列を準備します。今回は、異なる軸タイプを使用します。さらに、グリッド線の色も系列の色と同じになるように設定します。
series = new QSplineSeries;
*series << QPointF(1, 0.5) << QPointF(1.5, 4.5) << QPointF(2.4, 2.5) << QPointF(4.3, 12.5)
        << QPointF(5.2, 3.5) << QPointF(7.4, 16.5) << QPointF(8.3, 7.5) << QPointF(10, 17);
chart->addSeries(series);

auto axisY3 = new QCategoryAxis;
axisY3->append("Low", 5);
axisY3->append("Medium", 12);
axisY3->append("High", 17);
axisY3->setLinePenColor(series->pen().color());
axisY3->setGridLinePen((series->pen()));

chart->addAxis(axisY3, Qt::AlignRight);
series->attachAxis(axisX);
series->attachAxis(axisY3);
QChartをパラメータとしてQChartViewオブジェクトを作成します。
createDefaultChartView(chart);© 2026 The Qt Company Ltd. Documentation contributions included herein are the copyrights of their respective owners. The documentation provided herein is licensed under the terms of the GNU Free Documentation License version 1.3 as published by the Free Software Foundation. Qt and respective logos are trademarks of The Qt Company Ltd. in Finland and/or other countries worldwide. All other trademarks are property of their respective owners.
