
Qt Quick 3D - カスタムシェーダーの例
カスタム頂点シェーダーおよびフラグメントシェーダーの使用例を示します。
このサンプルでは、頂点シェーダーとフラグメントシェーダーのコードが完全にカスタマイズされたマテリアルを使用する方法を示しています。
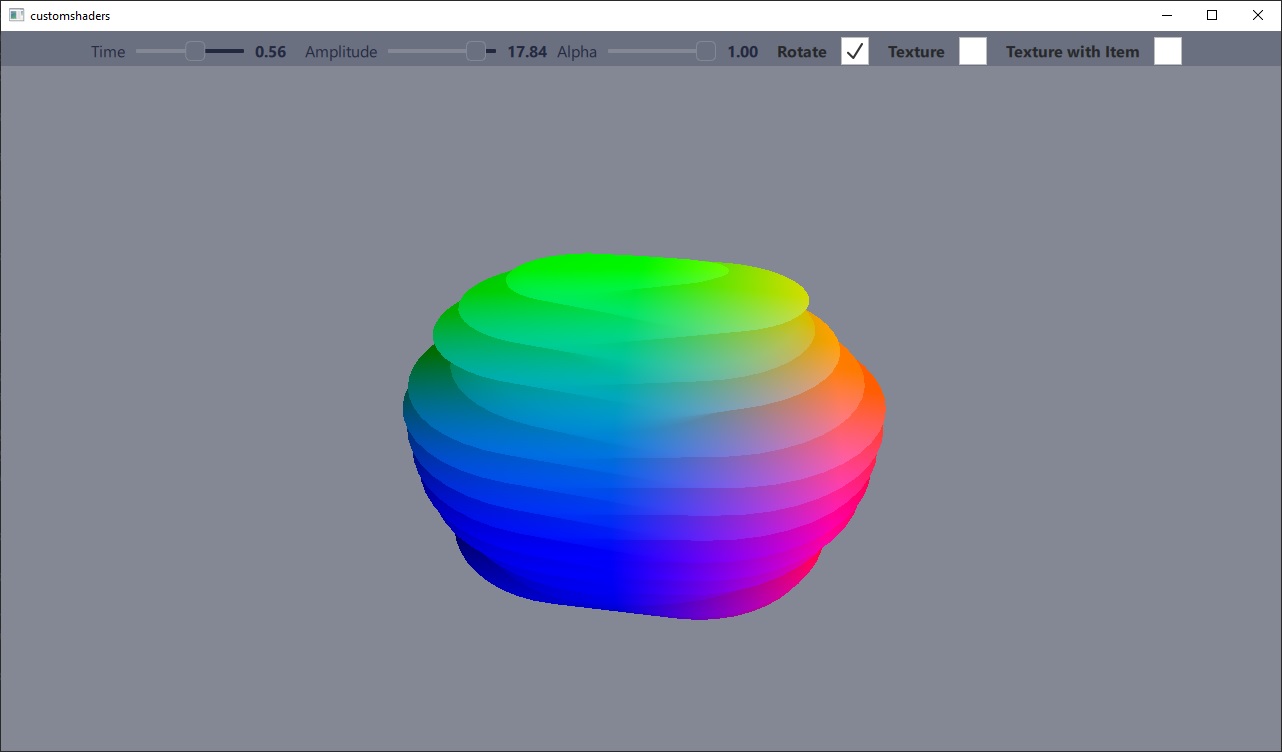
このサンプルは、「custommaterials」サンプルの対となるもので、「custommaterials」サンプルでは、別のグループのカスタムマテリアル、すなわち「shaded 」マテリアルについて解説しています。このマテリアルでは、シェーダーコードのスニペットが「PrincipledMaterial 」を置き換えるのではなく、それを拡張する形で使用されます。
カスタムマテリアルの実装
この例では、メッシュが正弦関数に従って頂点シェーダーによって変形されます。最終的な結果は、正弦関数の時間値と振幅値に対応する 2 つのスライダーによって制御されます。
フラグメントシェーダーは、頂点の座標値に基づいてメッシュに色を付けるために使用されます。2つのフラグメントシェーダーが含まれています:テクスチャ処理ありとテクスチャ処理なしのものです。テクスチャ処理ありのバージョンでは、画像ファイルまたはライブのQt Quick レイヤーから取得したテクスチャをサンプリングします。
このマテリアルはデフォルトの照明や影のシステムには参加しないため、shadingMode プロパティはCustomMaterial.Unshaded に設定されています。
カスタムマテリアルの機能に関する詳細については、「CustomMaterial 」を参照してください。
CustomMaterial {
    id: root
    property real time: 0.0
    property real amplitude: 5.0
    property real alpha: 1.0

    property bool texturing: false
    property bool textureFromItem: false
    property Item texSrc
    Texture {
        id: texFromFile
        source: "qt_logo.png"
    }
    Texture {
        id: texFromItem
        sourceItem: root.texSrc
    }
    property TextureInput tex: TextureInput {
        enabled: root.texturing
        texture: root.textureFromItem ? texFromItem : texFromFile
    }

    shadingMode: CustomMaterial.Unshaded
    sourceBlend: root.alpha < 1.0 ? CustomMaterial.SrcAlpha : CustomMaterial.NoBlend
    destinationBlend: root.alpha < 1.0 ? CustomMaterial.OneMinusSrcAlpha : CustomMaterial.NoBlend
    cullMode: CustomMaterial.BackFaceCulling

    vertexShader: "example.vert"
    fragmentShader: root.texturing ? "example_tex.frag" : "example.frag"
}
カスタムマテリアルの使用
カスタムシェーダーを使用するカスタムマテリアルは、他のマテリアルと同様に使用します。シェーダー内のユニフォームは、QMLのプロパティバインディングを通じて簡単に更新できます。
Model {
    position: Qt.vector3d(0, 0, 0)
    NumberAnimation on eulerRotation.y {
        from: 0
        to: 360
        duration: 3000
        loops: -1
        running: control.animateRotation
    }
    scale: Qt.vector3d(2, 2, 2)
    source: "#Sphere"
    materials: [
        ExampleMaterial {
            id: exampleMaterial
            time: control.time
            amplitude: control.amplitude
            alpha: control.alpha
            texturing: control.texturing
            textureFromItem: control.textureFromItem
            texSrc: Rectangle {
                layer.enabled: true
                layer.textureMirroring: ShaderEffectSource.NoMirroring
                visible: false
                SequentialAnimation on color {
                    ColorAnimation { from: "black"; to: "yellow"; duration: 2000 }
                    ColorAnimation { from: "yellow"; to: "cyan"; duration: 1000 }
                    ColorAnimation { from: "cyan"; to: "black"; duration: 500 }
                    loops: -1
                }
                width: 512
                height: 512
                Image {
                    source: "qt_logo.png"
                    anchors.centerIn: parent
                }
            }
        }
    ]
}© 2026 The Qt Company Ltd. Documentation contributions included herein are the copyrights of their respective owners. The documentation provided herein is licensed under the terms of the GNU Free Documentation License version 1.3 as published by the Free Software Foundation. Qt and respective logos are trademarks of The Qt Company Ltd. in Finland and/or other countries worldwide. All other trademarks are property of their respective owners.
