
Canvas2DContext QML Type
Canvas2D 항목에 그림을 그릴 수 있는 2D 컨텍스트를 제공합니다. 더 보기...
| Import Statement: | import QtCanvas2D |
| Since: | Qt 6.12 |
| Status: | Technology preview |
이 유형은 기술 미리보기 단계에 있으며 변경될 수 있습니다.
속성
- antialias : real
- canvas : Canvas2D
- direction : string
- fillRule : string
- fillStyle : variant
- font : string
- globalAlpha : real
- globalBrightness : real
- globalCompositeOperation : string
- globalContrast : real
- globalSaturation : real
- highQualityStroking : bool
- lineCap : string
- lineJoin : string
- lineWidth : real
- miterLimit : real
- strokeStyle : variant
- textAlign : string
- textAntialias : real
- textBaseline : string
- textLineHeight : real
- textWrapMode : string
- windingEnforce : bool
방법
- void addPath(path2d path, transform2d transform)
- void addPath(path2d path, int start, int count, transform2d transform)
- void arc(real x, real y, real radius, real startAngle, real endAngle, bool anticlockwise)
- void arcTo(real x1, real y1, real x2, real y2, real radius)
- void beginHoleSubPath()
- void beginPath()
- void beginSolidSubPath()
- void bezierCurveTo(real cp1x, real cp1y, real cp2x, real cp2y, real x, real y)
- void circle(real centerX, real centerY, real radius)
- void cleanupResources()
- void clearRect(real x, real y, real width, real height)
- void closePath()
- boxgradient2d createBoxGradient(real x, real y, real width, real height, real feather, real radius)
- boxshadow2d createBoxShadow(real x, real y, real width, real height)
- boxshadow2d createBoxShadow(real x, real y, real width, real height, real blur, string color, real radius)
- boxshadow2d createBoxShadow(real x, real y, real width, real height, real blur, string color, real radiusTopLeft, real radiusTopRight, real radiusBottomRight, real radiusBottomLeft)
- conicalgradient2d createConicalGradient(real x, real y, real angle)
- gridpattern2d createGridPattern(real x, real y, real width, real height, string lineColor, string backgroundColor, real lineWidth, real feather, real angle)
- lineargradient2d createLinearGradient(real x0, real y0, real x1, real y1)
- path2d createPath2D()
- path2d createPath2D(path2d path)
- path2d createPath2D(string svgPath)
- imagepattern2d createPattern(Image image, string repetition)
- radialgradient2d createRadialGradient(real x0, real y0, real r0, real x1, real y1, real r1)
- transform2d createTransform2D()
- void drawBoxShadow(boxshadow2d shadow)
- void drawImage(variant image, real dx, real dy)
- void drawImage(variant image, real dx, real dy, real dw, real dh)
- void drawImage(variant image, real sx, real sy, real sw, real sh, real dx, real dy, real dw, real dh)
- void ellipse(real centerX, real centerY, real radiusX, real radiusY)
- void ellipseRect(real x, real y, real width, real height)
- void fill()
- void fill(string fillRule)
- void fill(path2d path, int pathGroup)
- void fill(path2d path, string fillRule, int pathGroup)
- void fillRect(real x, real y, real width, real height)
- void fillText(text, x, y, maxWidth)
- void fillText(text, x, y, width, height)
- transform2d getTransform()
- void lineTo(real x, real y)
- object measureText(text)
- void moveTo(real x, real y)
- void quadraticCurveTo(real cpx, real cpy, real x, real y)
- void rect(real x, real y, real width, real height)
- void removePathGroup(int pathGroup)
- void reset()
- void resetClipping()
- void resetTransform()
- void restore()
- void rotate(real angle)
- void roundRect(real x, real y, real width, real height, real radius)
- void roundRect(real x, real y, real width, real height, real radiusTopLeft, real radiusTopRight, real radiusBottomRight, real radiusBottomLeft)
- void save()
- void scale(real scale)
- void scale(real sx, real sy)
- void setClipRect(real x, real y, real width, real height)
- void setPathWinding(string winding)
- void setTransform(transform2d transform)
- void setTransform(real a, real b, real c, real d, real e, real f)
- void skew(real angleX, real angleY)
- void stroke()
- void stroke(path2d path, int pathGroup)
- void strokeRect(real x, real y, real width, real height)
- void transform(transform2d transform)
- void transform(real a, real b, real c, real d, real e, real f)
- void translate(real x, real y)
상세 설명
Canvas2DContext 객체는 Canvas 항목의 getContext() 메서드를 통해 생성할 수 있습니다.
Canvas2D {
  id: canvas
  onPaint: {
     var ctx = canvas.getContext('2d');
     //...
  }
}
Context2D API는 몇 가지 향상된 기능을 포함하여 W3C Canvas 2D Context API 표준을 동일하게 구현합니다.
Context2D API는 Canvas 항목에 그림을 그리는 데 필요한 메서드와 속성을 정의하는 렌더링 컨텍스트를 제공합니다. 다음 코드는 canvas 렌더링 컨텍스트를 context 변수에 할당합니다:
var context = mycanvas.getContext("2d")다음은 Canvas2D 를 사용하여 둥근 버튼을 만드는 간단한 예제입니다.
 | |
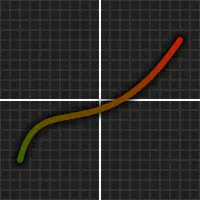
다음은 간단한 그래프를 그리는 또 다른 예제입니다.
 | |
속성 설명서
antialias : real
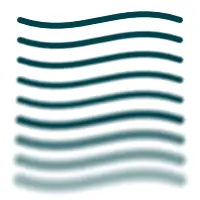
현재의 앤티앨리어싱 수준을 저장합니다. 앤티앨리어싱 수치가 높을수록 더 매끄럽게 그려집니다. 이 설정은 채우기와 선 그리기 작업에만 영향을 미치며, 이미지나 텍스트에는 적용되지 않습니다. 기본값은 1.0 이며, 최대값은 10.0 입니다.
앤티앨리어싱은 경로별로 수정할 수 있으므로, 각 획/채우기 작업 전에 설정할 수 있습니다.
 | |
textAntialias도 참조하십시오 .
canvas : Canvas2D
컨텍스트가 그리는 캔버스 항목을 보관합니다.
이 속성은 읽기 전용입니다.
direction : string
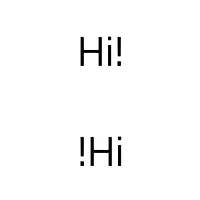
텍스트를 그리는 데 사용되는 현재 방향을 저장합니다. 가능한 값은 다음과 같습니다:
| 상수 | 설명 |
|---|---|
"inherit" | (기본값) 텍스트 방향은 ` QGuiApplication `의 `layoutDirection`에서 상속됩니다. https://doc.qt.io/qt-6/qguiapplication.html#layoutDirection-prop을 참조하십시오. |
"ltr" | 텍스트 방향은 왼쪽에서 오른쪽으로입니다. |
"rtl" | 텍스트 방향은 오른쪽에서 왼쪽으로입니다. |
"auto" | 텍스트 방향은 텍스트 문자열을 기반으로 자동으로 감지됩니다. QString::isRightToLeft()를 참조하십시오. |
기본 방향은 "inherit" 입니다.
 | |
fillRule : string
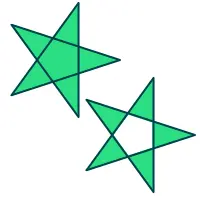
도형을 채우는 데 사용되는 현재 채우기 규칙을 저장합니다. 이 값은 규칙이 설정된 후 호출되는 모든 ` fill()` 호출에 적용됩니다. 기본 채우기 규칙은 "nonzero"
다음과 같은 채우기 규칙이 지원됩니다:
| 상수 | 설명 |
|---|---|
"nonzero" | (또는 "WindingFill") 경로는 0이 아닌 와인딩 규칙을 사용하여 채워집니다. 이 규칙을 사용하면 다음 방법을 통해 점이 도형 내부에 있는지 여부를 판단합니다. 해당 점에서 도형 바깥쪽 위치까지 수평선을 그립니다. 각 교차점에서 선의 방향이 위쪽인지 아래쪽인지 판단합니다. 와인딩 수는 각 교차점의 방향을 합산하여 결정됩니다. 이 수가 0이 아니면 해당 점은 도형 내부에 있는 것입니다. 이 채우기 모드는 대부분의 경우 닫힌 도형의 교차 영역으로도 간주될 수 있습니다. 이 모드가 기본값입니다. |
"evenodd" | (또는 "OddEvenFill") 경로는 홀수-짝수 채우기 규칙을 사용하여 채워집니다. 이 규칙을 적용할 때, 점이 도형 내부에 있는지 여부는 다음 방법을 사용하여 판단합니다. 해당 점에서 도형 바깥쪽의 한 지점까지 수평선을 그리고, 교차점의 개수를 세습니다. 교차점의 개수가 홀수이면, 해당 점은 도형 내부에 있습니다. |
 | |
fill()도 참조하십시오 .
fillStyle : variant
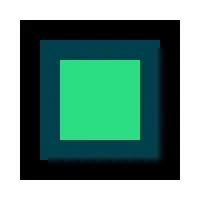
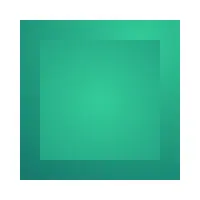
도형 채우기에 사용되는 현재 스타일을 저장합니다. 기본 채우기 스타일은 검은색 단색('#000000')입니다. 이 스타일은 CSS 색상 QML color 을 포함하는 문자열이거나 캔버스 브러시 객체일 수 있습니다. 유효하지 않은 값은 무시됩니다. 이 속성은 다음과 같은 여러 가지 색상 구문을 지원합니다:
- 'rgb(red, green, blue)' - 예: 'rgb(255, 100, 55)' 또는 'rgb(100%, 70%, 30%)'
- 'rgba(red, green, blue, alpha)' - 예: 'rgb(255, 100, 55, 1.0)' 또는 'rgb(100%, 70%, 30%, 0.5)'
- 'hsl(색상, 채도, 명도)'
- 'hsla(hue, saturation, lightness, alpha)'
- '#RRGGBB' - 예: '#00FFCC'
- '#AARRGGBB' - 예: '#8000FFCC'
- SVG 색상 이름 - 예: 'black', 'green' 또는 'lightsteelblue'
- Qt.hsla(색조, 채도, 명도, 알파) - 예: Qt.hsla(0.3, 0.7, 1, 1.0)
- Qt.rgba(red, green, blue, alpha) - 예: Qt.rgba(0.3, 0.7, 1, 1.0)
fillStyle 나 strokeStyle 가 루프 내에서 여러 번 할당되는 경우, Qt.rgba() 구문을 선택해야 합니다. 이는 이미 유효한 QColor 값이므로 매번 파싱할 필요가 없어 성능이 가장 우수하기 때문입니다.
 | |
 |
createLinearGradient(), createRadialGradient(), createConicalGradient(), createBoxGradient(), createBoxShadow(), createPattern(), createGridPattern() 및 strokeStyle도 참조하십시오 .
font : string
현재 글꼴 설정을 유지합니다.
W3C 2D 컨텍스트 표준 중 글꼴 관련 하위 집합이 지원됩니다:
- font-style (선택 사항): normal | italic | oblique
- font-variant (선택 사항): normal | small-caps
- font-weight (선택 사항): normal | bold | 1 ... 1000
- font-size: Npx | Npt (여기서 N은 양수임)
- font-family: http://www.w3.org/TR/CSS2/fonts.html#propdef-font-family 참조
참고: font-size 및 font-family속성은 필수이며, 반드시 위에 표시된 순서대로 지정해야 합니다. 또한, 이름에 공백이 포함된 글꼴 패밀리는 따옴표로 묶어야 합니다.
기본 글꼴 값은 "10px sans-serif"입니다.
globalAlpha : real
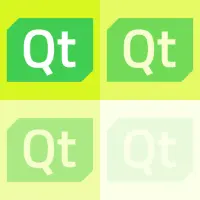
렌더링 작업에 적용된 현재 알파(투명도) 값을 저장합니다. 이 알파 값은 렌더링되는 모든 도형에 적용됩니다. 이미 투명한 경로의 경우, 비례적으로 투명도가 더욱 높아집니다. 알파 값은 0.0(완전히 투명)에서 1.0(완전히 불투명) 사이여야 합니다. 기본적으로 알파 값은 1.0 입니다.
 | |
globalBrightness : real
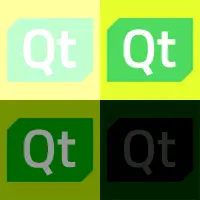
렌더링 작업에 적용되는 현재 밝기 값을 저장합니다. 이 밝기 값은 렌더링되는 모든 도형에 적용됩니다. 값이 0이면 도형이 완전히 검은색으로 그려집니다. 밝기를 높이려면 값을 1.0보다 크게 설정할 수도 있습니다. 기본적으로 밝기는 1.0 입니다.
 | |
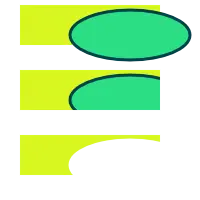
globalCompositeOperation : string
현재의 합성 작업을 유지합니다. 이 모드는 모든 그리기 작업에 적용됩니다. 허용되는 작업은 다음과 같습니다:
| 상수 | 설명 |
|---|---|
"source-atop" | A를 B 위에 중첩합니다. 두 이미지가 모두 불투명한 부분에는 소스 이미지를 표시합니다. 대상 이미지가 불투명하지만 소스 이미지가 투명한 부분에는 대상 이미지를 표시합니다. 그 외의 부분에는 투명도를 표시합니다. |
"source-over" | (기본값) A over B. 소스 이미지가 불투명한 곳에는 소스 이미지를 표시합니다. 그 외의 곳에는 대상 이미지를 표시합니다. |
"destination-out" | B out A. 대상 이미지가 불투명하고 소스 이미지가 투명한 영역에는 대상 이미지를 표시합니다. 그 외 영역에는 투명도를 표시합니다. 참고: 합성 모드가 제대로작동하려면 ‘ |
 | |
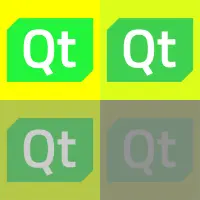
globalContrast : real
렌더링 작업에 적용되는 현재 대비 값을 저장합니다. 이 대비는 렌더링된 모든 도형에 적용됩니다. 값이 0이면 그리기 결과가 완전히 회색(0.5, 0.5, 0.5)으로 표시됩니다. 대비를 높이려면 값을 1.0보다 크게 설정할 수도 있습니다. 기본적으로 대비는 1.0 입니다.
 | |
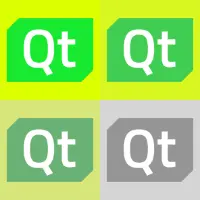
globalSaturation : real
렌더링 작업에 적용되는 현재 채도 값을 저장합니다. 이 채도 값은 렌더링되는 모든 도형에 적용됩니다. 값을 0으로 설정하면 채도가 비활성화되어 그리기 결과가 완전히 회색조로 표시됩니다. 채도를 높이려면 값을 1.0보다 크게 설정할 수도 있습니다. 기본적으로 채도는 1.0 입니다.
 | |
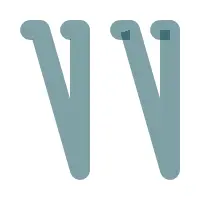
highQualityStroking : bool
현재의 고품질 스트로킹 활성화 상태를 유지합니다. 이 값을 ` true `로 설정하면, 스트로킹이 겹치거나 불투명도가 100%가 아닌 드문 경우에 더 정확한 렌더링 결과를 얻을 수 있습니다. 이 기능을 활성화하면 렌더링 비용이 증가합니다. 기본값은 ` false`입니다.
 | |
lineCap : string
현재 선 끝 모양을 저장합니다. 사용할 수 있는 선 끝 모양은 다음과 같습니다:
| 일정 | 설명 |
|---|---|
"butt" | (기본값) 각 선의 끝부분은 선의 방향에 수직인 평평한 모서리를 가집니다. |
"round" | 선 너비와 동일한 지름을 가진 반원이 선 끝에 추가됩니다. |
"square" | 선 너비만큼의 길이와 선 너비의 절반만큼의 너비를 가진 직사각형이 선의 방향에 수직인 가장자리에 밀착되어 배치됩니다. |
 | |
lineJoin : string
현재 선 연결 스타일을 저장합니다. 연결은 두 개의 연속된 선이 공유하는 하위 경로의 어느 지점에서나 존재합니다. 하위 경로가 닫혀 있는 경우, 해당 하위 경로의 첫 번째 선과 마지막 선을 연결하는 첫 번째 지점(마지막 지점과 동일)에도 연결이 존재합니다.
사용 가능한 선 연결 스타일은 다음과 같습니다:
| 상수 | 설명 |
|---|---|
"bevel" | 두 선 사이의 삼각형 모양의 틈이 채워집니다. |
"round" | 두 선 사이의 원호 부분이 채워집니다. |
"miter" | (기본값) 선의 바깥쪽 가장자리가 각도를 이루며 만나도록 연장되고, 이 영역이 채워집니다. |
 | |
miterLimit도 참조하십시오 .
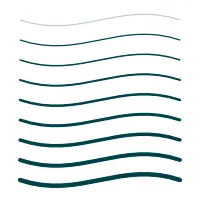
lineWidth : real
현재 선 너비를 저장합니다. 기본 선 너비는 1.0 입니다. 앤티앨리어싱이 활성화되면, 단일 픽셀 내의 선 너비에 따라 불투명도가 자동으로 점차적으로 변해 부드러운 출력 결과를 만들어 냅니다.
 | |
stroke()도 참조하십시오 .
miterLimit : real
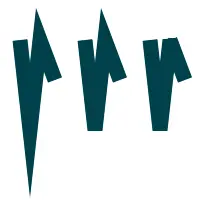
현재의 마이터 제한 길이를 저장합니다. 마이터 제한은 날카로운 모서리가 베벨 처리되는 시점을 제어합니다. 모서리 길이가 이 제한을 초과하게 되면, 대신 선들 사이에 “베벨” lineJoin 이 적용됩니다. 이 설정은 “마이터” 선 연결 방식에서만 효과가 있습니다. 기본 제한은 10.0 입니다.
 | |
lineJoin도 참조하십시오 .
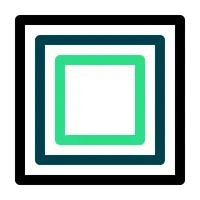
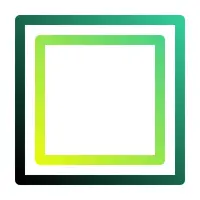
strokeStyle : variant
도형 주변의 선에 사용할 현재 색상이나 스타일을 저장합니다. 스타일은 CSS 색상 QML color 을 포함하는 문자열이거나 캔버스 브러시 객체일 수 있습니다. 유효하지 않은 값은 무시됩니다.
기본값은 검은색('#000000')입니다.
 | |
 | |
createLinearGradient(), createRadialGradient(), createConicalGradient(), createBoxGradient(), createBoxShadow(), createPattern(), createGridPattern() 및 fillStyle도 참조하십시오 .
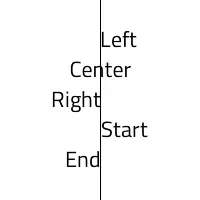
textAlign : string
현재 텍스트 정렬 설정을 저장합니다. 사용 가능한 값은 다음과 같습니다:
| 상수 | 설명 |
|---|---|
"start" | (기본값) 텍스트의 시작 가장자리에 정렬합니다(왼쪽에서 오른쪽으로 읽는 텍스트의 경우 왼쪽, 오른쪽에서 왼쪽으로 읽는 텍스트의 경우 오른쪽). |
"end" | 텍스트의 끝쪽 가장자리에 정렬합니다(좌에서 우로 읽는 텍스트의 경우 오른쪽, 우에서 좌로 읽는 텍스트의 경우 왼쪽). |
"left" | 왼쪽으로 정렬합니다. |
"right" | 오른쪽 정렬. |
"center" | 텍스트를 중앙 정렬합니다. |
 | |
textBaseline도 참조하십시오 .
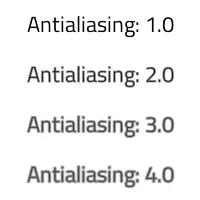
textAntialias : real
현재 텍스트 앤티앨리어싱 정도를 저장합니다. 이 값은 일반 앤티앨리어싱에 적용되는 배율로, 0.0 는 앤티앨리어싱을 비활성화하고 2.0 는 앤티앨리어싱을 두 배로 늘립니다. 기본값 is 는 1.0입니다.
참고: 사용된 텍스트 앤티앨리어싱 기술(SDF)의특성상 , 최대 앤티앨리어싱 수준은 상당히 제한적이며, 글꼴 크기가 작을수록 그 영향이 덜합니다.
 | |
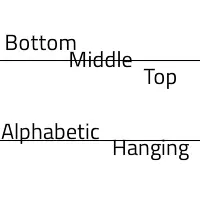
textBaseline : string
현재의 기준선 정렬 설정을 저장합니다. 사용할 수 있는 값은 다음과 같습니다:
| 상수 | 설명 |
|---|---|
"top" | em 사각형의 상단 |
"hanging" | 매달린 기준선 |
"middle" | em 사각형의 중앙 |
"alphabetic" | (기본값) 알파벳 기준선 |
"bottom" | em 사각형의 하단 |
 | |
textAlign도 참조하십시오 .
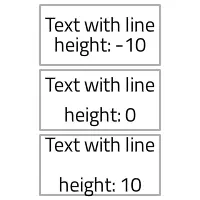
textLineHeight : real
현재 텍스트의 줄 간격 조정 값을 픽셀 단위로 저장합니다. 기본 줄 간격은 0 입니다.
 | |
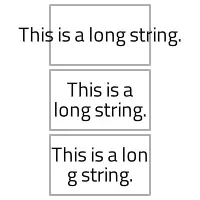
textWrapMode : string
현재의 텍스트 줄바꿈 모드, 즉 텍스트가 여러 줄로 어떻게 나뉘는지 저장합니다. 가능한 값은 다음과 같습니다:
| 상수 | 설명 |
|---|---|
"nowrap" | (기본값) 줄 바꿈이 수행되지 않습니다. 텍스트에 줄 바꿈 문자가 충분하지 않은 경우, contentWidth가 설정된 너비를 초과하게 됩니다. |
"wrap" | 가능한 경우 단어 경계에서 줄바꿈이 발생하며, 그렇지 않은 경우 단어 중간이라도 해당 줄의 적절한 지점에서 줄바꿈이 발생합니다. |
"wordwrap" | 단어 경계에서만 줄 바꿈이 수행됩니다. 단어가 너무 길면 콘텐츠 너비가 설정된 너비를 초과하게 됩니다. |
"wrapanywhere" | 줄의 어느 지점에서든 줄 바꿈이 이루어지며, 단어의 중간에서도 줄 바꿈이 발생합니다. |
기본 줄바꿈 모드는 ` "nowrap"`입니다.
 | |
windingEnforce : bool
현재 경로 감김 강제 적용 상태를 유지합니다. 이 값을 ` false `로 설정하면 ` setPathWinding()`에 설정된 내용과 일치하도록 경로 감김을 강제 적용하는 기능이 비활성화됩니다. 이 기능을 비활성화하면, 예를 들어 시계 방향으로 점을 추가하여 경로에 구멍을 만들 수 있습니다. 또한 비활성화하면 성능이 향상될 수 있습니다. 기본값은 ` true`입니다.
 | |
메서드 문서
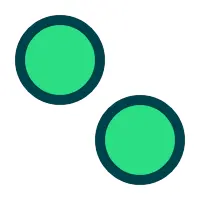
void addPath(path2d path, transform2d transform)
path 를 현재 경로에 추가하며, 선택적으로 transform 를 사용하여 경로 지점을 변경할 수 있습니다. transform 가 지정되지 않았거나(또는 단위 행렬인 경우), 이 연산은 경로 데이터를 재사용하므로 매우 빠르게 수행됩니다.
 | |
void addPath(path2d path, int start, int count, transform2d transform)
start 에 있는 명령어부터 시작하여 count 개의 명령어를 포함하여, 현재 경로에 path 을 추가합니다. 선택적으로 transform 을 사용하여 경로 지점을 변경할 수 있습니다. start 과 count 의 범위가 확인되므로, 경로에 포함된 명령어 수보다 더 많은 명령어에 접근하는 일은 없습니다. 경로가 현재 위치에서 계속 이어져서는 안 되는 경우, 먼저 moveTo()을 호출하십시오.
 | |
void arc(real x, real y, real radius, real startAngle, real endAngle, bool anticlockwise)
새로운 원호 모양의 하위 경로를 생성합니다. 원호의 중심은 x, y 에 위치하며, 반지름은 radius 이고, 각도는 startAngle 에서 endAngle 까지 그려집니다. 기본 곡선 방향은 시계 방향입니다. 반대 방향으로 변경하려면 anticlockwise 를 true로 설정하십시오. 각도는 라디안 단위로 지정됩니다.
 | |
arc()에 대해서는arcTo 및 W3C의 2D 컨텍스트 표준을참조하십시오 .
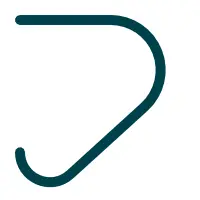
void arcTo(real x1, real y1, real x2, real y2, real radius)
마지막 경로 점과 지정된 두 점(x1, y1 및 x2, y2)을 radius 로 연결하여 모서리에 호 세그먼트를 추가합니다. 필요한 경우, 이 호는 경로의 마지막 점과 직선으로 자동으로 연결됩니다.
 | |
arcTo()에 대해서는arc 및 W3C의 2D 컨텍스트 표준도 참조하십시오 .
void beginHoleSubPath()
홀 서브 경로를 시작합니다. 이는 다음 명령과 동일합니다. setPathWinding("clockwise")
 | |
beginSolidSubPath()도 참조하십시오 .
void beginPath()
현재 경로를 지우면서 새로운 경로를 그리기 시작합니다.
void beginSolidSubPath()
고정 서브패스를 시작합니다. 이는 다음 명령과 동일합니다. setPathWinding("counterclockwise")
beginHoleSubPath()도 참조하십시오 .
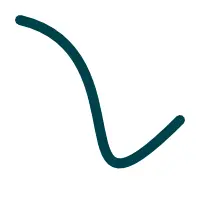
void bezierCurveTo(real cp1x, real cp1y, real cp2x, real cp2y, real x, real y)
경로의 마지막 점에서 두 제어점(cp1x, cp1y 및 cp2x, cp2y)을 거쳐 지정된 점(x, y)까지 3차 베지어 세그먼트를 추가합니다.
 | |
bezierCurveTo에 대한 W3C 2D 컨텍스트 표준도 참조하십시오 .
void circle(real centerX, real centerY, real radius)
( centerX, centerY)를 중심으로, 반지름 radius 인 새로운 원형 하위 경로를 생성합니다.
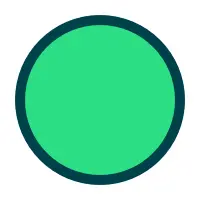 | |
참고: arc()와달리 , 이 메서드는 서브 경로의 마지막 점에서 원의 시작점까지 이어지는 직선을 추가하지 않습니다.
void cleanupResources()
캐시에서 사용되지 않는 텍스처를 제거하는 스케줄러입니다.
또한, 메모리 사용량을 최소화하기 위해 이 함수를 호출할 때 다른 캐시 및 풀의 크기가 축소될 수 있습니다. 이로 인해 이후의 렌더링 호출 비용이 증가할 가능성이 있습니다.
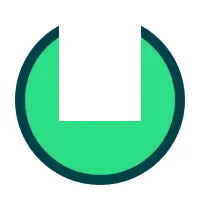
void clearRect(real x, real y, real width, real height)
x, y, width, height 로 지정된 직사각형을 투명한 검은색으로 채워, 해당 영역 내의 픽셀을 지웁니다. 지우기 작업에는 블렌딩이 필요하지 않으므로, fillRect()보다 더 빠르게 실행될 수 있습니다.
 | |
void closePath()
현재 하위 경로의 시작점으로 선을 그려 현재 하위 경로를 닫고, 자동으로 새로운 경로를 시작합니다. 새로운 경로의 현재 점은 이전 하위 경로의 첫 번째 점입니다.
closePath에 대해서는 W3C 2D 컨텍스트 표준을참조하십시오 .
boxgradient2d createBoxGradient(real x, real y, real width, real height, real feather, real radius)
직사각형 영역(x, y, width, height)을 덮는 상자 그라데이션을 나타내는 boxgradient2d 객체를 반환하며, 이 객체는 페더(부드러움) feather 와 모서리 반경 radius 을 갖습니다.
 | |
boxgradient2d::addColorStop(), fillStyle 및 strokeStyle도 참조하십시오 .
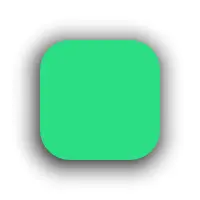
boxshadow2d createBoxShadow(real x, real y, real width, real height)
직사각형 영역(x, y, width, height)을 덮는 박스 섀도우를 나타내는 ` boxshadow2d ` 객체를 반환합니다.
 | |
drawBoxShadow()도 참조하십시오 .
boxshadow2d createBoxShadow(real x, real y, real width, real height, real blur, string color, real radius)
직사각형 영역(x, y, width, height)을 덮는 박스 그림자를 나타내며, 색상 color, 블러 blur 및 모서리 반경 radius 을 가진 ` boxshadow2d ` 객체를 반환합니다.
drawBoxShadow()도 참조하십시오 .
boxshadow2d createBoxShadow(real x, real y, real width, real height, real blur, string color, real radiusTopLeft, real radiusTopRight, real radiusBottomRight, real radiusBottomLeft)
색상 color 을 가진 ` boxshadow2d ` 객체를 반환하며, 이 객체는 사각형 영역(x, y, width, height)을 덮는 박스 섀도우를 나타내며, 블러 blur 와 모서리 반경(radiusTopLeft, radiusTopRight, radiusBottomRight, radiusBottomLeft)을 갖습니다.
drawBoxShadow()도 참조하십시오 .
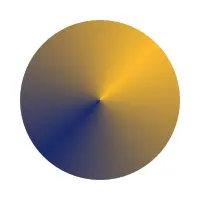
conicalgradient2d createConicalGradient(real x, real y, real angle)
중심점(x, y)을 중심으로 반시계 방향으로 색상을 보간하는 원추형 그라디언트를 나타내는 conicalgradient2d 객체를 반환합니다. 시작 각도 angle 는 라디안 단위입니다.
 | |
conicalgradient2d::addColorStop(), createLinearGradient(), createRadialGradient(), createPattern(), fillStyle 및 strokeStyle도 참조하십시오 .
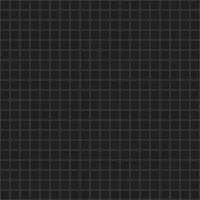
gridpattern2d createGridPattern(real x, real y, real width, real height, string lineColor, string backgroundColor, real lineWidth, real feather, real angle)
직사각형 영역(x, y, width, height)을 덮는 ` gridpattern2d ` 객체를 반환합니다. 이 그리드는 선에 lineColor 를, 배경에 backgroundColor 를 사용합니다. 선 너비는 lineWidth, 선 페더는 feather 이며, 회전 각도는 라디안 단위로 angle 입니다.
 | |
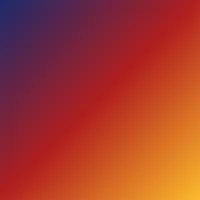
lineargradient2d createLinearGradient(real x0, real y0, real x1, real y1)
시작점(x0, y0)과 끝점(x1, y1) 사이의 선을 따라 색상이 변하는 선형 그라데이션을 나타내는 ` lineargradient2d ` 객체를 반환합니다.
그라디언트에는 그라디언트의 시작점과 끝점 사이에서 0부터 1까지의 위치에 배치된 색상 변화를 나타내는 두 개 이상의 색상 정지점이 있어야 합니다.
 | |
lineargradient2d::addColorStop(), createRadialGradient(), createConicalGradient(), createPattern(), fillStyle 및 strokeStyle도 참조하십시오 .
path2d createPath2D()
새로운 path2d 객체를 반환합니다. 이 메서드를 호출하는 것은 HTML 캔버스의 “new Path2D()” 명령과 동일합니다.
path2d createPath2D(path2d path)
path 의 복사본을 포함하는 새로운 path2d 객체를 반환합니다. 이 메서드를 호출하는 것은 HTML 캔버스의 "new Path2D(path)" 명령과 동일합니다.
path2d createPath2D(string svgPath)
svgPath 의 내용을 가진 새로운 path2d 객체를 반환합니다. 이 메서드를 호출하는 것은 HTML 캔버스의 "new Path2D(d)" 명령과 동일합니다.
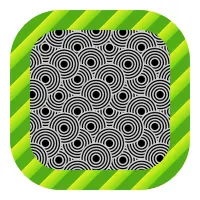
imagepattern2d createPattern(Image image, string repetition)
지정된 이미지를 사용하고, repetition 인자로 지정된 방향으로 반복되는 imagepattern2d 객체를 반환합니다.
image 매개변수는 유효한 Image 항목이거나 로드된 이미지 URL이어야 합니다. 이미지 데이터가 없는 경우, 이 함수는 INVALID_STATE_ERR 예외를 발생시킵니다.
repetition 에 허용되는 값은 다음과 같습니다:
| 상수 | 설명 |
|---|---|
"repeat" | 양방향 |
"repeat-x | 수평 방향만 |
"repeat-y" | 수직 방향만 |
"no-repeat" | 둘 다 아님 |
반복 인수가 비어 있거나 null인 경우, "repeat" 값이 사용됩니다.
 | |
strokeStyle 및 fillStyle도 참조하십시오 .
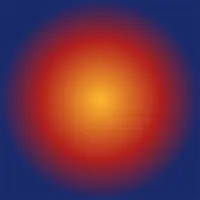
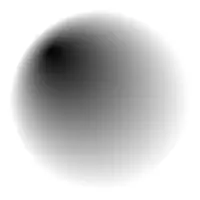
radialgradient2d createRadialGradient(real x0, real y0, real r0, real x1, real y1, real r1)
원점 (x0, y0)과 반지름 r0 을 갖는 시작 원과, 원점 (x1, y1)과 반지름 r1 을 갖는 끝 원을 기준으로 원뿔을 따라 그려지는 방사형 그라디언트를 나타내는 ` radialgradient2d ` 객체를 반환합니다.
매개변수가 4개뿐이므로, 매개변수는 (x, y, r0, r1)의 형태로 사용되며, 내반지름과 외반지름 모두 중심 위치는 동일합니다.
 | |
 | |
radialgradient2d::addColorStop(), createLinearGradient(), createConicalGradient(), createPattern(), fillStyle 및 strokeStyle도 참조하십시오 .
transform2d createTransform2D()
신분행렬로 초기화된 새로운 transform2d 객체를 반환합니다.
getTransform()도 참조하십시오 .
void drawBoxShadow(boxshadow2d shadow)
지정된 상자 shadow 를 그립니다. 그림자는 shadow 에서 정의된 위치, 크기, 색상, 블러 등의 속성을 적용하여 그려집니다. 이 메서드를 호출하기 전에 beginPath()를 호출할 필요는 없습니다.
| |
createBoxShadow()도 참조하십시오 .
void drawImage(variant image, real dx, real dy)
지정된 ‘ image ’를 (dx, dy) 위치에 캔버스에 그립니다. 참고: ` image ` 유형은 `Image` 항목이거나 이미지 URL일 수 있습니다. `Image` 항목으로 지정된 경우, 이미지가 완전히 로드되지 않았다면 이 메서드는 아무것도 그리지 않습니다. URL 문자열로 지정된 경우, 먼저 `Canvas` 항목의 ` Canvas2D::loadImage()` 메서드를 호출하여 이미지를 로드해야 합니다. 이 그리기 작업은 현재 컨텍스트의 클립 경로의 영향을 받습니다.
 | |
관련 항목: Image, Canvas2D::loadImage, Canvas2D::isImageLoaded, Canvas2D::imageLoaded 및 drawImage에 대한 W3C 2D 컨텍스트 표준.
void drawImage(variant image, real dx, real dy, real dw, real dh)
이 함수는 오버로드된 함수입니다. 주어진 항목을 image 로 지정하여, (dx, dy) 지점에 너비 dw, 높이 dh 로 캔버스에 그립니다.
 | |
Image, Canvas2D::loadImage(), Canvas2D::isImageLoaded, Canvas2D::imageLoaded 및 drawImage에 대한 W3C 2D 컨텍스트 표준도 참조하십시오 .
void drawImage(variant image, real sx, real sy, real sw, real sh, real dx, real dy, real dw, real dh)
이 함수는 오버로드된 함수입니다. 주어진 항목을 image 형식으로, 시작점 (sx, sy), 시작 너비 sw, 시작 높이 sh 을 기준으로, 캔버스상의 (dx, dy) 지점에 너비 dw, 높이 dh 로 그립니다.
 | |
Image, Canvas2D::loadImage(), Canvas2D::isImageLoaded, Canvas2D::imageLoaded 및 drawImage에 대한 W3C 2D 컨텍스트 표준도 참조하십시오 .
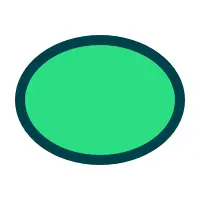
void ellipse(real centerX, real centerY, real radiusX, real radiusY)
( centerX, centerY)를 중심으로, radiusX 및 radiusY 를 갖는 새로운 타원형 하위 경로를 생성합니다.
 | |
void ellipseRect(real x, real y, real width, real height)
rect 내부에 타원 모양의 새로운 하위 경로를 생성합니다. x, y, width, height. 이 타원은 rect 영역을 덮게 됩니다.
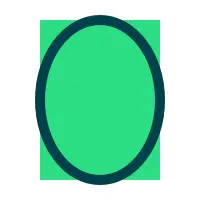 | |
참고: 이 메서드는 QtQuick::Context2D::ellipse()과 동일합니다.
void fill()
현재 경로를 현재 채우기 스타일과 현재 채우기 규칙으로 채웁니다.
 | |
fillStyle, fillRule 및 W3C 2D 컨텍스트 표준의 채우기(fill)항목도 참조하십시오 .
void fill(string fillRule)
현재 경로를 현재 채우기 스타일과 채우기 규칙 fillRule 으로 채웁니다.
fillStyle 및 fillRule도 참조하십시오 .
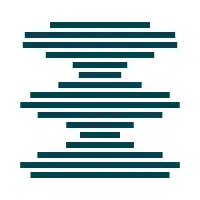
void fill(path2d path, int pathGroup)
path 에 현재 채우기 스타일과 채우기 규칙을 적용하고, 선택적 pathGroup 에 포함시킵니다. 경로에 명령어가 많고 대부분 정적일 경우, QCanvasPath 를 통한 렌더링이 가장 적합합니다.
pathGroup 가 -1 인 경우, 경로는 GPU 측에 캐시되지 않습니다. 이것이 기본값입니다. 경로 데이터의 캐싱을 요청하려면 0 보다 크거나 같은 값을 전달하십시오. 경로 캐시 그룹 사용에 대한 자세한 내용은 QCanvasPath 문서를 참조하십시오.
이 메서드를 호출하기 전에 beginPath()를 호출할 필요는 없습니다.
 | |
void fill(path2d path, string fillRule, int pathGroup)
path 를 현재 채우기 스타일로 채우며, fillRule 를 사용합니다. 캐시 그룹 매개변수 pathGroup 는 선택 사항입니다.
fillStyle, fillRule 및 path2d항목도 참조하십시오 .
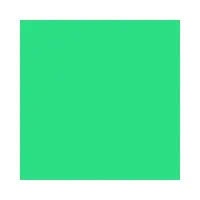
void fillRect(real x, real y, real width, real height)
지정된 위치( x, y)에 크기 width, height 인 채워진 사각형을 그립니다.
참고: 이 기능은 편의상 제공됩니다. 단일 사각형 이상의 영역을 채울 때는 rect()를 사용하는 것이 좋습니다.
 | |
fillStyle도 참조하십시오 .
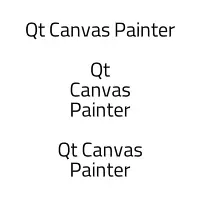
void fillText(text, x, y, maxWidth)
지정된 위치( x, y)에 text 문자열을 그립니다. 이때 현재 textAlign 및 textBaseline 값을 적용합니다. 텍스트를 여러 줄로 줄바꿈하려면 textWrapMode 를 사용하여 텍스트 줄바꿈 모드를 기본값인 "nowrap" 이외의 값으로 설정하십시오. 선택적 maxWidth 매개변수의 기본값은 0 입니다. 즉, 예를 들어 "wordwrap" 가 설정된 경우, 텍스트는 단어마다 줄바꿈됩니다. maxWidth 매개변수를 원하는 행 너비(픽셀 단위)로 설정하십시오.
 | |
font, textAlign, textBaseline 및 textWrapMode도 참조하십시오 .
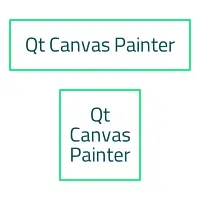
void fillText(text, x, y, width, height)
rect(x, y, width, height) 내부에 text 문자열을 그립니다. 이때 현재 textAlign 및 textBaseline 값이 사용됩니다. rect 매개변수의 너비가 maxWidth로 사용됩니다.
이 방법으로 텍스트를 그릴 때 텍스트 기준선을 TextBaseline::Top 또는 TextBaseline::Middle 로 설정하는 것이 종종 유용합니다.
 | |
font, textAlign, textBaseline 및 textWrapMode도 참조하십시오 .
transform2d getTransform()
현재 변환 행렬을 반환합니다.
setTransform()도 참조하십시오 .
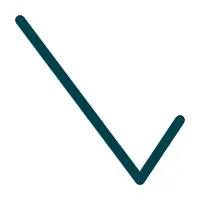
void lineTo(real x, real y)
현재 위치에서 (x, y)에 있는 점까지 선을 그립니다.
 | |
object measureText(text)
width 속성을 가진 객체를 반환하며, 이 속성의 값은 현재 글꼴에서 지정된 text 을 인수로 사용하여 QFontMetricsF::horizontalAdvance()를 호출한 결과와 동일합니다.
void moveTo(real x, real y)
(x, y) 지점을 갖는 새로운 하위 경로를 생성합니다.
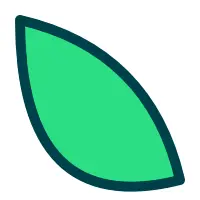
void quadraticCurveTo(real cpx, real cpy, real x, real y)
경로의 마지막 점에서 제어점을 경유하여(cpx, cpy) 지정된 점(x, y)까지 2차 베지어 세그먼트를 추가합니다.
 | |
quadraticCurveTo에 대한 W3C 2D 컨텍스트 표준도 참조하십시오 .
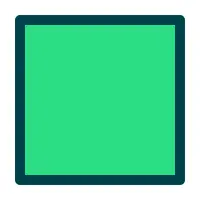
void rect(real x, real y, real width, real height)
x, y 위치에, width, height 크기의 새로운 직사각형 모양의 하위 경로를 생성합니다.
 | |
void removePathGroup(int pathGroup)
페인터 캐시에서 ` pathGroup `를 제거합니다. 이후 ` pathGroup `에 대해 ` fill()` 또는 ` stroke()`를 호출하면 경로가 그룹 캐시에 다시 생성됩니다.
참고: 경로는 페인터의 소멸자에서 자동으로 제거되므로, 일반적으로이 메서드를 호출할 필요는 없습니다. 이 메서드는 pathGroup 가 더 이상 필요하지 않거나, 예를 들어 경로의 명령어 수가 과거에 비해 현저히 줄어들어 버퍼 크기를 줄여야 할 때 메모리 사용량을 줄이기 위한 목적으로만 사용하십시오.
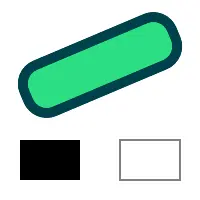
void reset()
현재 페인터 상태를 기본값으로 재설정합니다.
참고: 이 메서드는 HTML 캔버스 2D 컨텍스트의 reset() 메서드와 달리, 캔버스 버퍼를 시각적으로 지우지 않습니다.
 | |
void resetClipping()
클리핑을 초기화하고 비활성화합니다.
setClipRect()도 참조하십시오 .
void resetTransform()
변환 행렬을 기본값으로 재설정합니다( setTransform 를 호출하는 것과 동일함 (1, 0, 0, 1, 0, 0)).
또한 transform(), setTransform(), 및 reset()을 참조하십시오 .
void restore()
현재 렌더링 상태를 팝하고 복원합니다. 따라서 이전에 저장된 상태가 복원됩니다. save()이 호출되지 않았고 상태 스택이 비어 있는 경우, 이 메서드를 호출해도 아무 작업도 수행되지 않습니다.
save()도 참조하십시오 .
void rotate(real angle)
현재 좌표계를 시계 방향으로 angle 만큼 회전시킵니다.
각도는 라디안 단위로 지정됩니다.
 | |
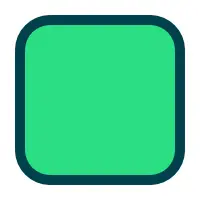
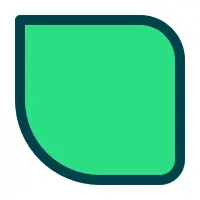
void roundRect(real x, real y, real width, real height, real radius)
x, y 위치에, width, height 크기의 새로운 둥근 사각형 모양의 하위 경로를 생성합니다. 모서리 둥글림은 radius 로 설정됩니다.
 | |
void roundRect(real x, real y, real width, real height, real radiusTopLeft, real radiusTopRight, real radiusBottomRight, real radiusBottomLeft)
x, y 위치에, width, height 크기의 새로운 둥근 사각형 모양의 하위 경로를 생성합니다. 모서리 둥글림 정도는 모서리마다 다르게 설정할 수 있으며, radiusTopLeft, radiusTopRight, radiusBottomRight, radiusBottomLeft 값을 사용할 수 있습니다.
 | |
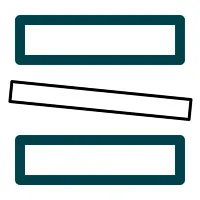
void save()
현재 렌더링 상태를 상태 스택에 밀어 넣고 저장합니다. 상태를 복원하려면 이에 대응하는 ` restore()` 메서드를 사용해야 합니다.
참고: 현재경로는 그리기 상태의 일부가 아닙니다. beginPath() 메서드를 호출하여 경로를 재설정할 수 있습니다.
 | |
restore()도 참조하십시오 .
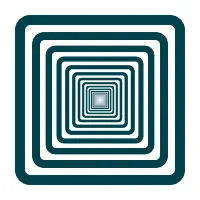
void scale(real scale)
현재 좌표계를 scale 로 확대/축소합니다. x 및 y 좌표가 모두 균등하게 확대/축소됩니다.
 | |
void scale(real sx, real sy)
현재 변환 행렬에 스케일 계수를 곱하여 캔버스 그리드 내 각 단위의 크기를 늘리거나 줄입니다. sx 는 수평 방향의 스케일 계수이며, sy 는 수직 방향의 스케일 계수입니다.
다음 코드는 캔버스에 그려진 객체의 가로 크기를 두 배로 늘리고 세로 크기를 절반으로 줄입니다:
ctx.scale(2.0, 0.5);void setClipRect(real x, real y, real width, real height)
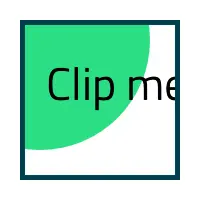
현재 시저 사각형을 (x, y, width, height)로 설정합니다. 시저 사각형은 현재 변환에 따라 변환됩니다.
참고: 클리핑은 성능에 약간의 부담을 주므로, 필요한 경우에만 사용해야 합니다.
 | |
resetClipping()도 참조하십시오 .
void setPathWinding(string winding)
현재 서브 경로 winding 를 “반시계 방향”(기본값) 또는 “시계 방향” 중 하나로 설정합니다. “반시계 방향”은 실선 서브 경로를 그리는 반면, “시계 방향”은 구멍을 그립니다.
 | |
beginHoleSubPath() 및 beginSolidSubPath()도 참조하십시오 .
void setTransform(transform2d transform)
현재 변환을 초기화하고 대신 transform 를 사용합니다.
 | |
transform() 및 getTransform()도 참조하십시오 .
void setTransform(real a, real b, real c, real d, real e, real f)
변환 행렬을 아래에 설명된 대로 인자로 지정된 행렬로 변경합니다.
변환 행렬을 직접 수정하면 한 번의 단계로 크기 조정, 회전 및 평행 이동을 수행할 수 있습니다.
캔버스상의 각 점은 어떤 것도 그려지기 전에 이 행렬로 곱해집니다. HTML Canvas 2D Context 사양은 변환 행렬을 다음과 같이 정의합니다.
- a 는 수평(x) 방향의 확대/축소 계수이며
- c 는 x 방향의 기울기 계수입니다
- e 는 x 방향의 평행 이동량입니다
- b 는 y(수직) 방향의 스큐 계수입니다
- d 는 y 방향의 확대/축소 계수입니다
- f 는 y 방향의 평행 이동량이다
- 마지막 행은 일정하게 유지됩니다
확대/축소 계수와 비스듬한 변형 계수는 배수입니다. e 및 f 는 translate(x,y) 메서드의 단위와 마찬가지로 좌표계 단위입니다.
transform()도 참조하십시오 .
void skew(real angleX, real angleY)
현재 좌표계를 X축 방향으로 angleX, Y축 방향으로 angleY 만큼 비틀어(변형) 줍니다. 매개변수가 하나만 제공될 경우, ` angleY `의 기본값은 0 입니다. 각도는 라디안 단위로 지정됩니다.
 | |
void stroke()
현재 획 스타일을 사용하여 경로를 그립니다.
 | |
strokeStyle 및 W3C 2D 컨텍스트 표준의 'stroke'항목도 참조하십시오 .
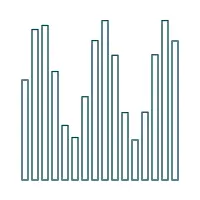
void stroke(path2d path, int pathGroup)
path 에 현재 획 스타일을 적용하여 pathGroup 에 속하는 선을 그립니다. 경로에 명령어가 많고 대체로 정적일 때는 QCanvasPath 를 통해 그리는 것이 가장 적합합니다.
pathGroup 가 -1 인 경우, 경로의 렌더링 관련 데이터는 캐시되지 않습니다. 이것이 기본값입니다. 경로 데이터의 캐싱을 요청하려면 0 이상의 값을 전달하십시오. 경로 캐시 그룹 사용에 대한 자세한 내용은 QCanvasPath 문서를 참조하십시오.
이 메서드를 호출하기 전에 beginPath()를 호출할 필요는 없습니다.
 | |
strokeStyle, path2d 및 W3C 2D 컨텍스트 표준의 stroke항목도 참조하십시오 .
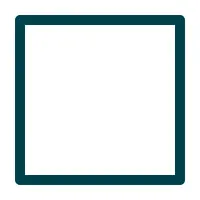
void strokeRect(real x, real y, real width, real height)
지정된 위치( x, y)에 크기 width, height 인 선이 그려진 사각형을 그립니다.
참고: 이 기능은 편의상 제공됩니다. 단일 사각형 이상의 테두리를 그릴 때는 rect()를 사용하는 것이 좋습니다.
 | |
strokeStyle, lineWidth, lineJoin 및 miterLimit도 참조하십시오 .
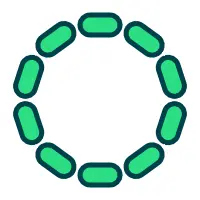
void transform(transform2d transform)
현재 좌표계에 지정된 척도 transform 를 곱합니다.
 | |
setTransform()도 참조하십시오 .
void transform(real a, real b, real c, real d, real e, real f)
현재 좌표계에 지정된 변환(a, b, c, d, e, f)을 곱합니다.
이 메서드는 setTransform()와 유사하지만, 기존 변환 행렬을 대체하는 대신 주어진 변환 행렬을 현재 행렬에 곱하여 적용합니다.
setTransform()도 참조하십시오 .
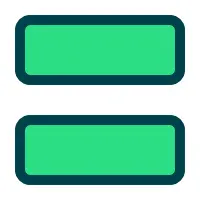
void translate(real x, real y)
현재 좌표계를 x 및 y 에 따라 변환합니다.
 | |
© 2026 The Qt Company Ltd. Documentation contributions included herein are the copyrights of their respective owners. The documentation provided herein is licensed under the terms of the GNU Free Documentation License version 1.3 as published by the Free Software Foundation. Qt and respective logos are trademarks of The Qt Company Ltd. in Finland and/or other countries worldwide. All other trademarks are property of their respective owners.
