
라이트 마커 및 점 선택 사용
참고: 이 내용은 ‘위젯이 포함된 차트 갤러리’ 예제의 일부입니다.

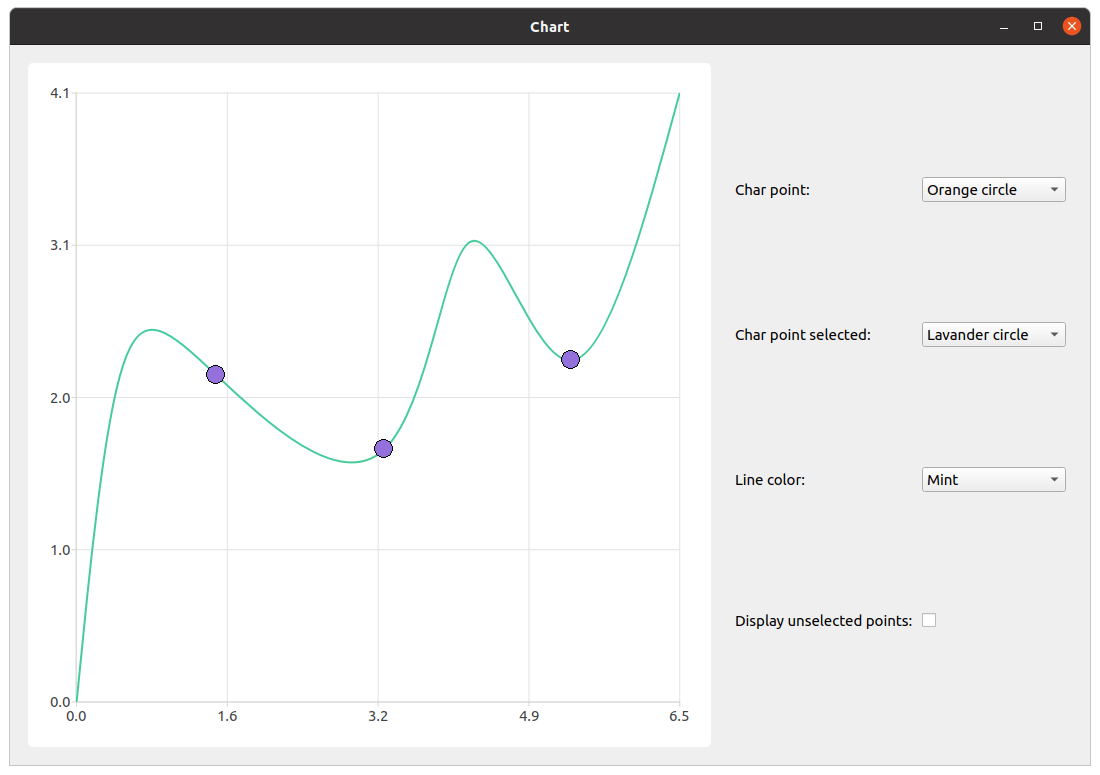
먼저 시리즈를 생성하고 데이터를 채운 다음, 선택 기능을 설정합니다. 라이트 마커 기능은 독립적인 기능이므로, 데이터 포인트의 표시 상태를 ‘ true ’로 설정하지 않는 것이 중요합니다. 두 설정을 모두 적용하면 의도하지 않은 동작이 발생할 수 있습니다.
constexpr qreal marker_size = 20.;

auto series = new QSplineSeries;
series->append({QPointF(0., 0.),
                QPointF(0.5, 2.27),
                QPointF(1.5, 2.2),
                QPointF(3.3, 1.7),
                QPointF(4.23, 3.1),
                QPointF(5.3, 2.3),
                QPointF(6.47, 4.1)
});
series->setMarkerSize(marker_size);
series->setLightMarker(rectangle(marker_size, Qt::red));
series->setSelectedLightMarker(blueTriangle(marker_size));

QObject::connect(series, &QXYSeries::clicked, series, [=](const QPointF &point) {
    int index = series->points().indexOf(point);
    if (index != -1)
        series->toggleSelection({index});
});
그런 다음 ‘ QChart ’, ‘ QChartview ’ 및 사용자 지정 요소를 배치할 레이아웃이 포함된 컨트롤 위젯을 생성합니다.
auto chart = new QChart;
chart->addSeries(series);
chart->createDefaultAxes();
chart->legend()->setVisible(false);
chart->layout()->setContentsMargins(0, 0, 0, 0);
chart->setTitle("Select points with mouse click");

auto chartView = new QChartView(chart, this);
chartView->setRenderHint(QPainter::Antialiasing);

auto controlWidget = new QWidget(this);
auto controlLayout = new QGridLayout(controlWidget);
다음 단계는 사용자 정의 요소를 생성하는 것입니다.
auto charPointCombobox = new QComboBox(controlWidget);
auto charPointSelectedCombobox = new QComboBox(controlWidget);
auto lineColorCombobox = new QComboBox(controlWidget);
auto showUnselectedPointsCheckbox = new QCheckBox(controlWidget);
마커 선택 콤보박스를 위한 레이블을 생성하고, 콤보박스에 항목을 채워 넣습니다. 또한 콤보박스에 기능을 구현합니다. 라이트 마커 기능의 구현을 고려할 때, 선택되지 않은 점의 표시 여부가 확인되었는지 확인해야 합니다. 라이트 마커의 표시 여부를 비활성화하려면 "empty" QImage 로 설정하면 됩니다. 사용자가 선택되지 않은 점의 표시를 해제하고 라이트 마커 이미지를 변경하더라도, 선택되지 않은 점은 보이지 않아야 합니다. 이 확인 작업이 수행되지 않으면 라이트 마커에 새로운 QImage 가 설정되어, 비활성화되었음에도 불구하고 선택되지 않은 점이 표시될 수 있습니다.
auto charPoint = new QLabel(tr("Char point: "), controlWidget);
charPointCombobox->addItems({tr("Red rectangle"),
                             tr("Green triangle"),
                             tr("Orange circle")
});
QObject::connect(charPointCombobox, &QComboBox::currentIndexChanged, series, [=](const int index) {
    if (showUnselectedPointsCheckbox->isChecked())
        series->setLightMarker(getPointRepresentation(PointType(index), marker_size));
});
선택된 점의 라이트 마커와 선 색상에도 거의 동일한 절차가 적용됩니다. 유일한 차이점은 기능에 영향을 미치지 않으므로 선택되지 않은 점의 표시 여부를 확인할 필요가 없다는 점입니다.
auto charPointSelected = new QLabel(tr("Char point selected: "), controlWidget);
charPointSelectedCombobox->addItems({tr("Blue triangle"),
                                     tr("Yellow rectangle"),
                                     tr("Lavender circle")
});
QObject::connect(charPointSelectedCombobox, &QComboBox::currentIndexChanged, series, [=](const int index) {
    series->setSelectedLightMarker(getSelectedPointRepresentation(SelectedPointType(index), marker_size));
});

auto lineColorLabel = new QLabel(tr("Line color: "), controlWidget);
lineColorCombobox->addItems({tr("Blue"),
                             tr("Black"),
                             tr("Mint")
});
QObject::connect(lineColorCombobox, &QComboBox::currentIndexChanged, series, [=](const int index) {
    series->setColor(makeLineColor(LineColor(index)));
});
선택되지 않은 점의 표시 여부를 변경할 때 약간의 차이가 있습니다. 앞서 언급했듯이, 라이트 마커를 보이지 않게 하려면 이를 “빈 값” QImage 으로 설정하면 됩니다. 따라서 체크박스 상태에 따라, 선택된 점의 라이트 마커는 “빈 값” QImage 으로 설정되거나 해당 콤보박스의 현재 인덱스에서 추출된 라이트 마커로 설정됩니다.
auto showUnselectedPointsLabel = new QLabel(tr("Display unselected points: "), controlWidget);
showUnselectedPointsCheckbox->setChecked(true);
QObject::connect(showUnselectedPointsCheckbox, &QCheckBox::stateChanged, series, [=](const int state) {
    if (state)
        series->setLightMarker(getPointRepresentation(PointType(charPointCombobox->currentIndex()), marker_size));
    else
        series->setLightMarker(QImage());
});
마지막 단계는 요소를 배치하고, 모든 위젯을 메인 위젯에 추가하며, 메인 창의 크기를 설정하는 것입니다.
controlLayout->addWidget(charPoint, 0, 0);
controlLayout->addWidget(charPointCombobox, 0, 1);

controlLayout->addWidget(charPointSelected, 1, 0);
controlLayout->addWidget(charPointSelectedCombobox, 1, 1);

controlLayout->addWidget(lineColorLabel, 2, 0);
controlLayout->addWidget(lineColorCombobox, 2, 1);

controlLayout->addWidget(showUnselectedPointsLabel, 3, 0);
controlLayout->addWidget(showUnselectedPointsCheckbox, 3, 1, 1, 2);

m_mainWidget = new QWidget(this);
auto mainLayout = new QHBoxLayout(m_mainWidget);
mainLayout->addWidget(chartView);
mainLayout->addWidget(controlWidget);
© 2026 The Qt Company Ltd. Documentation contributions included herein are the copyrights of their respective owners. The documentation provided herein is licensed under the terms of the GNU Free Documentation License version 1.3 as published by the Free Software Foundation. Qt and respective logos are trademarks of The Qt Company Ltd. in Finland and/or other countries worldwide. All other trademarks are property of their respective owners.
