
센서
'센서' 예제는 두 애플리케이션이 UDP 소켓을 사용하여 protobuf 메시지를 전송함으로써 통신하는 방법을 보여줍니다.
Sensors 예제는 다음 구성 요소로 이루어져 있습니다:
protobuf_sensorsqt_add_protobuf 호출을 사용하여 protobuf 스키마로부터 생성한 라이브러리.protobuf_sensor_emulator간단한 센서 동작을 시뮬레이션하는 애플리케이션.protobuf_sensors_clientUDP 소켓에서 센서 데이터를 표시하는 애플리케이션.
클라이언트 애플리케이션은 localhost UDP 포트 65500 에 바인딩하고 에뮬레이터 애플리케이션에서 전송되는 데이터를 대기합니다.
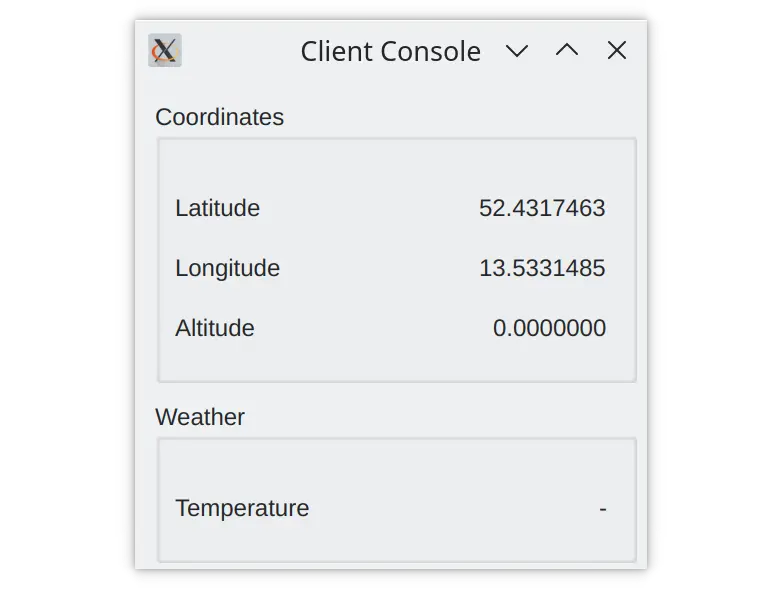
에뮬레이터 애플리케이션을 사용하여 센서 데이터의 값을 변경하고, 해당 데이터를 클라이언트의 UDP 포트로 전송합니다.

애플리케이션들은 protobuf_sensors 라이브러리에서 생성된 메시지를 사용하여 통신합니다. 이 라이브러리는 .proto 파일에 기술된 protobuf 스키마를 기반으로 생성됩니다.
qt_add_protobuf(protobuf_sensors
    PROTO_FILES
        sensors.proto
        tlv.proto
)
첫 번째 파일은 센서 데이터를 포함하는 Type-Length-Value 메시지를 설명합니다:
package qt.examples.sensors.tlv;

enum MessageType {
    Coordinates = 0;
    Temperature = 1;
    WarningNotification = 2;
}

// Protobuf messages imply inline data size.
message TlvMessage {
    MessageType type = 1;
    bytes value = 2;
}
두 번째 .proto 파일에는 센서 메시지에 대한 설명이 포함되어 있습니다:
package qt.examples.sensors;

message Coordinates {
    double longitude = 1;
    double latitude = 2;
    double altitude = 3;
}

message Temperature {
    enum Unit {
        Farenheit = 0;
        Celsius = 1;
    }
    sint32 value = 1;
    Unit units = 2;
}

message WarningNotification {
    string text = 1;
}
메시지는 클라이언트에서 인스턴스화하는 ` QProtobufSerializer `를 사용하여 직렬화됩니다:
class SensorClient : public QObject
{
    Q_OBJECT
...
private:
    QUdpSocket m_client;
    QProtobufSerializer m_serializer;
};
그리고 에뮬레이터에서는:
class SensorEmulator : public QObject
{
    Q_OBJECT
...
    QUdpSocket m_socket;
    QProtobufSerializer m_serializer;
};
에뮬레이터 애플리케이션에서 ‘ Send ’ 버튼을 클릭하면, ‘ QLineEdit ’ 필드의 데이터가 문자열 형식에서 메시지 필드별 형식으로 변환됩니다. 예를 들어, ‘Coordinates’ 메시지의 필드의 경우 double 형식으로 변환됩니다:
    QObject::connect(ui->sendCoordinates, &QPushButton::clicked, this, [this]() {
        qt::examples::sensors::Coordinates coord;
        coord.setLatitude(ui->latitudeValue->text().toDouble());
        coord.setLongitude(ui->longitudeValue->text().toDouble());
        coord.setAltitude(ui->altitudeValue->text().toDouble());
        emit coordinatesUpdated(coord);
    });
그런 다음 모든 필드가 포함된 메시지가 직렬화되어 ‘Type-Length-Value’ 메시지로 감싸집니다:
    Q_ASSERT(serializer != nullptr);
    tlv::TlvMessage msg;
    msg.setType(type);
    msg.setValue(data);
    return msg.serialize(serializer);
클라이언트는 수신된 데이터그램에 대해 역순의 연산을 적용합니다. 먼저 데이터그램 데이터에서 Type-Length-Value 메시지를 역직렬화합니다:
       const auto datagram = m_client.receiveDatagram();
        qt::examples::Qt Sensors::tlv::TlvMessage msg;
        msg.deserialize(&m_serializer, datagram.data());
       if (m_serializer.lastError()
                != QAbstractProtobufSerializer::Error::None) {
            qWarning().nospace() << "Unable to deserialize datagram ("
                      << qToUnderlying(m_serializer.lastError()) << ")"
                       << m_serializer.lastErrorString();
            continue;
        }
그런 다음 Type-Length-Value 메시지가 센서 메시지로 역직렬화됩니다:
            qt::examples::sensors::Coordinates coord;
            coord.deserialize(&m_serializer, msg.value());
            emit coordinatesUpdated(coord);
            break;
마지막으로, 변환되어 사용자에게 표시됩니다:
    ui->latitudeValue->setText(QString::number(coord.latitude(), 'f', 7));
    ui->longitudeValue->setText(QString::number(coord.longitude(), 'f', 7));
    ui->altitudeValue->setText(QString::number(coord.altitude(), 'f', 7));
참고: 예제를 실행하기전에 , 사용 중인 운영 체제에서 UDP 포트 65500 에 대한 바인딩과 UDP를 통한 데이터 전송이 허용되는지 확인하십시오.
© 2026 The Qt Company Ltd. Documentation contributions included herein are the copyrights of their respective owners. The documentation provided herein is licensed under the terms of the GNU Free Documentation License version 1.3 as published by the Free Software Foundation. Qt and respective logos are trademarks of The Qt Company Ltd. in Finland and/or other countries worldwide. All other trademarks are property of their respective owners.
