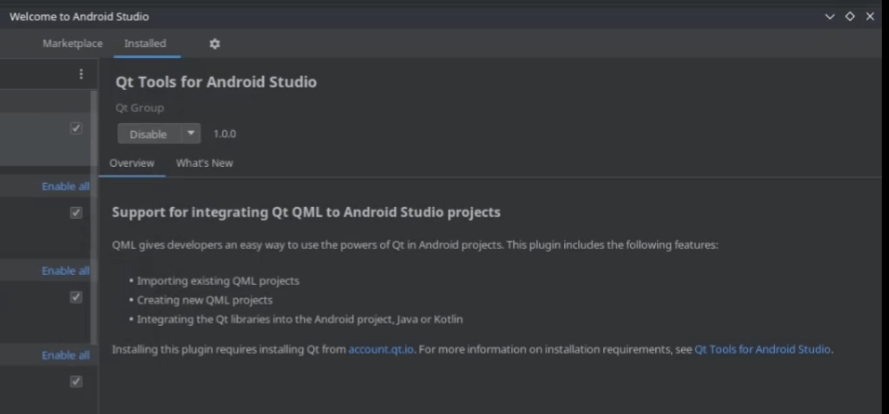
Qt Tools for Android Studio
Overview
What you need to know about the plugin:
Features
The plugin allows you to import new or existing Qt QML projects to a new or existing Android Studio project.
Supported configurations
You can find what is supported here.
Host environments
The host environment limitations for building Qt applications also exist for the plugin. The plugin has been tested on the following operating systems:
- Linux (Ubuntu 22.04)
- Windows (10, 11)
- macOS ARM (Xcode version 15.2)
Android Studio
Android Studio Giraffe (2022.3.1) to Iguana (2023.2.1) is supported.
Qt for Android
Qt for Android version 6.7 or later is required.
Android SDK
The following configurations are supported in this Qt release:
| Distribution | Architecture | Compiler | JDK | Gradle | Package |
|---|---|---|---|---|---|
| Android 8.0 (API 26) to 14 (API 34) | arm64-v8a, x86_64, x86, and armeabi-v7a | Clang 17.0.2 (NDK r26b or 26.1.10909125) | JDK 17 | Gradle 8.3 and AGP 7.4.1 | Multi-ABI APKs and AABs |
Note: Multi-ABI builds are available only when using CMake. For more information, see CMake Android Multi-ABIs.
Note: It's recommended that Qt apps use the same NDK r26b version used for building these official Qt for Android libraries to avoid missing symbol errors.
Tools
The CMake and Ninja versions that are supported are packaged with the version of Qt you are installing.
Licensing
This plugin is covered by the Qt Community Edition license.
Getting started
The following video covers installing the plugin, installing all the minimum required Qt dependencies for using the plugin, runs through importing an example Qt for Android project, and building and running the project on a target device.
The following sections will cover this information, as well as further details on the plugin's features and UI.
Installing dependencies
- Qt for Android installation (6.7 or later)
- Google's Android Studio IDE
- The Android SDK
Install Qt for Android
There are two ways to get Qt for Android, but for most users, we recommended the following way:
With the Qt Online Installer
To download and install Qt for Android, follow the instructions on the Get and Install Qt page, and do a custom install that includes at least the minimum requirements:
- Qt for Android
- CMake
- Ninja
The following instructions assume you don't want to install Qt Design Studio and Qt Creator. These would normally be installed by default but the instructions here explicitly deselect these and anything not required.
- Select custom install. If you change the location make sure to note this as you will need it later.
- Deselect Qt Design Studio.
- Expand Qt 6.7 or later and select Qt for Android.
- Deselect Developer and Designer Tools.
- Select CMake and Ninja.
- Select any optional Qt modules you might need.
- Proceed to install.
Clone, build and install Qt yourself
This method should only be used by developers who are working with unreleased or modified Qt builds. It won't be covered here.
See Qt for Android - Building from Source.
Install Android Studio and the plugin
This plugin is installed like any other IntelliJ plugin.
- Download and install Android Studio version Giraffe | 2023.1.1 Canary 1 or later.
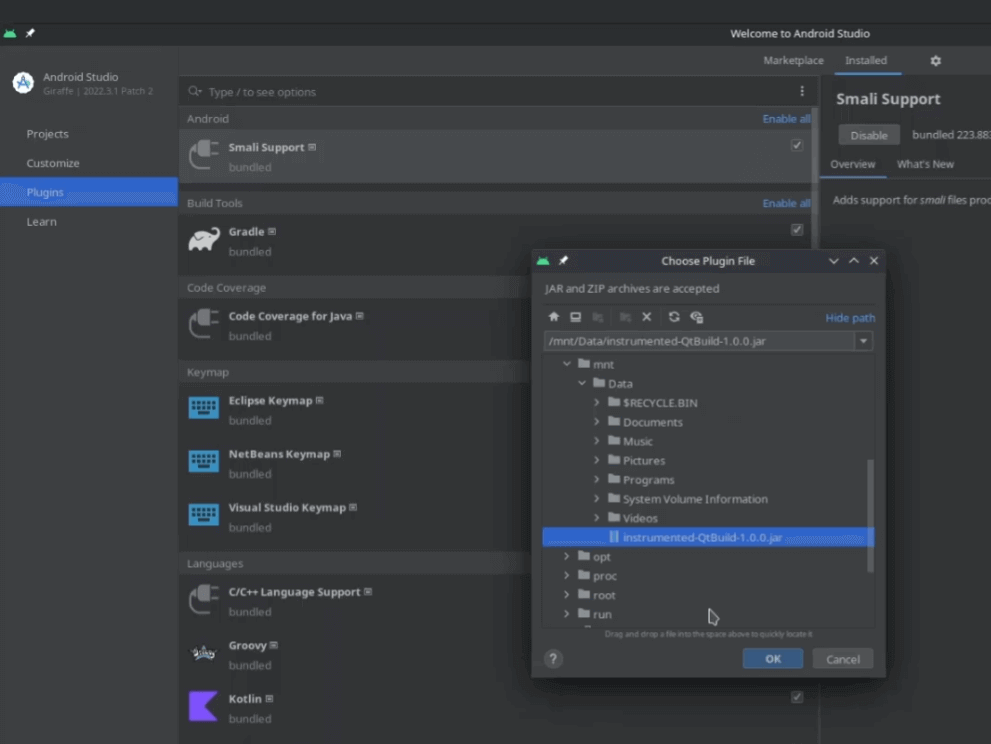
- Head to the plugin's IntelliJ marketplace page to download the plugin's jar file.
- Start Android Studio.
- On top-right corner select Settings(gear-icon)->Install Plugins From Disk
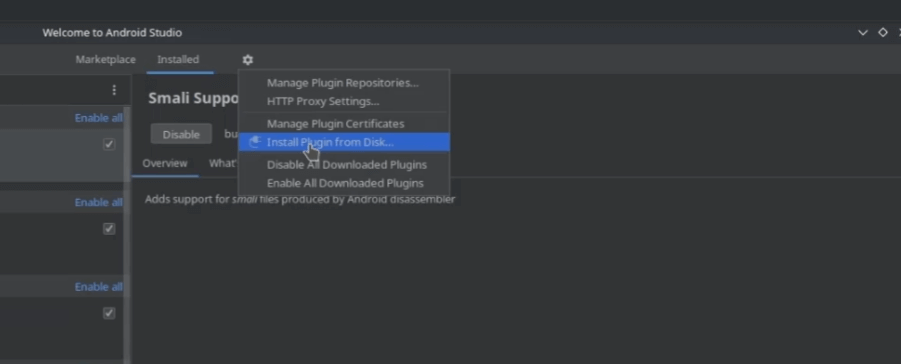
- Select file and select OK.
- Check that the plugin is installed.
Configure the plugin
The plugin needs to know where certain parts of the Qt toolchain are.
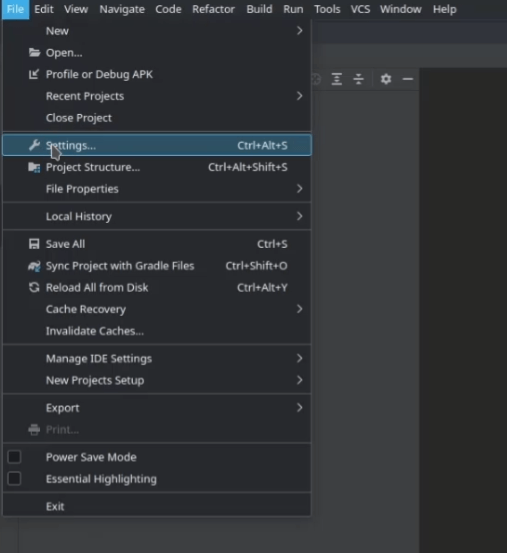
- On top-left corner select File -> Settings.
- Expand Build,Execution,Deployment and Select Qt.
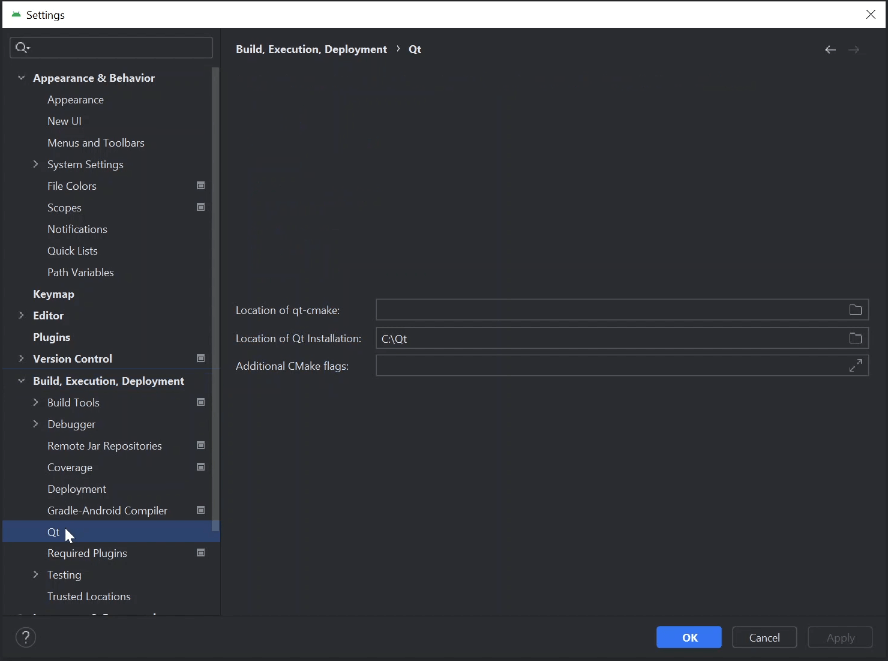
- On this page, you need to set the path to the qt-cmake script, located in
[Qt Folder Path]/<qt version>/android_<architecture>/bin. Make sure to select the right architecture for the platform you are targeting.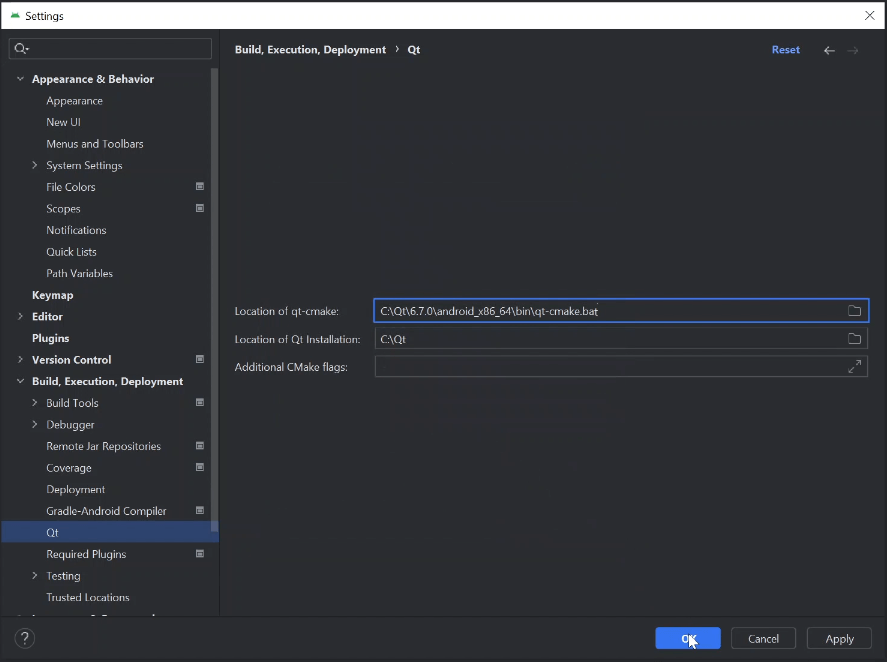
- For a Windows host select
qt-qmake.bat. - For other operating systems select
qt-cmake.
- For a Windows host select
Note: The Additional CMake flags field allows you to modify your projects CMake call.
Install the Android SDK
Use Android Studio's SDK manager to install the correct API, platform, and tools for this version of Qt. See Android SDK.
Running the example
Test your development setup by running the examples shipped with the Qt installation. You'll need to know your Qt folder path first. When using the Qt Online Installer, the default install locations for the Qt folder are:
- Windows: C:/Qt
- macOS: ~/Qt
- Linux: ~/Qt
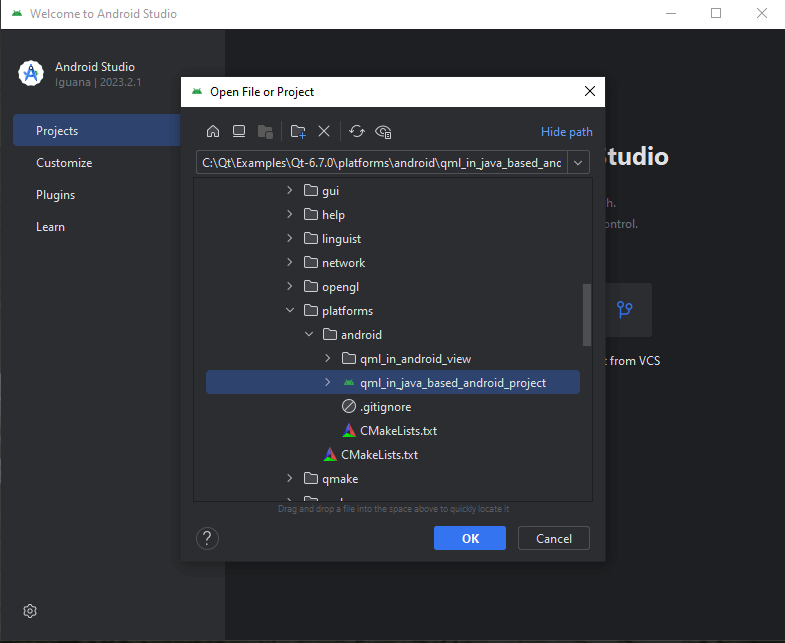
The example projects are located under your Qt installation directory in Qt/Examples/<qt version>/platforms/android/. To test the examples:
- From Android Studio's welcome screen, select Open.
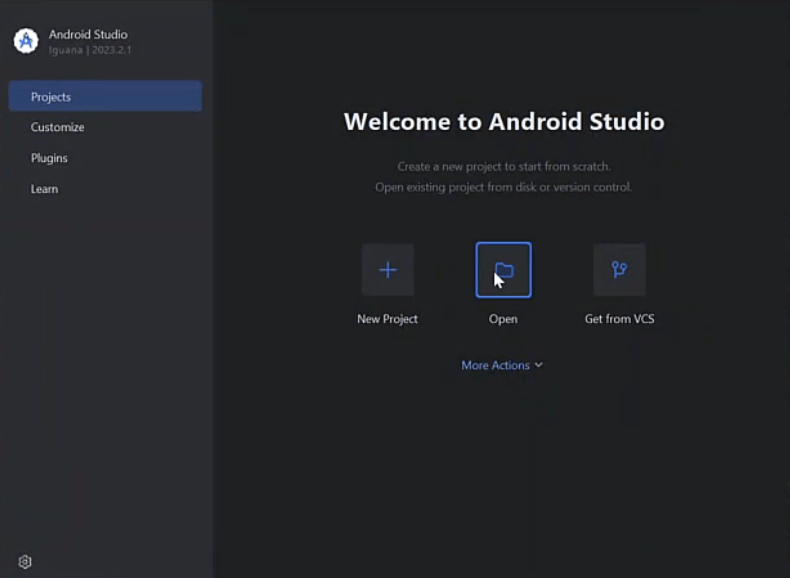
- Select the Qt project example you want.
Compiling and deploying to a target device or emulator
To compile and deploy, select Run.
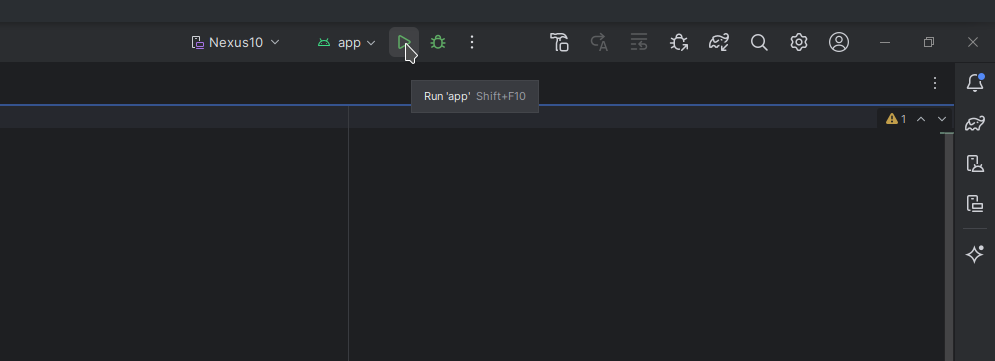
This will build the Qt project and the Android Studio project and run it.
Note: Selecting Make Project will not build the Qt project.
Debugging
Debugging QML or C++ is not possible with the plugin. For that, see Qt Creator.
Writing your first application from scratch
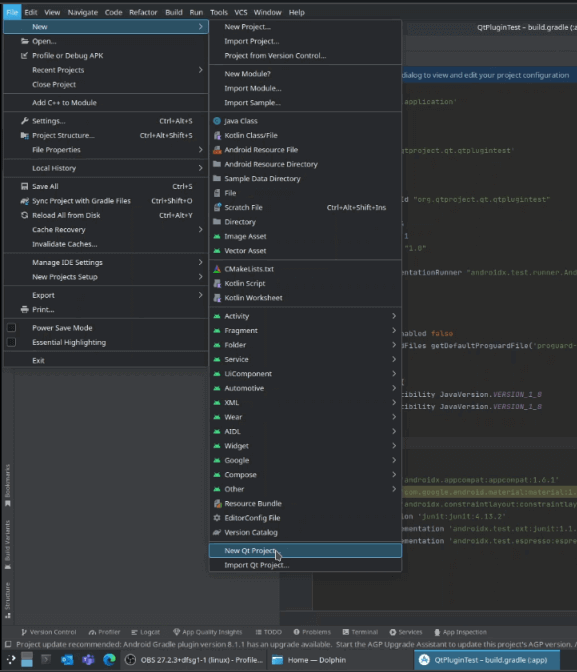
- From Android Studio top-left select File -> New -> New Qt Project.
- Set the name for the project, select the projects folder, select the
Qt versionand select OK.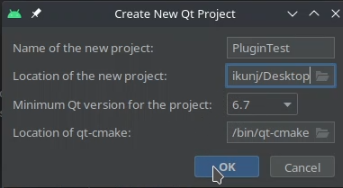
- Start writing your first Qt QML application!
If you are a returning user or just getting started with QML, the QML Reference has what you need.
Integrating QML in an Android application
The API documentation for embedding QML in Android applications has specific implementation details and insights into this.
© 2024 The Qt Company Ltd. Documentation contributions included herein are the copyrights of their respective owners. The documentation provided herein is licensed under the terms of the GNU Free Documentation License version 1.3 as published by the Free Software Foundation. Qt and respective logos are trademarks of The Qt Company Ltd. in Finland and/or other countries worldwide. All other trademarks are property of their respective owners.
