咖啡机
Qt Quick 应用程序具有基于状态的自定义用户界面。
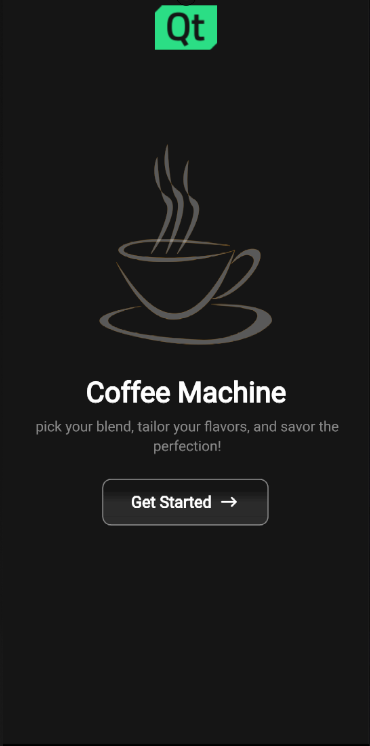
该应用程序展示了一种跨平台、多屏幕尺寸和响应式的方式,用于实现产品订购的典型用户界面。
运行示例
运行示例 Qt Creator,打开Welcome 模式,然后从Examples 中选择示例。更多信息,请参阅Qt Creator: 教程:构建并运行。
用户界面演示
本节将引导您了解应用程序的典型用户流程。
选择配方

咖啡机应用程序可让您选择一种咖啡类型,并显示该类型咖啡的剩余数量。
咖啡定制
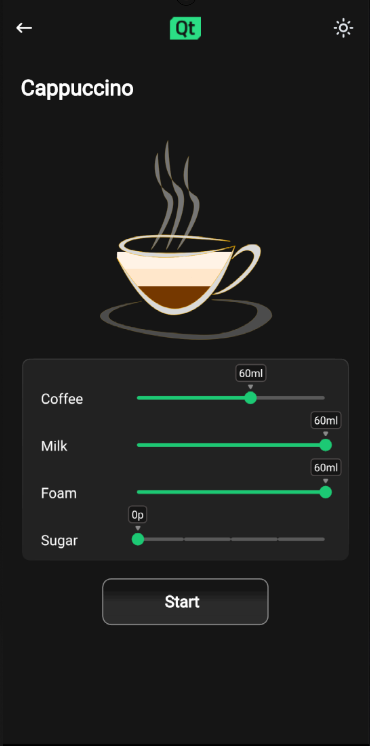
选择配方后,应用程序会显示混合咖啡的比例:
- 冲泡咖啡
- 热牛奶
- 奶泡
- 糖
可通过滑块进行修改。
显示冲煮状态
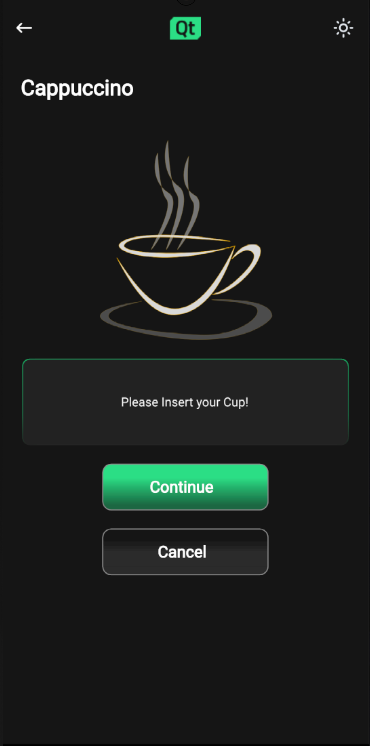
一旦用户确认杯子已放入咖啡机,冲煮就会开始。
冲煮开始后,应用程序会以动画形式显示冲煮过程。
咖啡已煮好
冲煮过程结束后,应用程序会显示装有所需混合咖啡的咖啡杯几秒钟,然后返回开始页面。
如何运行
下面我们将讨论这些功能是如何实现的。
适应屏幕尺寸和方向
应用程序窗口根对象有高度和宽度的初始值,这将用作桌面平台上的窗口大小。默认的QWindow::AutomaticVisibility 可确保窗口在移动平台等需要最大化或全屏显示的平台上以最大化或全屏显示。
ApplicationWindow {
    visible: true
    width: 1000
    height: 600
    title: qsTr("Coffee")

    background: Rectangle {
        color: Colors.currentTheme.background
    }
ApplicationWindow 的子对象会获取ApplicationWindow 的大小,并据此确定自己的大小。
该应用在整个应用页面组件中使用GridLayout ,以轻松适应屏幕方向的变化。
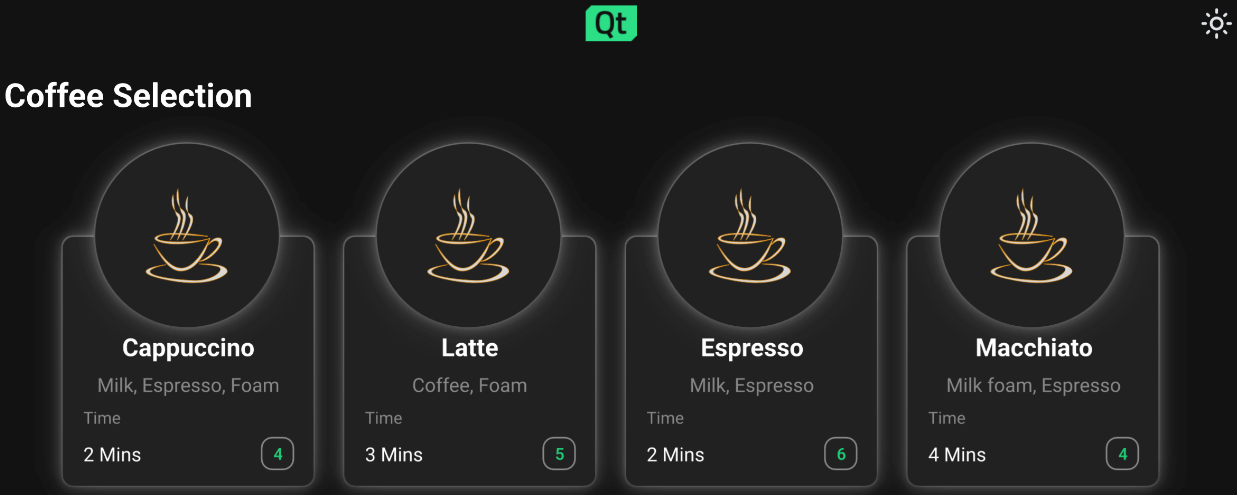
{当安卓设备方向为横向时,屏幕会切换为横向模式}。
{横屏模式是 Windows 桌面的默认方向}。
注意: 在桌面版本中,宽度必须大于高度。
浏览应用程序页面
应用程序使用StackView QML 类型显示应用程序的不同页面。处理不同页面组件的StackView 在ApplicationFlowForm.ui.qml 中实现。
从一个页面浏览到下一个页面会触发ApplicationFlow.qml 中的状态变化,其中所需的属性变化由PropertyChanges QML 类型处理:
states: [
    State {
        name: "Home"
        PropertyChanges {
            target: toolbar
            backButton.opacity: 0
            backButton.enabled: false
            themeButton.opacity: 0
            themeButton.enabled: false
            logo.sourceSize.width: 70
            logo.sourceSize.height: 50
        }
在这些状态变化过程中发生的动画由Transition 和PropertyAnimation 在ApplicationFLowForm.ui.qml 的StackView 组件中实现。
实现启动页面
应用程序开始时会向用户显示Home 页面,作为StackView 中的初始项:
StackView {
    id: stack
    anchors.top: parent.top
    anchors.bottom: parent.bottom
    anchors.left: parent.left
    anchors.right: parent.right
    anchors.topMargin: parent.height / 20

    pushEnter: Transition {
        PropertyAnimation {
            property: "x"
            from: stack.width
            to: 0
            duration: 400
        }
    }
Home 组件的结构是将Item 组件作为根对象,并带有状态机和适当的属性别名,然后是GridLayout 。所有应用程序页面组件都将采用这种结构。
Home 页面显示一个咖啡杯的图片,上面有 Qt XML 徽标,标题是 "咖啡机",标题下有一些关于用户期望的朗朗上口的简介,还有一个getStartedButton 按钮。
用户可以通过按下getStartedButton 向前移动,按钮onClicked 功能是通过ApplicationFlow.qml 实现的:
getStartedbutton.onClicked: {
    applicationFlow.state = "Coffee-selection"
    applicationFlow.stack.pushItem(applicationFlow.choosingCoffee, {appFlow: applicationFlow})
}
这将触发ApplicationFlow.qml 中的状态更改为 "咖啡选择",并将choosingCoffee 组件推到StackView 中Home 组件的顶部。
实现咖啡选择
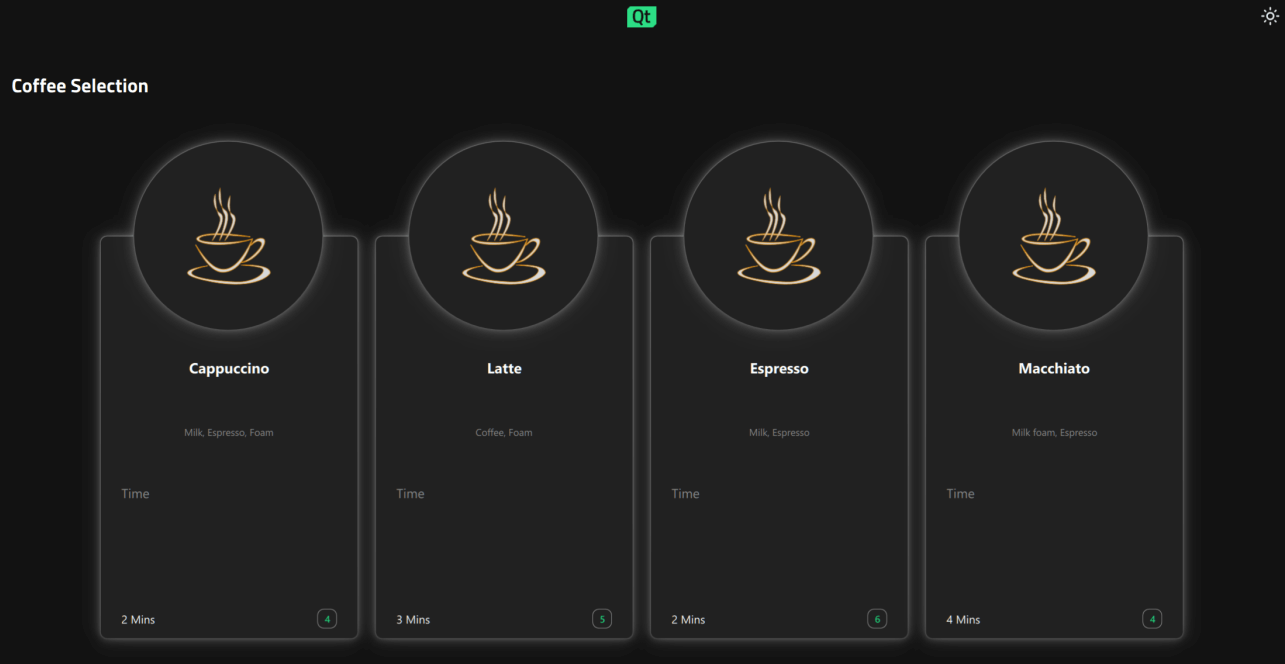
在咖啡选择页面ChoosingCoffee.qml 上,用户可以看到 4 种不同的咖啡供选择。这些选项显示为CoffeeCards ,位于ChoosingCoffee.qml 中的GridLayout 内:
GridLayout {
    id: cards
    anchors.horizontalCenter: parent.horizontalCenter
    anchors.top: parent.top
    rowSpacing: 20
    columnSpacing: 20
    CoffeeCard {
        id: cappuccino
        coffeeName: "Cappuccino"
        ingredients: "Milk, Espresso, Foam"
        time: 2
    }
    CoffeeCard {
        id: latte
        coffeeName: "Latte"
        ingredients: "Coffee, Foam"
        time: 3
    }
    CoffeeCard {
        id: espresso
        coffeeName: "Espresso"
        ingredients: "Milk, Espresso"
        time: 2
    }
    CoffeeCard {
        id: macchiato
        coffeeName: "Macchiato"
        ingredients: "Milk foam, Espresso"
        time: 4
    }
}
CoffeeCard 的实现位于CoffeeCard.qml 。
根据ApplicationWindow 根对象所遵循并通过状态机向下传递到ChoosingCoffee.qml 和GridLayout 的可用屏幕宽度和高度属性,这些卡片可以网格或行列方式显示。
CoffeeCards 在该页面上,用户可以更改咖啡的名称、冲泡时间、配料以及当前可用的杯子数量。
在该页面上,用户还可以按屏幕右上角的小太阳图标按钮,首次更改应用程序主题。按下主题按钮可调用ApplicationFlow.qml 中的themeButton 函数:
function themeButton() {
    if (Colors.currentTheme == Colors.dark) {
        Colors.currentTheme = Colors.light
    } else {
        Colors.currentTheme = Colors.dark
    }
}
该函数会更改Colors.qml 的currentTheme 属性,整个应用程序的颜色会通过属性绑定自动更改。应用程序中使用的所有颜色都位于Colors.qml 中。
如果主题切换为浅色主题,主题更改图标按钮图标就会变成半月形。
按下任何一张咖啡卡都会触发CoffeeCard.qml 中AbstractButton 的状态变化,然后触发NumberAnimation 至Transition 的状态变化:
AbstractButton {
    width: parent.width - 2
    height: parent.height - 2
    anchors.horizontalCenter: parent.horizontalCenter
    anchors.verticalCenter: parent.verticalCenter
    id: button
    hoverEnabled: true
    checkable: true
    enabled: (root.cupsLeft != 0) ? true : false
    transitions: Transition {
        NumberAnimation {
            properties: "scale"
            duration: 50
            easing.type: Easing.InOutQuad
        }
    }
这将把选中的咖啡卡缩小,并把咖啡卡的边缘变成绿色,让用户知道咖啡确实被选中了。
每张咖啡卡的button 属性别名onClicked 函数与ApplicationFlow.qml 中的函数绑定。当用户按下任何一张咖啡卡时,名称与所选咖啡选项相关的函数就会被调用。该函数会将ApplicationFlow.qml 的状态设置为Settings ,向StackView 推送一个新组件,并相应设置原料属性。
执行咖啡设置
在此页面上,用户可以通过调整自定义Slider QML 类型来定制咖啡选项,以符合自己的喜好。改变滑块的值将影响咖啡杯内的液面高度,这是通过将Cup.qml 内液体图像的高度与相应滑块的值绑定来实现的。
Settings 页面中滑块的值存储在CoffeeConfig 中,以便以后使用Synchronizer Qml 类型。
Synchronizer {
     sourceObject: settingsForm.coffeeConfig
     sourceProperty: "sugarAmount"
     targetObject: settingsForm.sugarSlider
     targetProperty: "value"
}
单击 "开始 "按钮可将ApplicationFlow.qml 的状态更改为 "插入",应用程序将显示Insert.qml 。
执行插入杯
在此页面上,用户需要在冲煮过程开始前将杯子插入机器。
按Continue 按钮后,应用程序将进入Progress 页面。
执行冲煮咖啡
进度页面显示一个咖啡杯和进度条,它们以各自的方式实时显示咖啡冲泡过程。
这里的咖啡杯在装满咖啡后将显示与用户在Settings 页面上所选配置完全相同的配置,这是通过将Cup 属性变量绑定到ApplicationFlow.qml 中保存的相应值来实现的。
装满咖啡杯的动画是通过状态引擎Transition 和SmoothedAnimation 实现的。
Cup {
    id: cup
    Layout.alignment: Qt.AlignHCenter | Qt.AlignTop
    state: "0"
}
进度条动画由Behavior 实现。
Behavior on greenBar.width {
    SmoothedAnimation {
        easing.type: Easing.Linear
        velocity: (progressForm.contentItem.width / progressForm.brewTime) * 1000
    }
}
Timer 状态引擎将在咖啡冲泡完成后更新应用程序状态。
Timer {
    id: timer
    interval: progressForm.brewTime
    running: true
    onTriggered: {
        progressForm.appFlow.onFinished()
    }
}
实现咖啡就绪
就绪页面显示一个装满用户所选配置的咖啡杯,并配有 "您的咖啡已就绪 "文字和复选图标。
显示该页面时,Timer 开始运行,一旦达到设定的时间间隔,用户就会被引导回到Home.qml 。
源文件
Squish GUI 测试
本应用程序带有针对 Qt Android 的Squish GUI 测试。这些测试使用Qt 的 Squish和 Python 编写,可在应用程序测试目录下找到。
使用 Squish for Qt for Android 时,请确保使用Qt 内置钩子并用 adb转发 Squish 端口。如果在dlopen 失败时出现 "Cannot load library"(无法加载库)错误,请禁用 CMake 配置中的QT_USE_TARGET_ANDROID_BUILD_DIR ,或在Qt Creator 中清除Projects->Build Settings->CMake->Current Configuration 中的 。
如果没有 Squish 许可证,可以免费试用。
另请参阅 所有 Qt 示例。
© 2025 The Qt Company Ltd. Documentation contributions included herein are the copyrights of their respective owners. The documentation provided herein is licensed under the terms of the GNU Free Documentation License version 1.3 as published by the Free Software Foundation. Qt and respective logos are trademarks of The Qt Company Ltd. in Finland and/or other countries worldwide. All other trademarks are property of their respective owners.

