Qt Quick 操作方法
本页旨在提供易于发现、有用的参考资料,说明在Qt Quick 中执行特定任务的最简单、最好的方法。每个解决方案都提供 QML 和/或 C++ 代码片段(如适用),每个片段都经过 Qt Test 自动测试,以确保其功能不变。
如何使用
点击按钮时从 QML 调用 C++ 函数
假设 C++ 类型在应用程序中的 QML 文件中是全局可用的,最简单的方法是用QML_SINGLETON 使其成为 QML 单例。例如,在头文件中,backend.h :
#include <QObject>
#include <QQmlEngine>

class Backend : public QObject
{
    Q_OBJECT
    QML_ELEMENT
    QML_SINGLETON

public:
    Q_INVOKABLE void doStuff();
};
backend.cpp:
#include "backend.h"#include <QDebug>voidBackend::doStuff(){
    qDebug() << "Did stuff!";
}
然后,您可以从任何 QML 文件中调用该函数:
import QtQuick.Controls

import MyModule

ApplicationWindow {
    width: 400
    height: 400
    title: qsTr("C++ Button example")

    Button {
        text: qsTr("Click me")
        onClicked: Backend.doStuff()
    }
}
如果 C++ 类型只需提供给一小部分 QML 文件,可考虑使用QML_ELEMENT 。有关向 QML 公开 C++ 类型的更多方法,请参阅《在 C++ 和 QML 之间选择正确的集成方法》(Choosing the Correct Integration Method Between C++ and QML)。
本例假定Backend 类型在 QML 模块中可用。在 CMake 中,可通过qt_add_qml_module 实现。有关详细演示,请参阅构建 QML 应用程序。
查看哪个项目有活动焦点
为窗口的activeFocusItem 属性编写一个属性更改信号处理程序:
import QtQuick
import QtQuick.Controls

ApplicationWindow {
    width: 400
    height: 400
    visible: true
    title: qsTr("Active focus debugging example")

    onActiveFocusItemChanged: print("activeFocusItem: " + activeFocusItem)

    Row {
        TextField {
            objectName: "textField1"
        }
        TextField {
            objectName: "textField2"
        }
    }
}
这将把当前拥有活动焦点的项目打印到控制台。为确保输出有用,请给每个项目一个描述性的objectName 。
创建类似 Android TimePickerDialog 的时间选择器
我们准备了一个包含几个QML 文件的示例,演示如何实现这一功能。您可以按以下方式在应用程序中使用它们:
import QtQuick
import QtQuick.Layouts
import QtQuick.Controls.Material

ApplicationWindow {
    id: window
    width: 600
    height: 600
    visible: true
    title: qsTr("Time Picker Example")

    Material.theme: darkThemeSwitch.checked ? Material.Dark : Material.Light

    // Shows the selected time and opens the dialog.
    TimeComponentLabel {
        id: openDialogLabel
        width: parent.width - 80
        anchors.centerIn: parent
        font.pixelSize: Qt.application.font.pixelSize * 8
        renderTypeQuality: Text.VeryHighRenderTypeQuality
        interactive: !timePickerDialog.opened

        text: Qt.formatTime(new Date(1970, 1, 1, timePickerDialog.hours, timePickerDialog.minutes), "hh:mm")

        onTapped: timePickerDialog.openWithMode(TimePicker.Mode.Hours)
    }

    ColumnLayout {
        // We always want the openDialogLabel to be centered in the window, not us.
        // For that reason, we use anchors rather than putting the root items into a ColumnLayout.
        anchors.horizontalCenter: parent.horizontalCenter
        anchors.top: openDialogLabel.bottom
        anchors.topMargin: 24
        spacing: 12

        Switch {
            id: is24HourSwitch
            text: qsTr("24 Hour")
            checked: timePickerDialog.is24Hour
        }
        Switch {
            id: darkThemeSwitch
            text: qsTr("Dark")
        }
    }

    TimePickerDialog {
        id: timePickerDialog
        anchors.centerIn: parent
        is24Hour: is24HourSwitch.checked

        onTimeAccepted: print("A time was chosen - do something here!")
    }
}
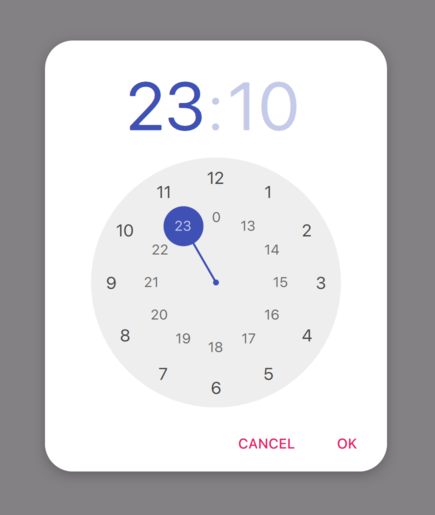
浅色主题的 TimePickerDialog。 |
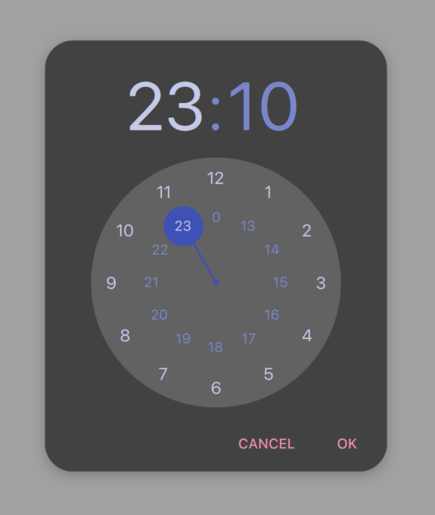
深色主题的 TimePickerDialog。 |
在 JavaScript 中使用 C++ 枚举
要在 JavaScript 中使用 C++ 枚举(即QJSEngine ,而不是QQmlEngine 或QQmlApplicationEngine ),请使用QJSEngine::newQMetaObject():
    QJSEngine engine;
    engine.installExtensions(QJSEngine::AllExtensions);

    QJSValue backendJsMetaObject = engine.newQMetaObject(&Backend::staticMetaObject);
    engine.globalObject().setProperty("Backend", backendJsMetaObject);

    Backend backend(&engine);
    const bool loaded = backend.load();
这样就可以在 JavaScript 中使用该枚举:
export function backendStatusUpdate(backendStatus) {
    if (backendStatus === Backend.Error) {
        console.warn("Error!")
        return
    }

    console.log("Backend loaded successfully")
}当使用QQmlEngine 或QQmlApplicationEngine 时,有更简单的选择;更多信息,请参阅在 C++ 和 QML 之间选择正确的集成方法。
backend.h:
#include <QObject>
#include <QJSEngine>

class Backend : public QObject
{
    Q_OBJECT

public:
    Backend(QJSEngine *engine);

    enum Status {
        Unknown,
        Error,
        Loading,
        Loaded
    };

    Q_ENUM(Status)

    bool load();

private:
    QJSEngine *mEngine = nullptr;
};
backend.cpp:
#include "backend.h"Backend::Backend(QJSEngine*engine) : mEngine(engine) { }boolBackend::load() {// Do some loading here... constQJSValuemodule=  mEngine->importModule(":/script.mjs");if(module.isError()) {        qWarning() << "Error loading script.mjs:" << module.toString();
       return false; }constQJSValuefunction=module.property("backendStatusUpdate");if(!function.isCallable()) {        qWarning() << "backendStatusUpdate script function is not callable!";
       return false; }constQJSValuefunctionResult=function.call(QJSValueList()<<Loaded);if(functionResult.isError()) {        qWarning() << "backendStatusUpdate script function had errors:" << functionResult.toString();
       return false; }return true; }
更多信息,请参见QObject Integration 。
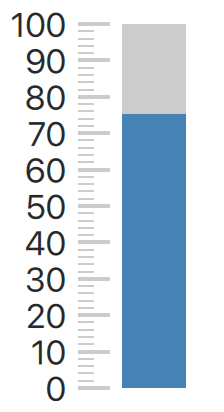
创建仪表
我们准备了一个示例,其中包括一些C++ 和 QML 文件,用于演示如何完成此操作。您可以按以下方式在应用程序中使用它们:
import QtQuick.Controls

import GaugeHowTo

ApplicationWindow {
    width: 400
    height: 400
    title: qsTr("Gauge example")

    Gauge {
        minimumValue: 0
        value: 75
        maximumValue: 100
    }
}

© 2025 The Qt Company Ltd. Documentation contributions included herein are the copyrights of their respective owners. The documentation provided herein is licensed under the terms of the GNU Free Documentation License version 1.3 as published by the Free Software Foundation. Qt and respective logos are trademarks of The Qt Company Ltd. in Finland and/or other countries worldwide. All other trademarks are property of their respective owners.


