Creating Qt Translation Files
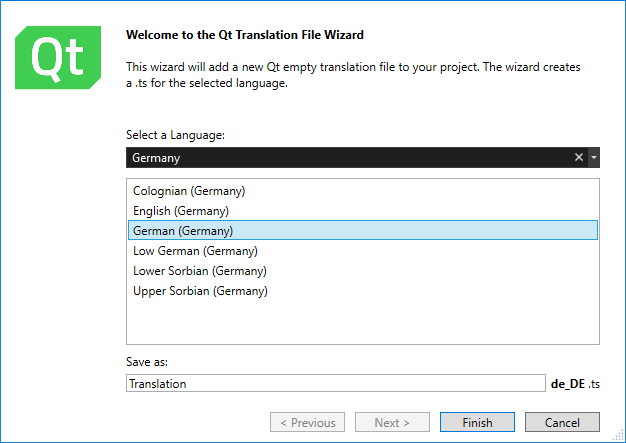
To add a new translation file to the project:

- Select Project > Add New Item > Installed > Visual C++ > Qt > Qt Translation File.
- In Select a Language, you can choose a language from the list of supported languages. You can use Search to filter for a specific language.
- In the Save as field, enter a filename for the translation file.
- Select Finish to create the file and have it listed in Translation Files in Visual Studio's Solution Explorer.
- Right-click a translation file to open a context menu with options for running
lupdateandlrelease.
To start Qt Linguist, select Extensions > Qt VS Tools > Launch Qt Linguist or double-click a .ts file in the Solution Explorer.
By default, Qt Linguist opens in Visual Studio. To open it as a stand-alone application, select Detach.
To run Qt Linguist in a separate window by default, select Extensions > Qt VS Tools > Options > Qt Linguist, and set Run in detached window to True.
For more information about Qt's translation tools, see the Qt Linguist Manual.
© 2022 The Qt Company Ltd. Documentation contributions included herein are the copyrights of their respective owners. The documentation provided herein is licensed under the terms of the GNU Free Documentation License version 1.3 as published by the Free Software Foundation. Qt and respective logos are trademarks of The Qt Company Ltd in Finland and/or other countries worldwide. All other trademarks are property of their respective owners.

