동적 다운로드 프로젝트 빌드 및 플래싱
이 튜토리얼은 Windows 10 호스트에서 Qt 예제 애플리케이션을 위한 INTEGRITY 프로젝트를 빌드하는 과정을 안내합니다. 지원되는 Qt 모듈을 사용하는 모든 Qt 예제 애플리케이션을 선택할 수 있습니다.
Qt 애플리케이션 빌드 환경 준비하기
INTEGRITY 프로젝트를 빌드하기 전에 빌드 환경을 준비해야 합니다. Windows CMD 터미널에서 setEnvironment.bat 스크립트를 실행합니다. 스크립트에 대한 자세한 내용은 Windows 10용 배치 스크립트 만들기를 참조하세요.
setEnvironment.bat
Qt 애플리케이션 예제 빌드하기
CMake를 사용하여 Qt 6 애플리케이션을 빌드하려면 Windows CMD 터미널에서 다음 명령을 실행합니다:
"Qt installation path>\bin\qt-cmake.bat" CMakeLists.txt -GNinja
-DCMAKE_PREFIX_PATH="C:\Users\user\targetbuild"
-DQt6_DIR="C:\Users\user\targetbuild\lib\cmake\Qt6"
-DQt6Core_DIR="C:\Users\user\targetbuild\lib\cmake\Qt6Core"
-DQt6Gui_DIR="C:\Users\user\targetbuild\lib\cmake\Qt6Gui"

 cmake --build .
여기서 qt-cmake 은 CMake를 호출하여 적절한 포함 경로로 프로젝트를 구성하는 래퍼 스크립트입니다.
MULTI에서 동적 다운로드 프로젝트 만들기
- 멀티 런처를 시작하고 File > Create workspace 을 선택합니다.
- 생성 창 모드에서 New Project 을 선택하고 OK 을 클릭합니다.
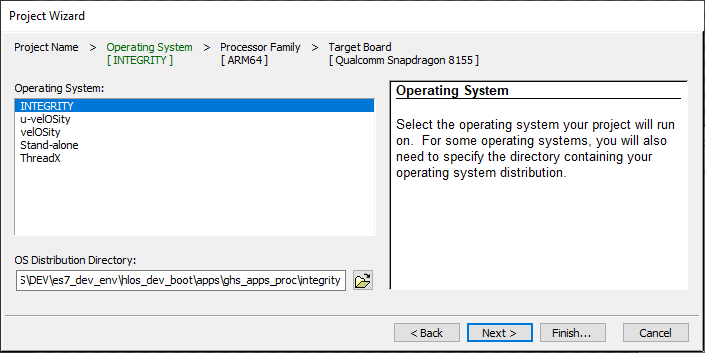
- Project Wizard 대화 상자에서 새 프로젝트를 생성할 경로(예: C:\사용자\사용자\문서\내 프로젝트\프로젝트1\기본값.gpj )를 선택하고 Next 을 클릭합니다.
- Operating System 대화 상자에서 무결성을 선택하고 Next 을 클릭합니다.

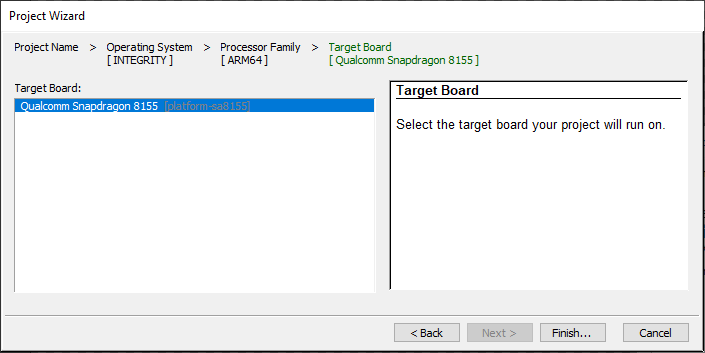
- Finish 을 선택합니다.

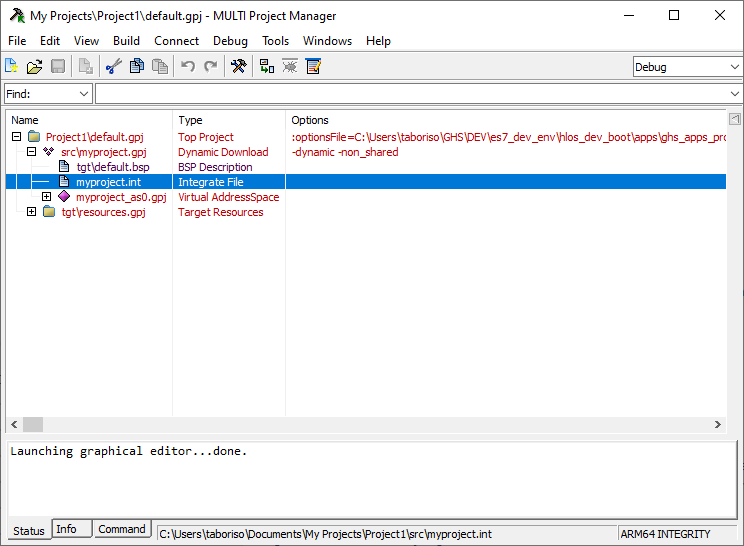
- Create New > Dynamic Download > Next 을 선택합니다.
- Settings For Dynamic Download > Finish 을 선택합니다.

동적 다운로드 프로젝트 빌드
- 프로젝트 트리에서 myproject.int 파일을 편집하고 저장합니다:
AddressSpace Name qtapp Filename C:\path\to\your\qt\app\binary MemoryPoolSize 0x2700000 Language C++ HeapSize 0x90000 Task Initial StackSize 0x90000 StartIt false EndTask Extendedmemorypoolsize 0x300000 EndAddressSpace - 'multi_commands '라는 새 파일을 만들고 다음 명령을 추가합니다:
switch -component "debugger.task.qtapp.Initial" route "debugger.task.qtapp.Initial" { __ntwcommand prepare_target } wait -load switch -component "debugger.task.qtapp.Initial" route "debugger.task.qtapp.Initial" { __ntwcommand resume } wait -time 240000 -stop switch -component "debugger.task.qtapp.Initial" unload myproject wait -time 8000 -stop savedebugpane cmd "autotestresult.txt" quitall - Windows CMD 터미널에서 빌드 및 로드 명령을 실행합니다:
multi.exe "C:\Users\user\Documents\My Projects\Project1\default.gpj" -build myproject &
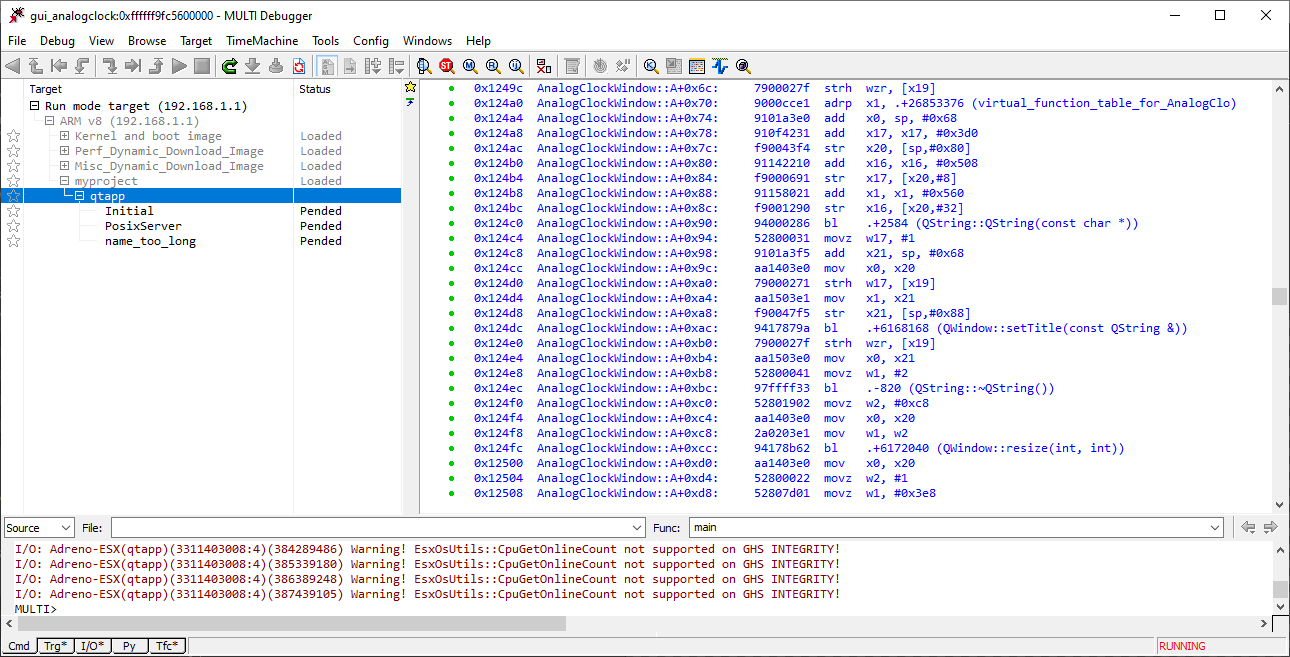
multi.exe "C:\Users\user\Documents\My Projects\Project1\dbg\bin\myproject" -connect="rtserv2 192.168.1.1" -p C:\Users\user\multi_commands &

참고: 'rtserv2 192.168.1.1' 은 보드 IP 주소입니다. 배선 설정을 확인하여 보드 네트워크를 설정합니다.
참고: 동적 다운로드를 통해 배포하는 데 몇 분 정도 걸립니다.
© 2025 The Qt Company Ltd. Documentation contributions included herein are the copyrights of their respective owners. The documentation provided herein is licensed under the terms of the GNU Free Documentation License version 1.3 as published by the Free Software Foundation. Qt and respective logos are trademarks of The Qt Company Ltd. in Finland and/or other countries worldwide. All other trademarks are property of their respective owners.

