8155P에서 이미지 플래싱 및 실행하기
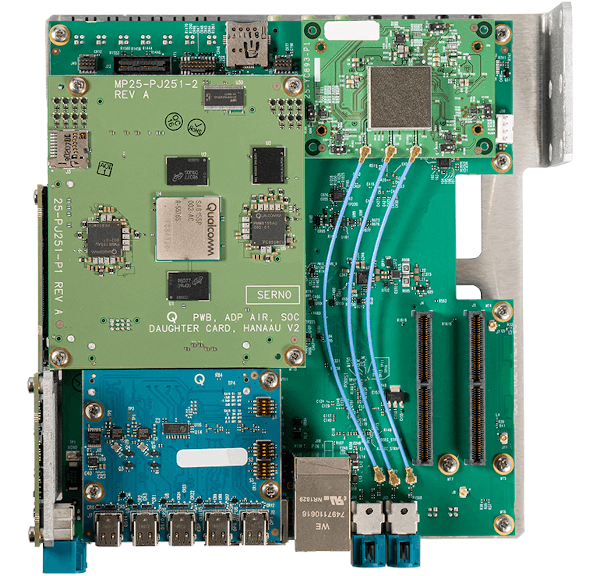
퀄컴 스냅드래곤 8155P 보드
퀄컴 스냅드래곤 8155P 보드의 윗면도입니다.
배선 설정
보드에서 애플리케이션을 플래싱하고 디버깅하려면 PC와 보드 사이에 여러 개의 케이블이 필요합니다:
- 전원 커넥터
- 마이크로 USB는 FT 직렬 콘솔 출력입니다.
- 일반 USB는 QFIL/패스트부팅 포트(USB-A - USB A/USB C 케이블)입니다.
- 디스플레이포트 케이블은 그래픽 출력용
- 이더넷 포트는 애플리케이션을 동적으로 로드하기 위한 포트입니다.
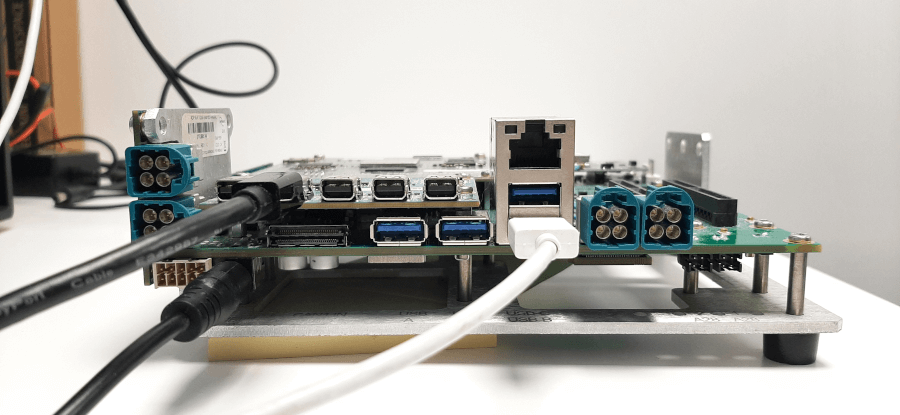
다음은 배선 구성 예시입니다. 전원이 켜져 있고, 이미지 플래싱을 위해 수 USB-A가 연결되어 있으며, 그래픽 출력을 위해 DisplayPort 케이블이 연결되어 있습니다.
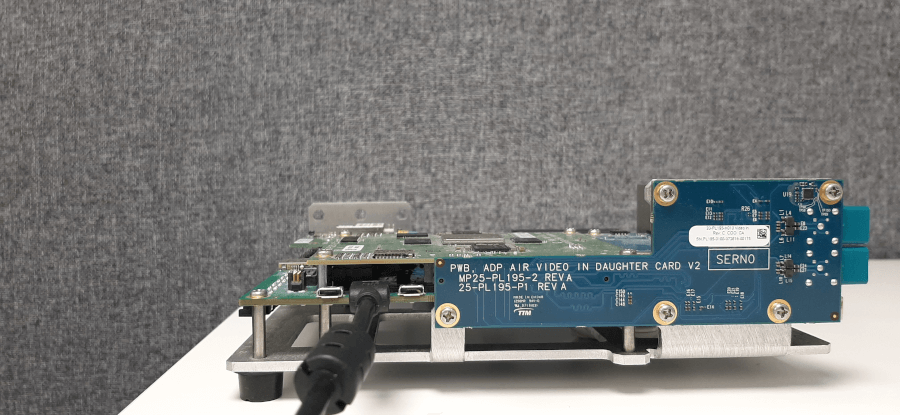
FT 직렬 콘솔을 사용하기 위해 마이크로 USB가 연결됩니다.
빠른 부팅 모드로 전환하기
퀄컴 스냅드래곤 8155P 보드에서 이미지를 플래시하려면 호스트 OS에 Fastboot 도구를 설치합니다. 참조, Fastboot 도구
플래싱하기 전에 보드를 Fastboot 모드로 전환합니다:
- 보드와 직렬 연결을 엽니다:
putty /dev/ttyUSB0 -serial -sercfg 115200,8,1
- 두 가지 옵션이 있습니다:
- 장치에서 볼륨 키를 누른 상태에서 장치의 전원을 껐다가 다시 켭니다.
- 또는 UART 셸의 아래쪽 화살표를 누르고 장치의 전원을 껐다 켜세요.
- 보드가 패스트부팅 모드로 성공적으로 전환되면 콘솔 출력에 따라 다음과 같이 인쇄됩니다:
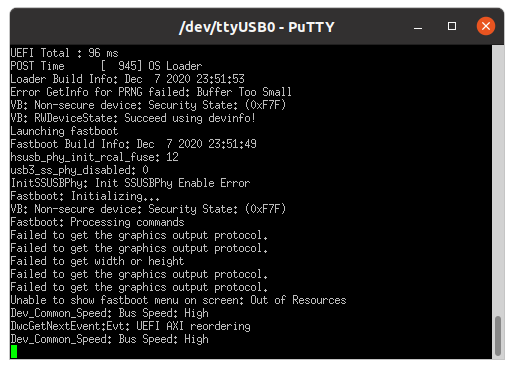
보드가 빠른 부팅 모드에 있는지 확인하는 또 다른 방법은 명령을 실행하는 것입니다:
fastboot devices
플래시 이미지
빌드 스크립트는 보드 파티션에 대한 이미지 세트를 생성합니다.
boot.img, perf_dyn.img, misc_dyn.img, abl.elf, etc
빠른 부팅 모드로 전환한 후 이미지를 보드에 플래시할 수 있습니다.
- 처음 설정할 때는 GHS ES7_FinalCopy/ES7_customer_package_readme.docx의 이미지 플래싱 절차를 따르십시오:
cd /work/ghs/sa8155/es7/es7_dev_env/hlos_dev_boot/apps/ghs_apps_proc/qc_bsp/out/chk/bin/target
fastboot flash abl  abl.elf
fastboot flash boot vmm-adp-gvm-sa8155/boot.img
fastboot flash perf_dyn_a vmm-adp-gvm-sa8155/perf_dyn.img
fastboot flash misc_dyn_a  vmm-adp-gvm-sa8155/misc_dyn.img

cd /work/ghs/sa8155/es7/es7_dev_env/ES7_FinalCopy/Images/sa8155_hyp
fastboot flash hyp_a hyp.mbn
fastboot flash tz tz.mbn
fastboot flash apdp apdp.mbn

cd /work/ghs/sa8155/es7/es7_dev_env/hlos_dev_boot/apps/ghs_apps_proc/qc_bsp/out/chk/bin/target/fs
fastboot flash gh_sys sys.img
fastboot flash gh_persist ghs_persist.img
fastboot flash gh_test ghs_test.img.sparse

cd /work/ghs/sa8155/es7/es7_dev_env/hlos_dev_boot/apps/ghs_apps_proc/qc_bsp/prebuilt_NHLOS/adsp/asic_8150
fastboot flash adsp adsp.img

cd /work/ghs/sa8155/es7/es7_dev_env/hlos_dev_boot/lagvm/LINUX/android/out/target/product/msmnile_gvmgh
fastboot flash vendor vendor.img
참고: ES7_FinalCopy/ES7_customer_package_readme.docx는 QC [ES7] 고객 패키지의 일부입니다. 자세한 내용은 Qualcomm 지원팀에 문의하세요.
- 처음 플래싱하는 것이 아니라면 모놀리스 부분을 플래싱해야 합니다:
cd /work/ghs/sa8155/es7/es7_dev_env/hlos_dev_boot/apps/ghs_apps_proc/qc_bsp/out/chk/bin/target
fastboot flash boot vmm-adp-gvm-sa8155/boot.img
- 보드를 다시 시작합니다.
보드에서 Qt 애플리케이션 실행
- 직렬 콘솔을 엽니다:
putty /dev/ttyUSB0 -serial -sercfg 115200,8,1
- 명령을 실행합니다:
rt <application name> Initial
- Qt 애플리케이션 예제 실행:
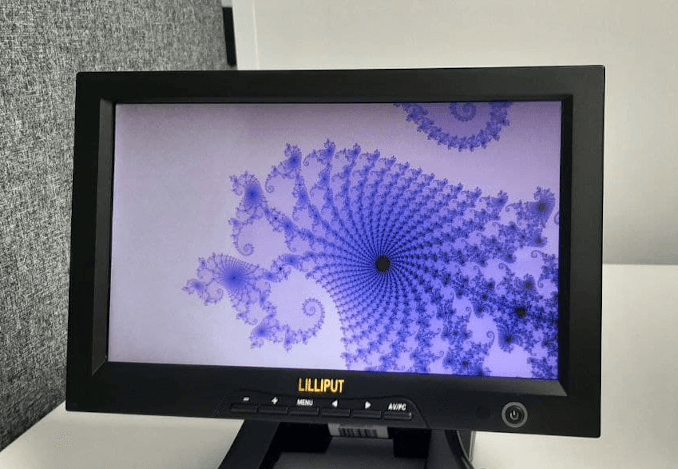
Qt 애플리케이션이 퀄컴 스냅드래곤 8155P 보드에서 실행 중이며 연결된 화면에 표시됩니다.
© 2025 The Qt Company Ltd. Documentation contributions included herein are the copyrights of their respective owners. The documentation provided herein is licensed under the terms of the GNU Free Documentation License version 1.3 as published by the Free Software Foundation. Qt and respective logos are trademarks of The Qt Company Ltd. in Finland and/or other countries worldwide. All other trademarks are property of their respective owners.

