QML 카메라 애플리케이션
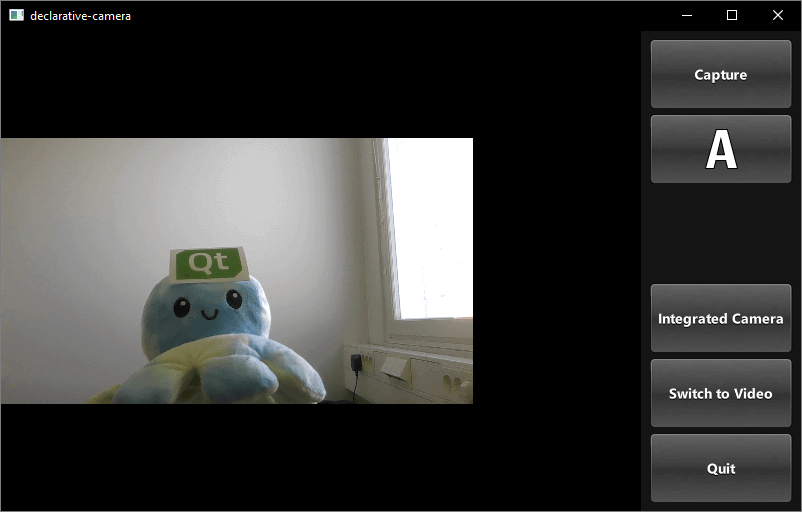
이 Qt Quick 기반 애플리케이션은 API를 사용하여 정지 이미지 또는 동영상을 캡처하는 방법을 보여줍니다.

이 예는 QML을 통해 카메라 기능에 액세스하는 방법을 보여줍니다. 설정을 변경하고 이미지 또는 동영상을 캡처하는 방법을 보여줍니다.
예제 실행하기
에서 예제를 실행하려면 Qt Creator에서 Welcome 모드를 열고 Examples 에서 예제를 선택합니다. 자세한 내용은 Qt Creator: 튜토리얼을 참조하세요 : 빌드 및 실행을 참조하세요.
애플리케이션 구조
이 예제의 대부분의 QML 코드는 사용자 인터페이스를 지원합니다. 요구 사항을 지원하는 사용자 지정 유형은 기존 Qt Quick 컨트롤을 사용하여 구현되었습니다.
화면 방향을 사용하여 레이아웃 선택하기
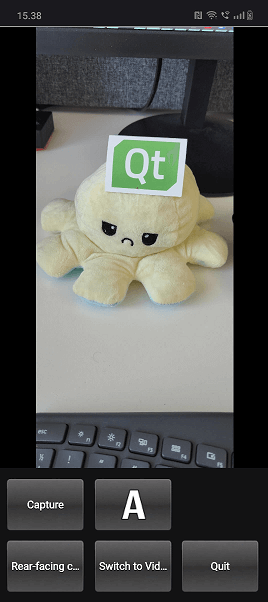
방향 및 컨트롤 레이아웃 상태 로직은 다음과 같이 별도의 Item( controlLayout )에 캡슐화되어 있습니다:
    Item {
        id: controlLayout

        readonly property bool isMobile: Qt.platform.os === "android" || Qt.platform.os === "ios"
        readonly property bool isLandscape: Screen.desktopAvailableWidth >= Screen.desktopAvailableHeight
        property int buttonsWidth: state === "MobilePortrait" ? Screen.desktopAvailableWidth / 3.4 : 114

        states: [
            State {
                name: "MobileLandscape"
                when: controlLayout.isMobile && controlLayout.isLandscape
            },
            State {
                name: "MobilePortrait"
                when: controlLayout.isMobile && !controlLayout.isLandscape
            },
            State {
                name: "Other"
                when: !controlLayout.isMobile
            }
        ]

        onStateChanged: {
            console.log("State: " + controlLayout.state)
        }
    }
stillControls 및 videoControls 객체는 모두 stillControls 에 표시된 것처럼 이 Item의 state 및 buttonsWidth 속성에 바인딩됩니다:
    PhotoCaptureControls {
        id: stillControls
        state: controlLayout.state
        anchors.fill: parent
        buttonsWidth: controlLayout.buttonsWidth
        buttonsPanelPortraitHeight: cameraUI.buttonsPanelPortraitHeight
        buttonsPanelWidth: cameraUI.buttonsPanelLandscapeWidth
        captureSession: captureSession
        visible: (cameraUI.state === "PhotoCapture")
        onPreviewSelected: cameraUI.state = "PhotoPreview"
        onVideoModeSelected: cameraUI.state = "VideoCapture"
        previewAvailable: imageCapture.preview.length !== 0
    }
디버깅을 지원하기 위해 레이아웃 상태 변경에 대한 메시지가 기록됩니다.
다음은 세로형 레이아웃입니다:

state 속성이 처음에 PhotoCapture 으로 설정되어 있는 것을 볼 수 있습니다.
그런 다음 states 자체는 다음과 같이 정의됩니다:
    states: [
        State {
            name: "PhotoCapture"
            StateChangeScript {
                script: {
                    camera.start()
                }
            }
        },
        State {
            name: "PhotoPreview"
        },
        State {
            name: "VideoCapture"
            StateChangeScript {
                script: {
                    camera.start()
                }
            }
        },
        State {
            name: "VideoPreview"
            StateChangeScript {
                script: {
                    camera.stop()
                }
            }
        }
    ]
캡처용 컨트롤
캡처를 위한 컨트롤은 PhotoCaptureControls.qml 및 VideoCaptureControls.qml에서 구현됩니다. 각각은 제어 버튼에 사용되는 공통 버튼 크기와 여백을 정의한 다음 버튼을 선언하는 FocusScope 을 기반으로 합니다.
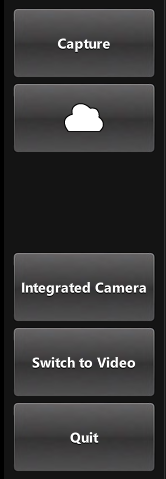
이렇게 하면 화면 오른쪽에 열이 생성되며, 이 열에는 위에서 아래로 나열된 다음 컨트롤이 포함됩니다:
Capture또는Record버튼: 캡처를 시작합니다.- 현재 선택한 화이트 밸런스 모드의 아이콘을 표시하는
capture properties버튼을 누르면 팝업을 사용하여 다음 옵션의 아이콘을 표시합니다:- 플래시 모드(사용 가능한 경우)
- 화이트 밸런스 모드
- 노출 보정
- 촬영이 완료되면
View버튼이 표시됩니다. - 현재 선택된 캡처 장치를 표시하고 누르면 팝업을 통해 전환할 수 있는 장치 목록을 제공하는 버튼입니다.
- 현재 활성 선택 항목에 따라 대체 캡처 모드(동영상 또는 사진)를 표시하고 누르면 모드가 전환되는
Switch To버튼입니다. Quit버튼: 애플리케이션을 종료하는 버튼입니다.


이미지 캡처
이를 트리거하는 버튼은 CameraButton.qml에 정의되어 있지만 카메라와의 상호 작용은 컨트롤 유형에 있으므로 PhotoCaptureControls를 살펴봅시다:
            CameraButton {
                text: "Capture"
                implicitWidth: captureControls.buttonsWidth
                visible: captureControls.captureSession.imageCapture.readyForCapture
                onClicked: captureControls.captureSession.imageCapture.captureToFile("")
            }
줌 컨트롤
ZoomControl.qml 에 구현된 ZoomControl 유형은 Item을 기반으로 하며 드래그할 수도 있는 줌 레벨을 나타내는 막대를 생성합니다. 지수 계산 방법을 사용하여 grove 의 위치에 따라 확대/축소 계수를 결정합니다.
이 막대는 초기 줌이 1보다 큰 경우에만 표시됩니다. 즉, 현재 활성 카메라에 줌 기능이 있다는 뜻입니다.

Item {
    id : zoomControl
    property real currentZoom : 1
    property real maximumZoom : 1
    property real minimumZoom : 1
    signal zoomTo(real target)

    visible: zoomControl.maximumZoom > zoomControl.minimumZoom

    MouseArea {
        id : mouseArea
        anchors.fill: parent

        property real initialZoom : 0
        property real initialPos : 0

        onPressed: {
            initialPos = mouseY
            initialZoom = zoomControl.currentZoom
        }

        onPositionChanged: {
            if (pressed) {
                var target = initialZoom * Math.pow(5, (initialPos-mouseY)/zoomControl.height);
                target = Math.max(zoomControl.minimumZoom, Math.min(target, zoomControl.maximumZoom))
                zoomControl.zoomTo(target)
            }
        }
    }

    Item {
        id : bar
        x : 16
        y : parent.height/4
        width : 24
        height : parent.height/2

        Rectangle {
            anchors.fill: parent

            smooth: true
            radius: 8
            border.color: "white"
            border.width: 2
            color: "black"
            opacity: 0.3
        }

        Rectangle {
            id: groove
            x : 0
            y : parent.height * (1.0 - (zoomControl.currentZoom-zoomControl.minimumZoom) / (zoomControl.maximumZoom-zoomControl.minimumZoom))
            width: parent.width
            height: parent.height - y
            smooth: true
            radius: 8
            color: "white"
            opacity: 0.5
        }

        Text {
            id: zoomText
            anchors {
                left: bar.right; leftMargin: 16
            }
            y: Math.min(parent.height - height, Math.max(0, groove.y - height / 2))
            text: "x" + Math.round(zoomControl.currentZoom * 100) / 100
            font.bold: true
            color: "white"
            style: Text.Raised; styleColor: "black"
            opacity: 0.85
            font.pixelSize: 18
PhotoCaptureControls.qml 및 VideoCaptureControls.qml에서 zoomTo 신호는 선택한 카메라의 zoomFactor 속성을 계산된 target 값으로 설정하고 ZoomControl 막대를 업데이트합니다.
    ZoomControl {
        x : 0
        y : 0
        width : 100
        height: parent.height - (flashControl.visible * flashControl.height) -
                (captureControls.state === "MobilePortrait" ? buttonPaneShadow.height : 0)

        currentZoom: captureControls.captureSession.camera.zoomFactor
        maximumZoom: captureControls.captureSession.camera.maximumZoomFactor
        minimumZoom: captureControls.captureSession.camera.minimumZoomFactor
        onZoomTo: (target) => captureControls.captureSession.camera.zoomFactor = target
    }
플래시 및 토치 제어

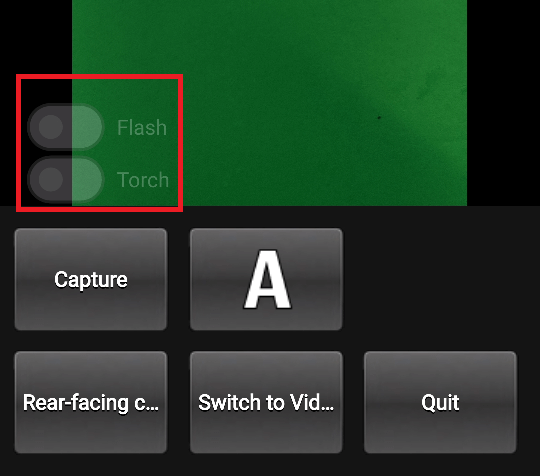
FlashControl.qml 에 정의되어 스위치를 통해 플래시 모드 선택 및 토치 기능을 토글할 수 있습니다. 줌 컨트롤과 마찬가지로 스위치는 활성 디바이스가 해당 기능을 지원하는 경우에만 미리보기 창 상단에 표시됩니다.
여기에서는 해당 기능이 지원되는지 확인합니다:
    property Camera cameraDevice
    property bool mIsFlashSupported: (cameraDevice && cameraDevice.active) ? cameraDevice.isFlashModeSupported(Camera.FlashOn) : false
    property bool mIsTorchSupported: (cameraDevice && cameraDevice.active) ? cameraDevice.isTorchModeSupported(Camera.TorchOn) : false
여기에서는 카메라 장치를 직접 제어하는 flashModeControl 스위치를 구현했습니다.
        Switch {
            id: flashModeControl
            visible: flashControl.mIsFlashSupported
            opacity: checked ? 0.75 : 0.25
            text: "Flash"
            contentItem: Text {
                text: flashModeControl.text
                color: "white"
                leftPadding: flashModeControl.indicator.width + flashModeControl.spacing
            }

            onPositionChanged: {
                if (position) {
                    if (torchModeControl.checked)
                        torchModeControl.toggle();
                    flashControl.cameraDevice.flashMode = Camera.FlashOn

                } else {
                    flashControl.cameraDevice.flashMode = Camera.FlashOff
                }
            }
        }
토치 제어도 비슷한 방식으로 구현됩니다.
© 2025 The Qt Company Ltd. Documentation contributions included herein are the copyrights of their respective owners. The documentation provided herein is licensed under the terms of the GNU Free Documentation License version 1.3 as published by the Free Software Foundation. Qt and respective logos are trademarks of The Qt Company Ltd. in Finland and/or other countries worldwide. All other trademarks are property of their respective owners.

