
音频样本与声压级
本示例展示了麦克风采样值与音频电平的对比图。
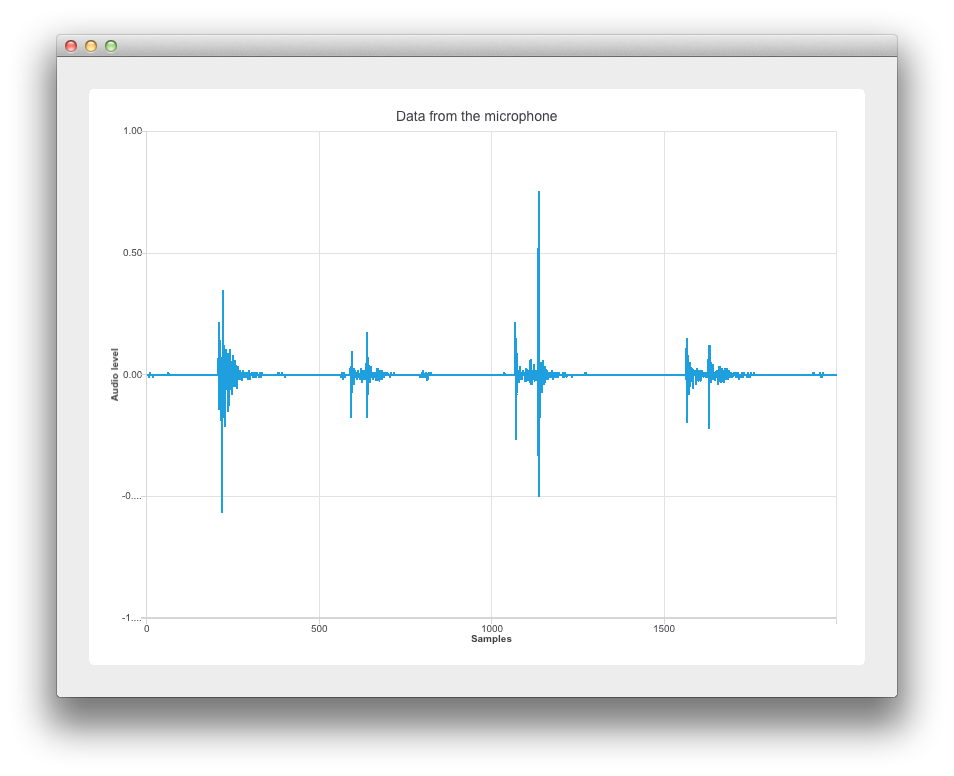
本示例的实现基于Widgets。有关具体信息,请参阅《Qt Widgets 编程入门》。以下各节介绍了如何使用Qt Charts API在“采样数与声级”图表上显示动态数据。有关采样的更多信息,请参阅采样(信号处理)。
运行示例
您可以通过以下方式运行该示例:
- Qt Creator
打开Welcome 模式,并从Examples 中选择该示例。有关详细信息,请参阅Qt Creator :教程:构建和运行。
- Qt Extension for Visual Studio Code
在“Command Palette ”中运行Qt: Open Qt examples 命令,并从列表中选择该示例。有关更多信息,请参阅Qt Extension for Visual Studio Code :教程:构建和运行。
获取音频数据
得益于main.cpp 中集成了Qt Multimedia 模块,我们可以创建一个新的QAudioDevice 对象,该对象代表目标平台的默认音频设备。我们还会检查是否存在音频输入设备,并在没有可用音频输入设备时通知用户。
    if (inputDevice.isNull()) {
        QMessageBox::warning(nullptr, "audio",
                             "There is no audio input device available.");
        return -1;
}随后,通过构造函数参数w 将音频设备传递给 Widgetw 。接着调用w.show() 来显示该控件。
    Widget w(inputDevice);
    w.resize(800, 600);
    w.show();
设置图表
本节介绍图表和坐标轴的设置。
在widget.cpp 中,重新实现的Widget构造函数承担了应用程序逻辑方面的主要工作。QChart、QLineSeries和QChartView对象的声明如下:
    : QWidget(parent)
    , m_chart(new QChart)
    , m_series(new QLineSeries)
{
    auto chartView = new QChartView(m_chart);
    m_chart->addSeries(m_series);
m_series 用于处理音频输入数据。
x 轴“采样数”
我们将 x 轴的最小值至最大值范围设置为 0 到 XYSeriesIODevice::sampleCount。(在 xyseriesiodevice.h 中声明为 2000)。随后,我们设置其标题文本。
    auto axisX = new QValueAxis;
    axisX->setRange(0, XYSeriesIODevice::sampleCount);
    axisX->setLabelFormat("%g");
    axisX->setTitleText("Samples");
y 轴“音频电平”
我们创建 QValueAxisaxisY ,并设置其范围和标题文本。
    auto axisY = new QValueAxis;
    axisY->setRange(-1, 1);
    axisY->setTitleText("Audio level");
附加坐标轴并设置图表标题
我们将坐标轴连接到图表,隐藏图例,并将图表标题设置为包含作为音频输入所使用的麦克风名称。
    m_chart->addAxis(axisX, Qt::AlignBottom);
    m_series->attachAxis(axisX);
    m_chart->addAxis(axisY, Qt::AlignLeft);
    m_series->attachAxis(axisY);
    m_chart->legend()->hide();
布局图表
在此,我们使用QVBoxLayout mainLayout ,并将我们的 QChartviewchartView 添加到垂直布局中。
    m_chart->setTitle("Data from the microphone (" + deviceInfo.description() + ')');

    auto mainLayout = new QVBoxLayout(this);
使用音频输入数据
本节演示如何将麦克风数据传递给 QLineSeriesm_series 。与之前一样,这依赖于Qt Multimedia 模块。
首先,我们将 deviceInfo 传递给QAudioInput 的构造函数。
    mainLayout->addWidget(chartView);

    m_audioInput = new QAudioInput(deviceInfo, this);

QAudioFormat formatAudio;然后,我们配置我们的QAudioFormat formatAudio ,包括其通道数、采样率和采样格式。
    formatAudio.setSampleRate(8000);
    formatAudio.setChannelCount(1);
现在我们可以创建一个 `QAudioSource ` 并设置其缓冲区大小。
    formatAudio.setSampleFormat(QAudioFormat::UInt8);

    m_audioSource = new QAudioSource(deviceInfo, formatAudio);
现在是时候将数据连接到图表上了。为此,我们创建了一个名为 XYSeriesIODevice 的类。有关其实现方式,请参阅XYSeriesIODevice。
    m_audioSource->setBufferSize(200);

    m_device = new XYSeriesIODevice(m_series, this);
    m_device->open(QIODevice::WriteOnly);
XYSeriesIODevice
XYSeriesIODevice在xyseriesiodevice.cpp 中实现,负责信号采样。writeData 函数以4为固定分辨率,根据采样计数设置QList m_buffer 的大小,并用x值递增、y值设为0的QPointFs填充该数组。
{
    static const int resolution = 4;

    if (m_buffer.isEmpty()) {
        m_buffer.reserve(sampleCount);
        for (int i = 0; i < sampleCount; ++i)
            m_buffer.append(QPointF(i, 0));
    }

    int start = 0;
随后,我们进行一些采样操作。
    const int availableSamples = int(maxSize) / resolution;
    if (availableSamples < sampleCount) {
        start = sampleCount - availableSamples;
        for (int s = 0; s < start; ++s)
            m_buffer[s].setY(m_buffer.at(s + availableSamples).y());
    }

    for (int s = start; s < sampleCount; ++s, data += resolution)
        m_buffer[s].setY(qreal(uchar(*data) -128) / qreal(128));

    m_series->replace(m_buffer);
return (sampleCount - start) * resolution;© 2026 The Qt Company Ltd. Documentation contributions included herein are the copyrights of their respective owners. The documentation provided herein is licensed under the terms of the GNU Free Documentation License version 1.3 as published by the Free Software Foundation. Qt and respective logos are trademarks of The Qt Company Ltd. in Finland and/or other countries worldwide. All other trademarks are property of their respective owners.
